Tool Height Setting Gauge


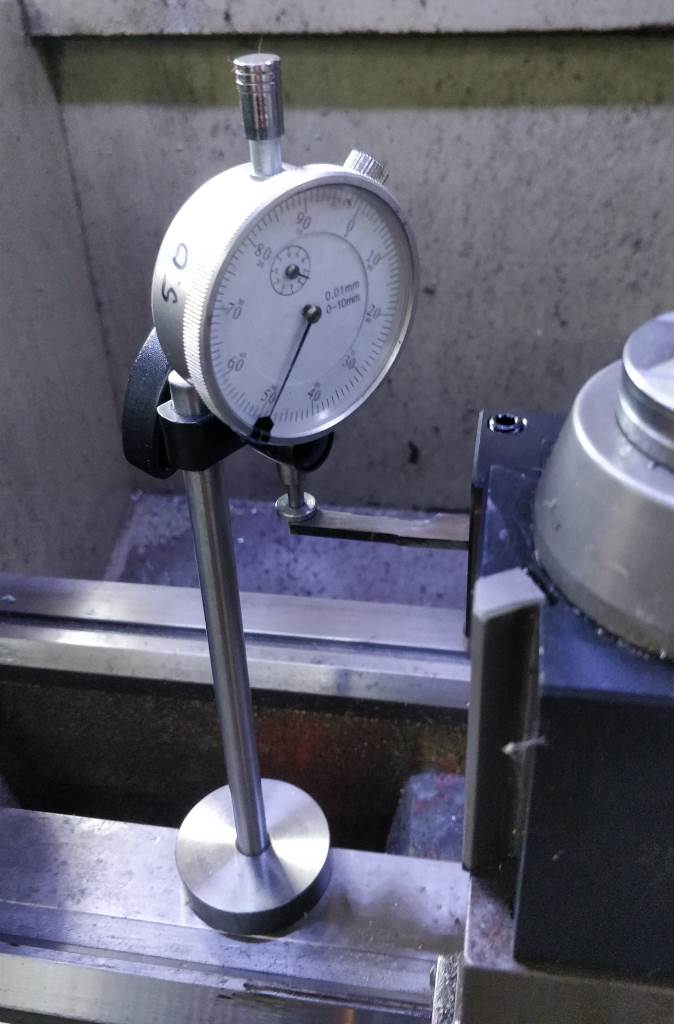
This simple tool can be used to very quickly set the height of a tool holder in the lathe. It uses a 10 mm travel dial gauge with a custom-made flat-bottomed probe tip. The base of the gauge is 50 mm diameter and 12 mm thick with a 8 mm hole reamed in the middle. The bottom is relieved 42 mm × 1 mm such that only the outer rim of the gauge makes contact with the ways, ensuring that the shaft is perpendicular to the ways. The shaft is 10 mm diameter with the bottom end turned down to be a close fit in the base. It is glued into the base with Loctite 603. The dial indicator is held to the shaft with a coupling taken from a magnetic indicator stand.
To set the indicator up for first use, a flat-topped (brass cutting) tool holder was set to be exactly on centre height. The gauge was then slid into the correct place on the shaft to make the mid-travel point (5 mm as indicated) to be approximately correct for the height of that tool. The dial was then rotated such that the 0 line was under the needle.
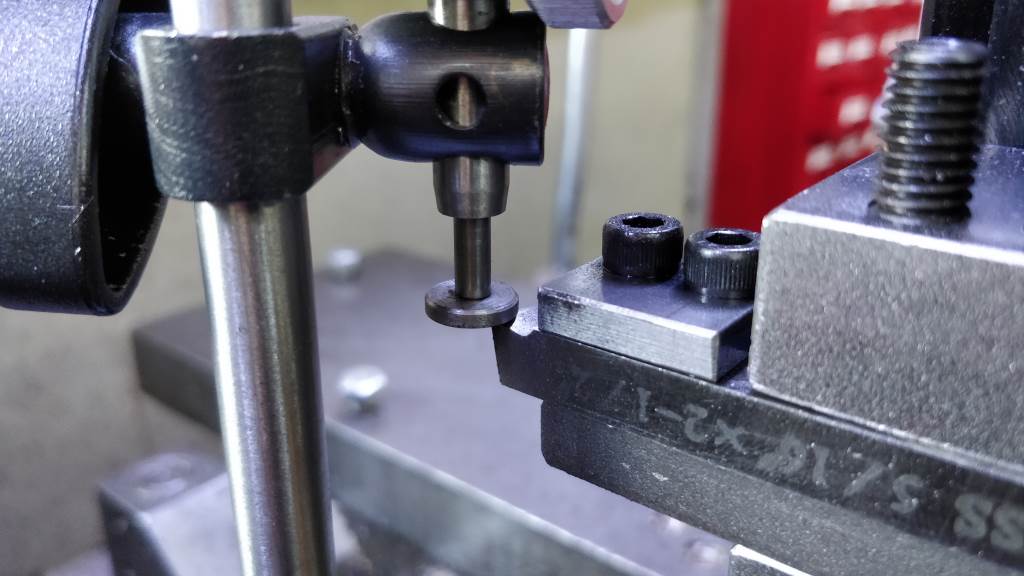
The photos at the top of the page show how the gauge is used. Having a measuring dial, it makes it very easy to fit a tool holder and see how much to wind the adjustment wheel to get the tool holder into the correct height. Any movement that happens as a result of tightening the tool holder wedge can be seen on the dial (with my tool post and tool holders it's consistently an upwards movement of 100 μm) and hence can be compensated for: the tool holder is positioned 100 μm low and then the tool post handle tightened; the movement to the correct position is clearly seen on the dial. It took considerably longer to write this paragraph than it does to set a tool up!
As the dial gauge gives a measurement (rather than just being a shelf that a tool is butted up against), it can also be used for deliberately offset tools. For example, I made a simple 3 mm key-way slotting tool for cutting internal key-ways. The top surface of this tool needed to be 1.5 mm above the lathe's centre line so I simply used the tool height gauge but adjusted the tool to be set at 6.5 mm rather than 5 mm.


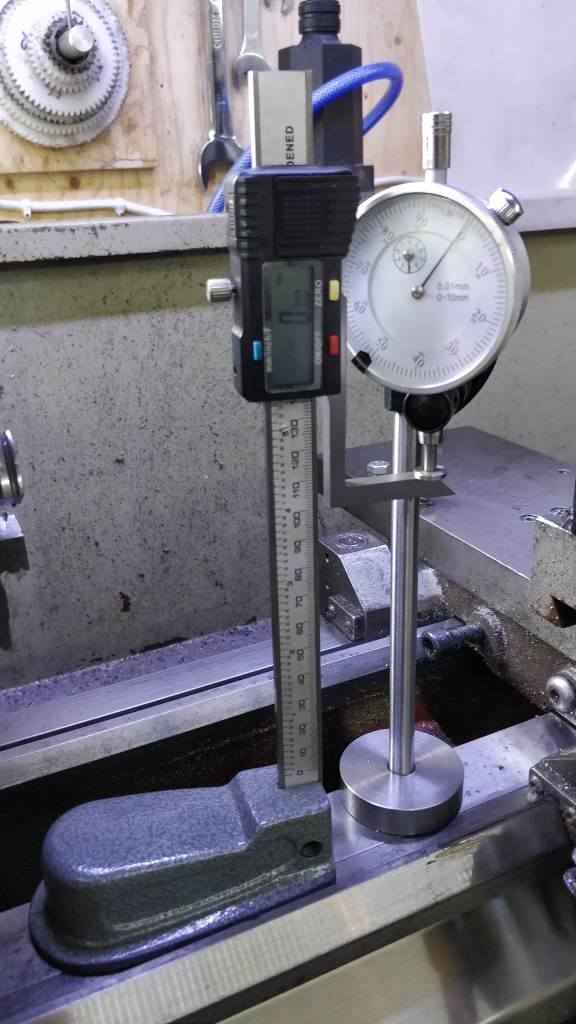
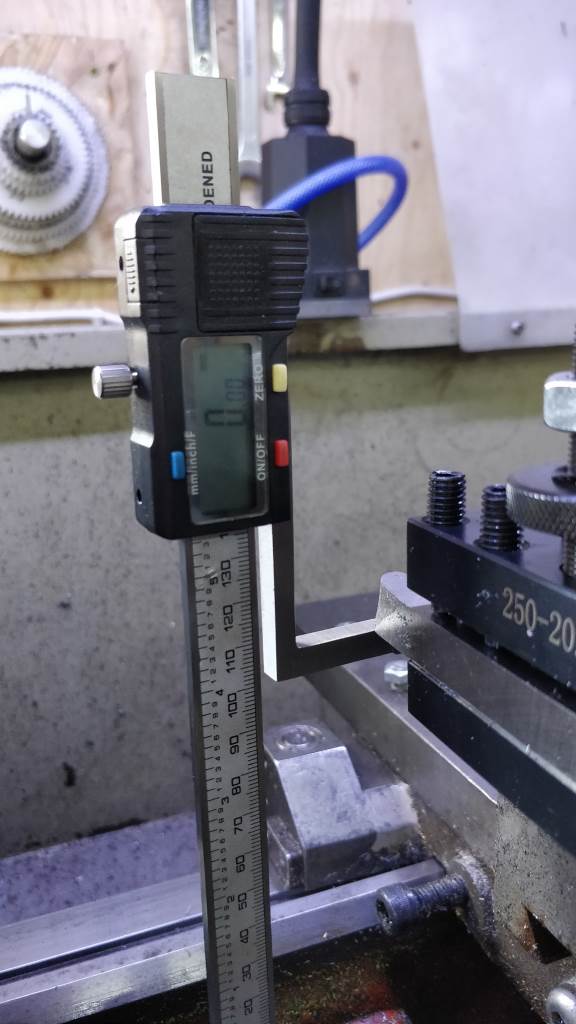
The gauge cannot be used directly to set up an inverted tool. Having said that, I do that far less frequently. For this use, I use a small digital height gauge as an interim device. The height gauge is set up such that the top is at the level read by the gauge as 5 mm, as shown in the left-hand photo. The height gauge is then zeroed and can be used for setting an inverted tool.
This website is free and ad-free, but costs me money to run. If you'd like to support this site, please consider making a small donation or sending me a message to let me know what you liked or found useful.
