Travel Tool Chest & Workbench
 |
This chest (made out of Sweet Chestnut, American Black Walnut, brass and stainless steel) gives me the ability to carry all the tools I need to make small wooden boxes and such-like, while also providing plenty of different work-holding approaches and hence acting as a workbench as well as a tool chest.
All the woodwork (with the exception of a few "resawing" cuts on a bandsaw) was done with hand tools. All of the metal bits were also made by me, but not with hand tools, because hand-tool metalworking is just silly! The project started in January 2023 and finished in December 2023, so basically took me all year (albeit only working on it in my spare time).
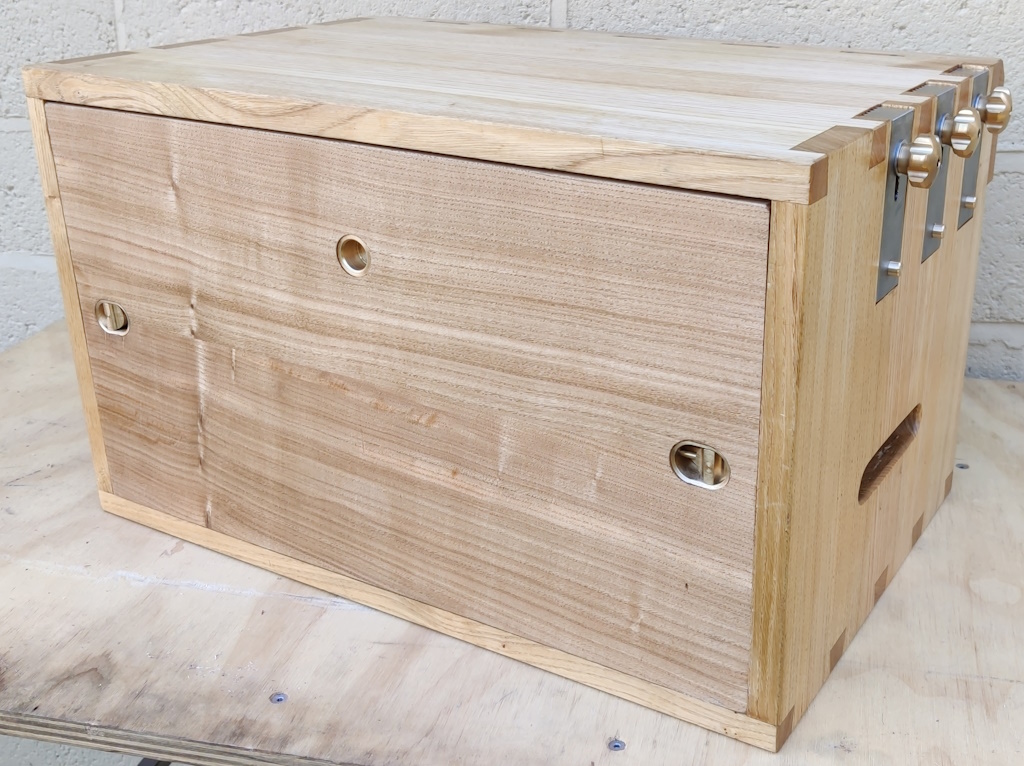
The photo at the top of the page shows the completed chest with the front on. The slot in the right-hand side is a carrying handle; there's one on the opposite side as well. The brass knobs either side of the front slide left-to-right, pushing a pin into the side walls of the chest and holding the front in place. The central brass hole in the front is a lipped pocket, which gives you something to pull on after unlocking the two brass pins. For reasons that will become clear later, the outer surface of the front needed to be completely flush with nothing sticking out.
 |
This photo shows what it looks like when you open it. The drawers store the various tools I need for box-making; the un-oiled long chestnut pieces are "doe's feet" to help with work holding. The walnut pieces attached to the inside of the front of the chest are explained later.
For background, the primary reason I did this project was to practice hand tool woodwork without having to worry too much about aesthetics (which are not my forte, although I'm really pleased with how the chest came out). Less significantly, I also wanted the ability to take a tool kit on holiday and be able to make small boxes and such-like. Since my other half has had M.E., she often needs to spend a reasonable amount of time resting and I'd go spare if I just had to sit around reading all day, so having a little project kit with me helps keep me sane.
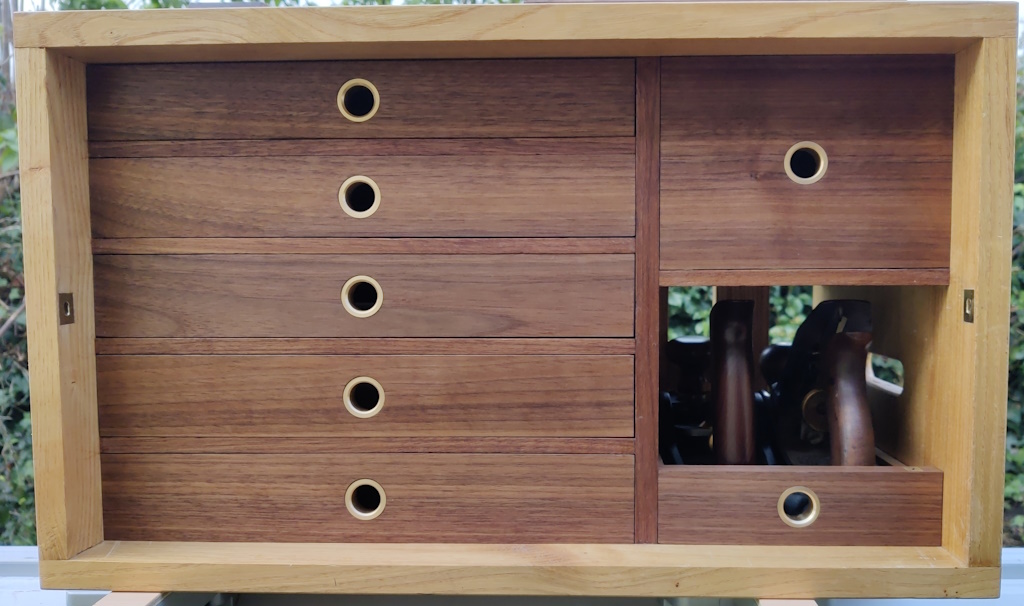 |
This photo shows another view of the inside front of the chest. The drawer fronts were all cut from the same piece of walnut, so there's relatively good grain matching from drawer to drawer.
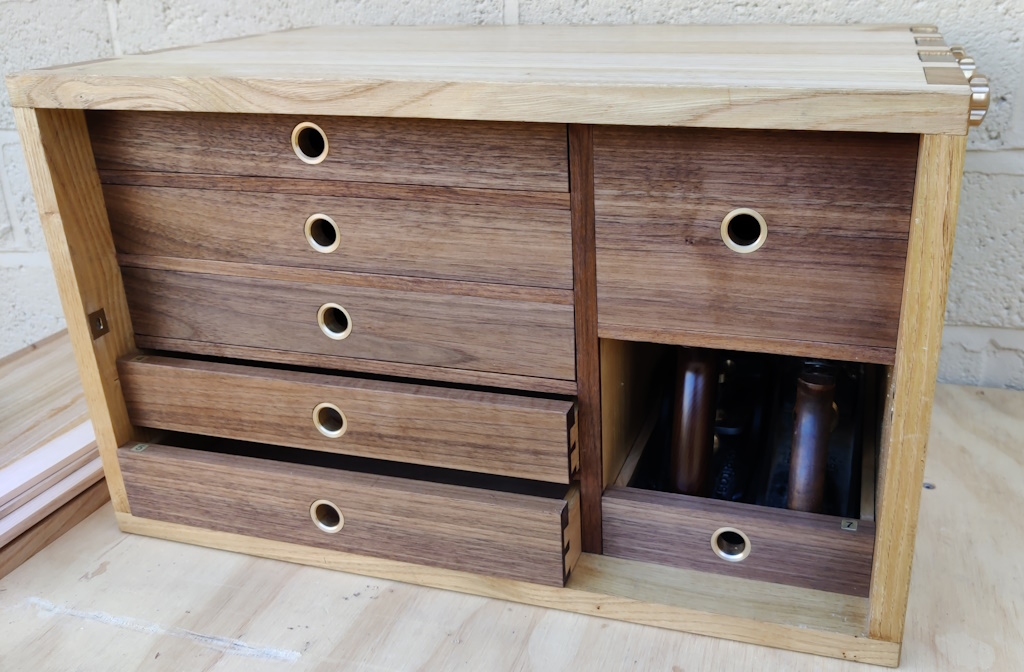 |
This photo shows another view of the front of the chest with a couple of the drawers slightly open. The drawers are constructed with half-lap dovetails at the front and normal dovetails at the back. The drawer pulls are brass tubes (actually top-hat shaped as I thought it looked better): you can push your finger into the hole and pull the drawer out. If you look closely you'll see that the drawers have a small brass piece in the top of the drawer-front with a number etched into the top (and the etching filled with engravers' black shellac wax). The drawers are intended to be removed while the chest is being used as a workbench, so having numbers on the drawers makes it quick and easy to get them back in the right place.
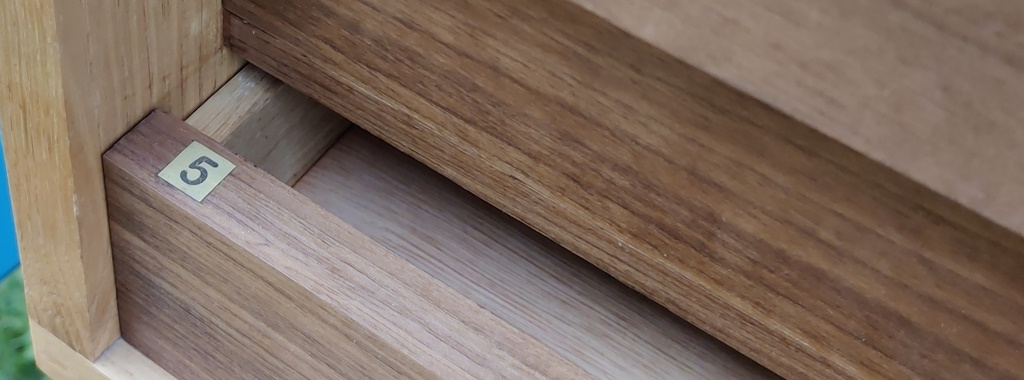 |
This photo shows a closer view of an etched drawer number.
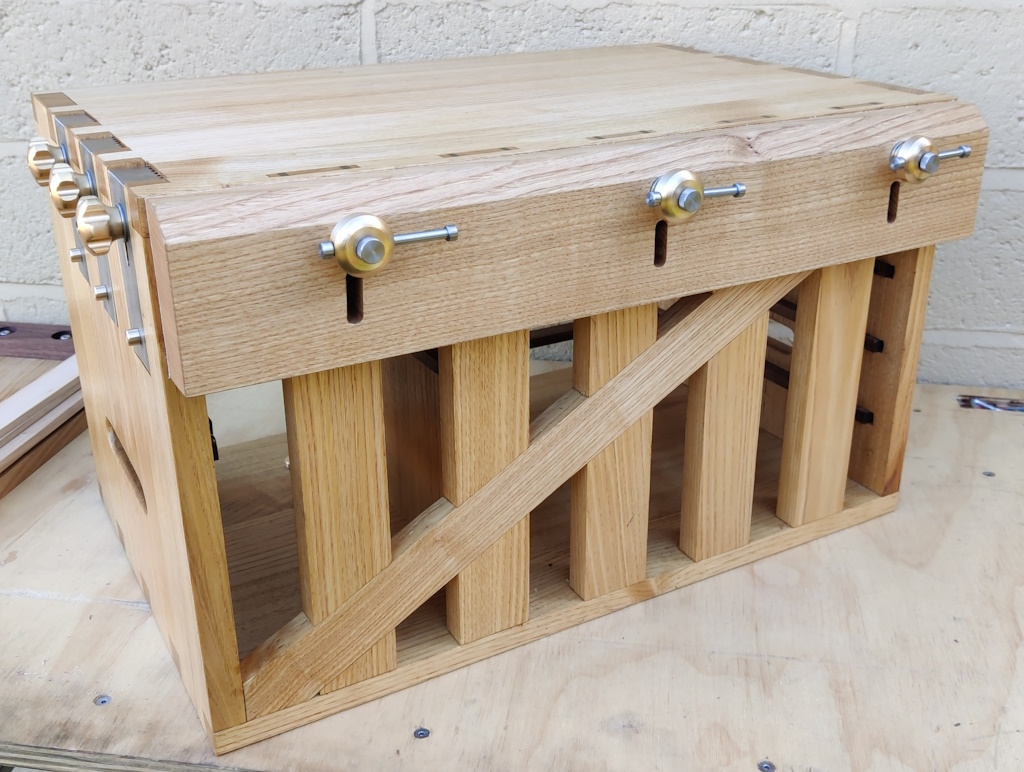 |
This photo shows the rear of the chest. The large piece across the top acts as a vice, with three separate vice screws for various different clamping options. The uprights in the back are rigidly attached to the top and bottom (with wedged through mortice and tenon joints) and give a firm surface to clamp against while allowing for wood movement (by having narrow slats rather than a complete solid back).
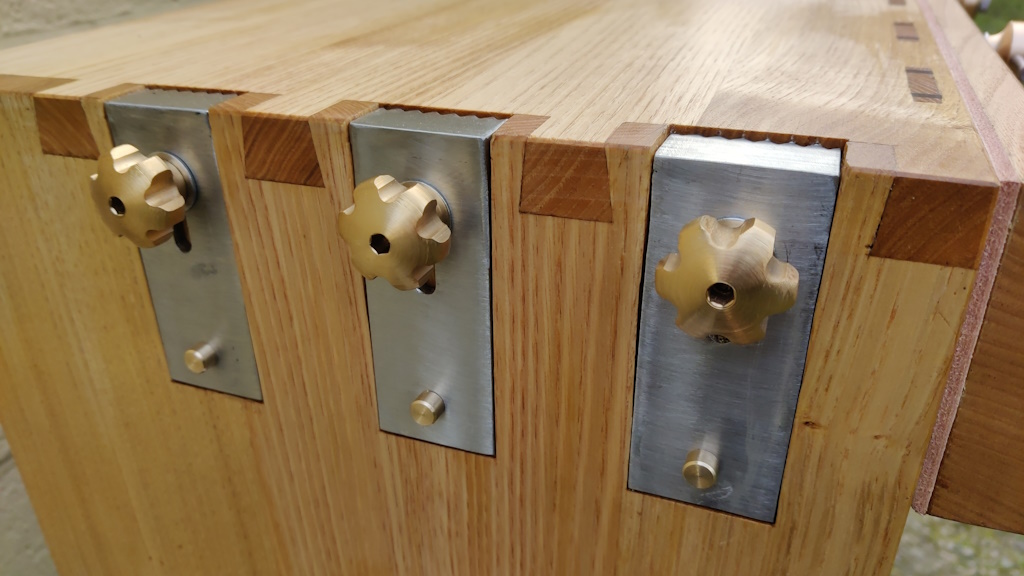 |
This photo shows the planing stops (made out of some stainless steel flat bar, welded into an L-shape). The brass knobs lock the planing stops in place; the small brass pins at the bottom give you something to grab to slide the stops up and down. The photo above also shows the leather jaw on the vice.
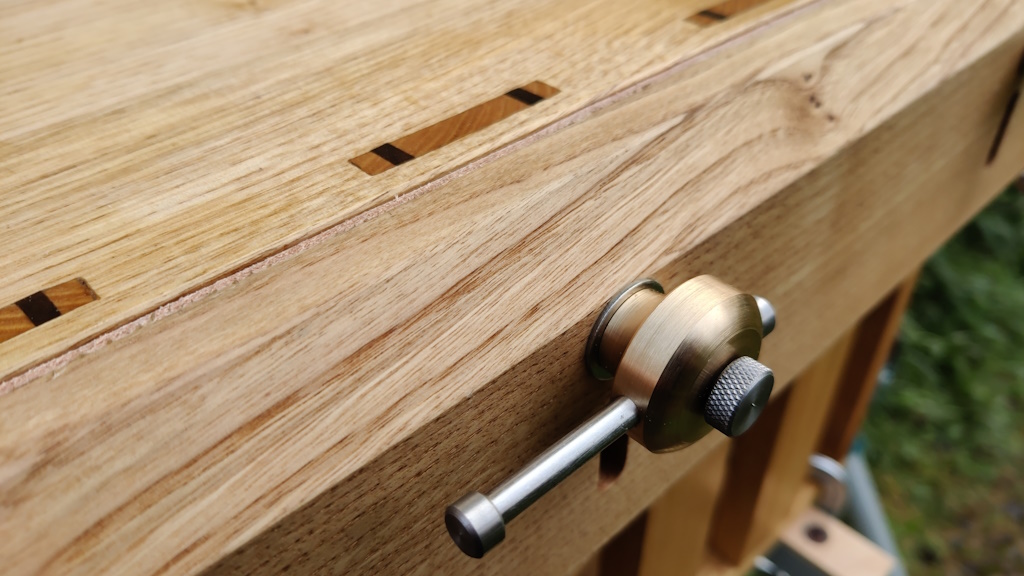 |
This photo shows a close-up of the vice screw and one of the wedged tenons. The cross-bar for the vice screw knob is made of 303 stainless steel. The knurled knob is also made of 303 stainless; there's a tiny brass pad on the end of the screw thread so that the knurled screw doesn't damage the surface of the cross-bar.
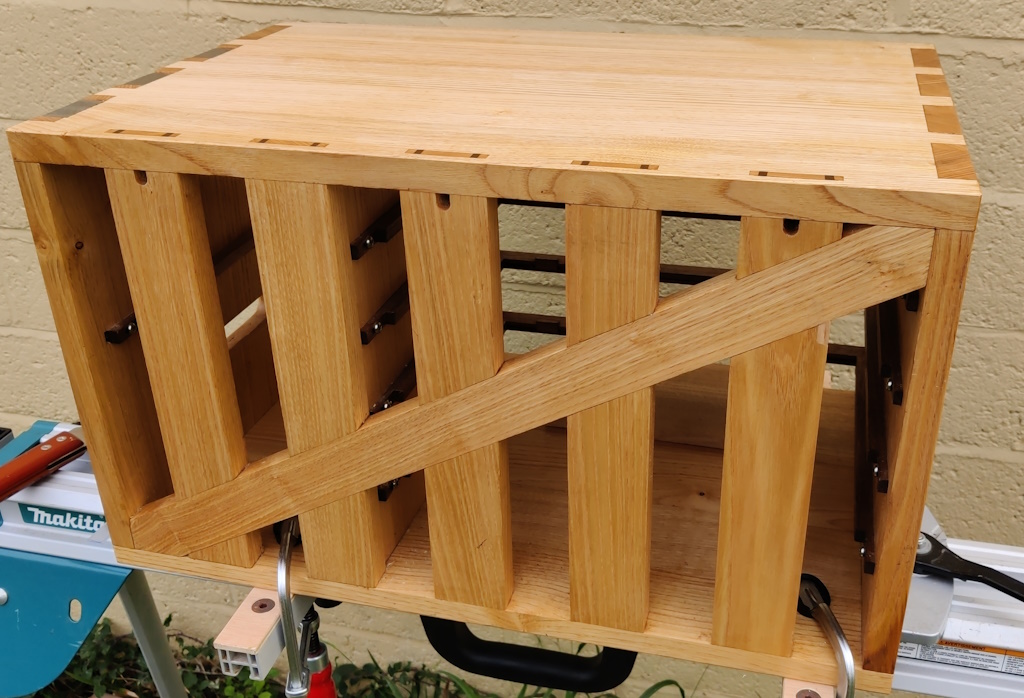 |
This photo shows what the back looks like with the vice completely removed. The diagonal piece is set into the uprights with half-lap joints. It is intended to prevent "racking" (twisting of the frame) when planing against the planing stops.
Work Holding
The chest allows work to be held in several different ways to allow many different operations to be carried out.
 |
This photo shows a board being held vertically in the vice for sawing. A similar set-up can be used for planing the end or an edge of a board.
 |
Where a board is too wide to go between two of the vice screws, the middle screw can be removed and wider boards held firmly.
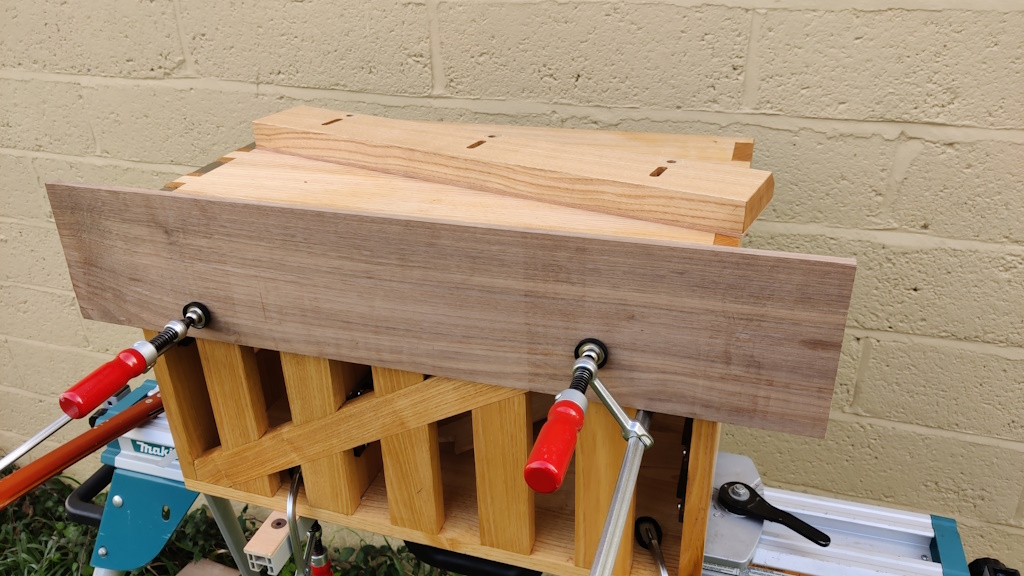 | 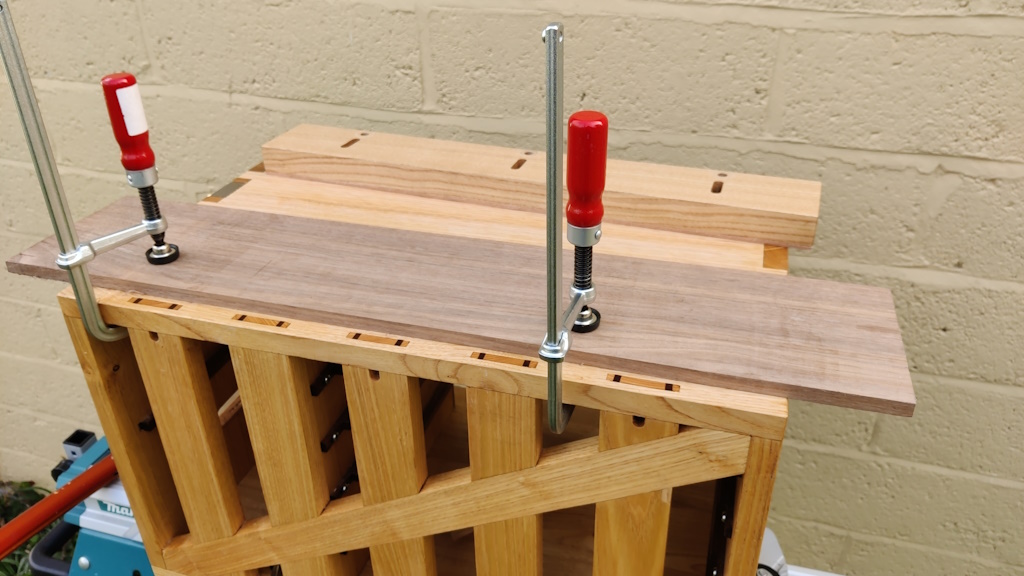 |
For really long and/or wide boards, the vice can be completely removed and boards clamped directly to the back, as shown in the first photo, or clamped to the top for sawing/chiselling etc, as shown in the second photo. Note that you can click on any of the photos on this page to see a bigger view.
 |
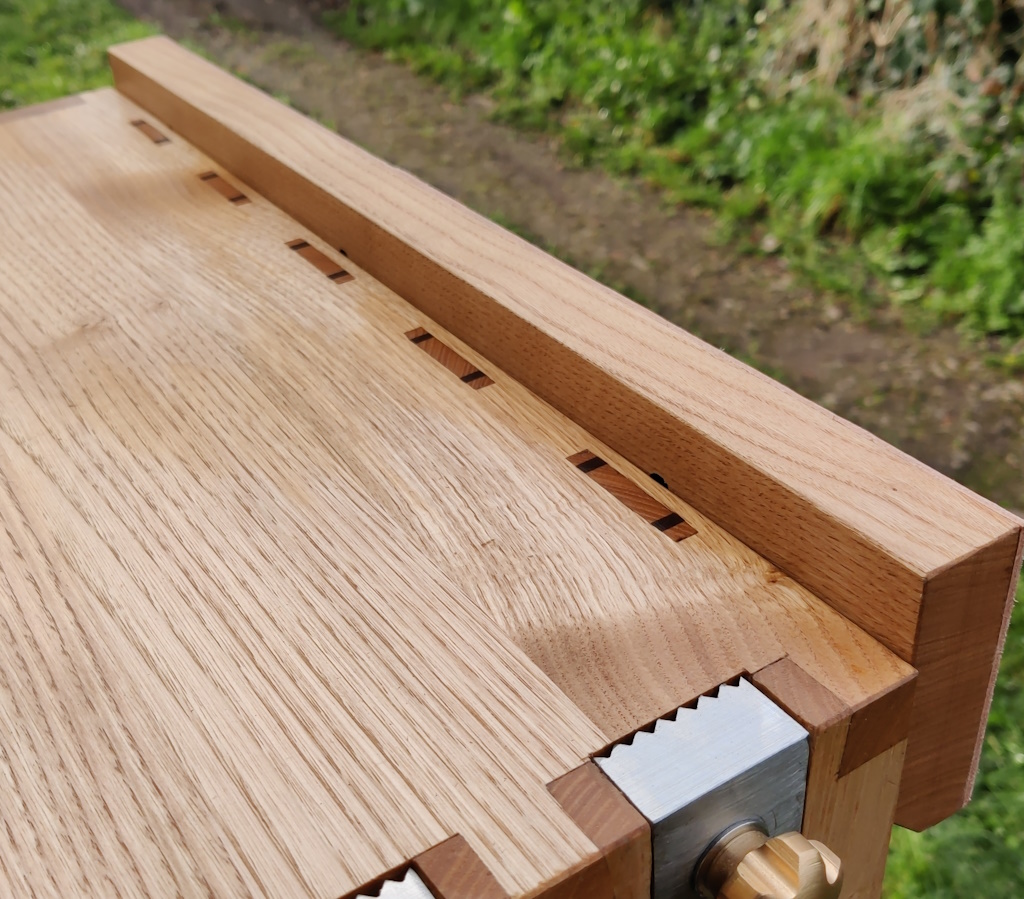
The planing stops can be raised to allow planing up against the stop. They can be raised by very small amounts for planing thin boards; the top surface of the planing stop is parallel to the top of the chest, so if the plane blade clears the teeth, it'll clear the whole stop.
 |
For a bit more rigidity when planing, a doe's foot can be clamped to the chest; this allows some cross grain planing as well as going directly towards the planing stops.
 |
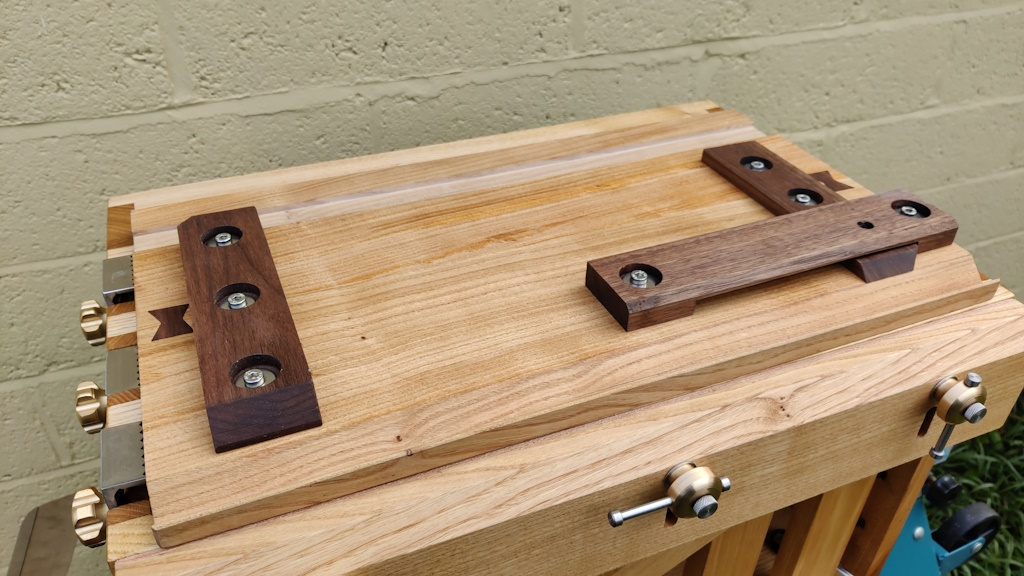
This photo shows the vice having been refitted back-to-front and upside-down using the slotted holes. This provides a stop across the full length of the chest, which can be used for planing against or to prevent movement in two directions at once (in combination with the planing stops).
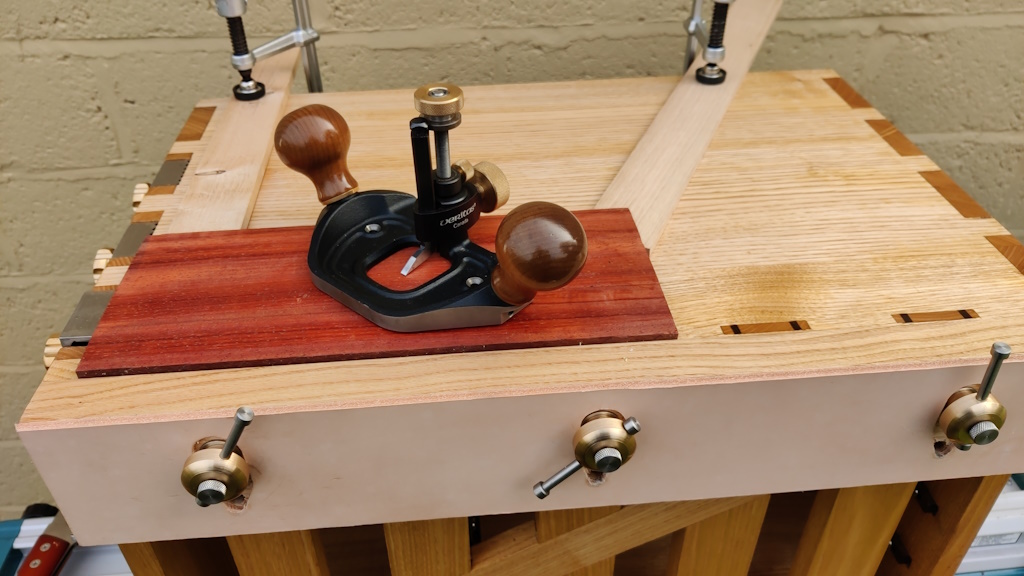 |  |
With the inverted vice raised slightly (below the top of a workpiece) and a couple of wooden pieces clamped to the front of the chest, it's possible to constrain a workpiece while giving full access to the top surface for any required operations.
 |
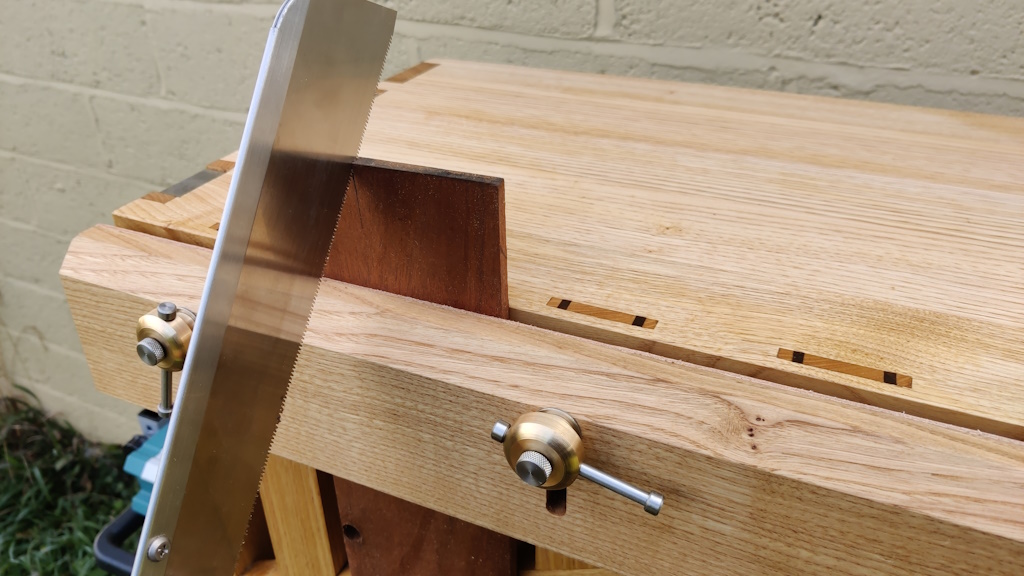
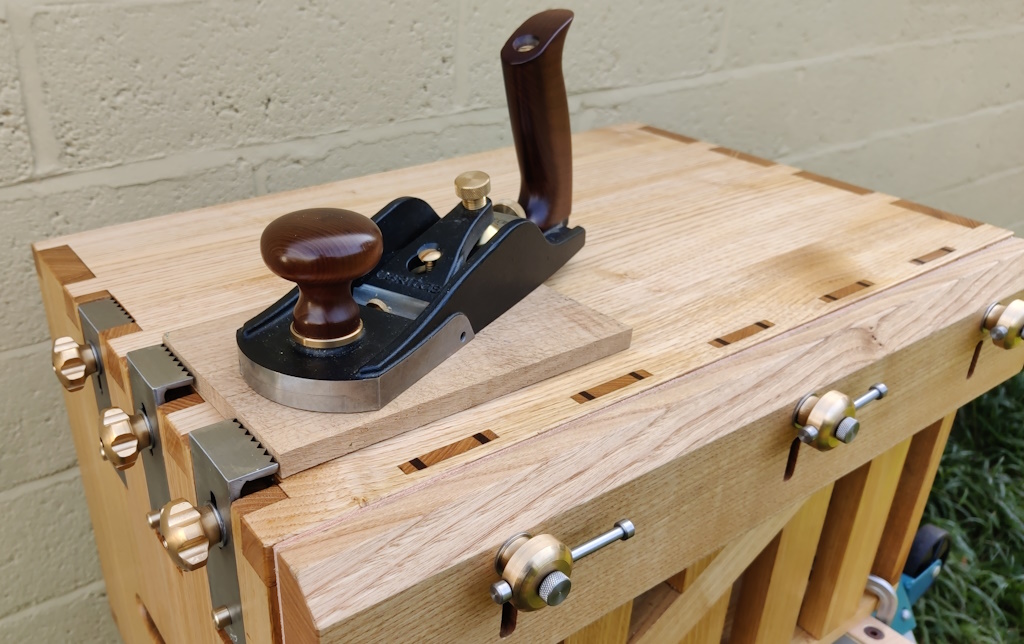
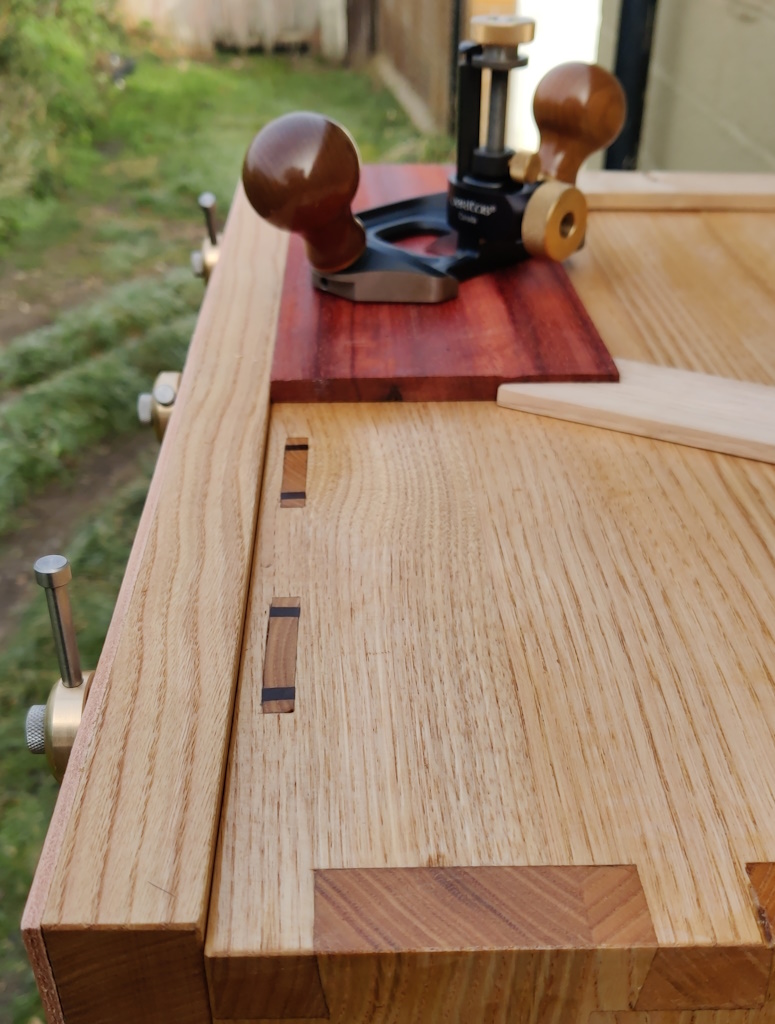
Finally (I think), there's the chest front / shooting board, which goes on top and pushes against the planing stops (this is the main reason for having three planing stops: so one is far enough over to support the shooting board near the working side).
 |
This photo shows the shooting board in use for shooting the end of a board square.
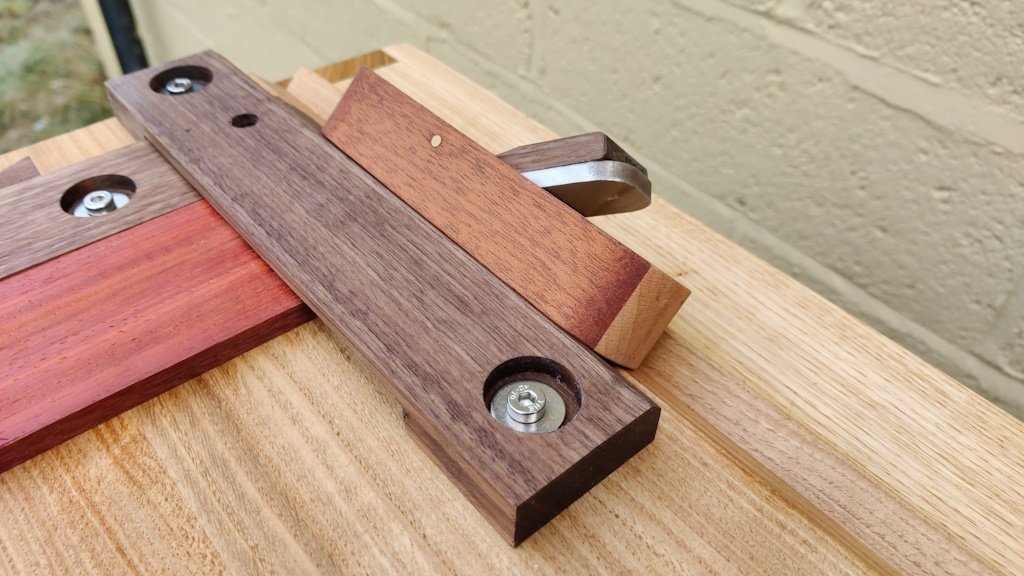 |  |
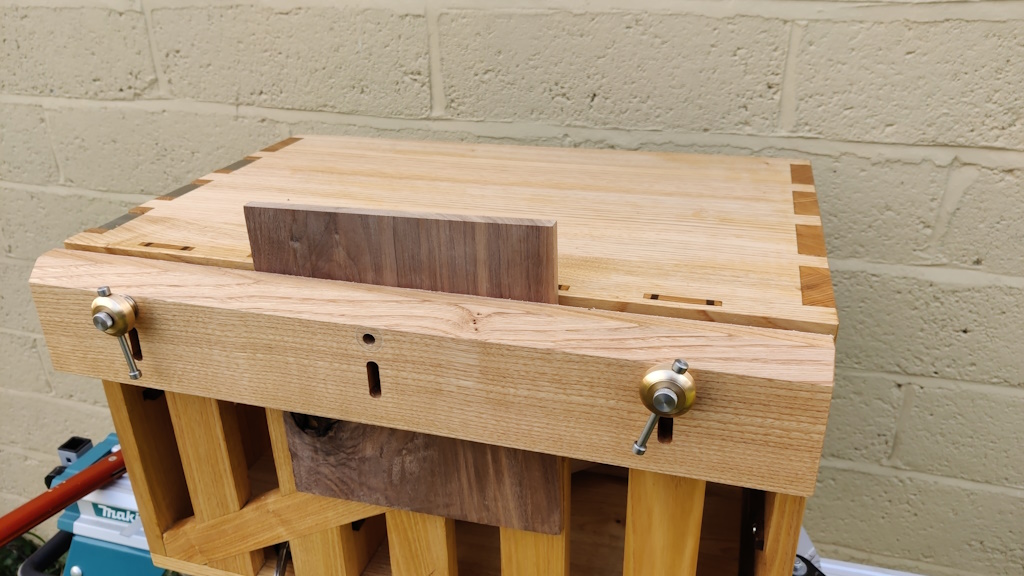
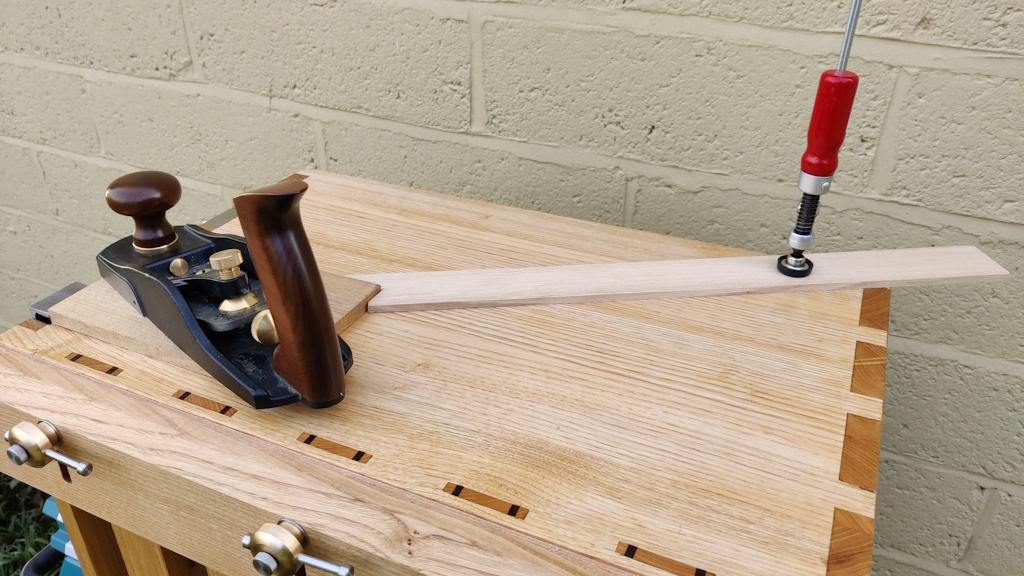
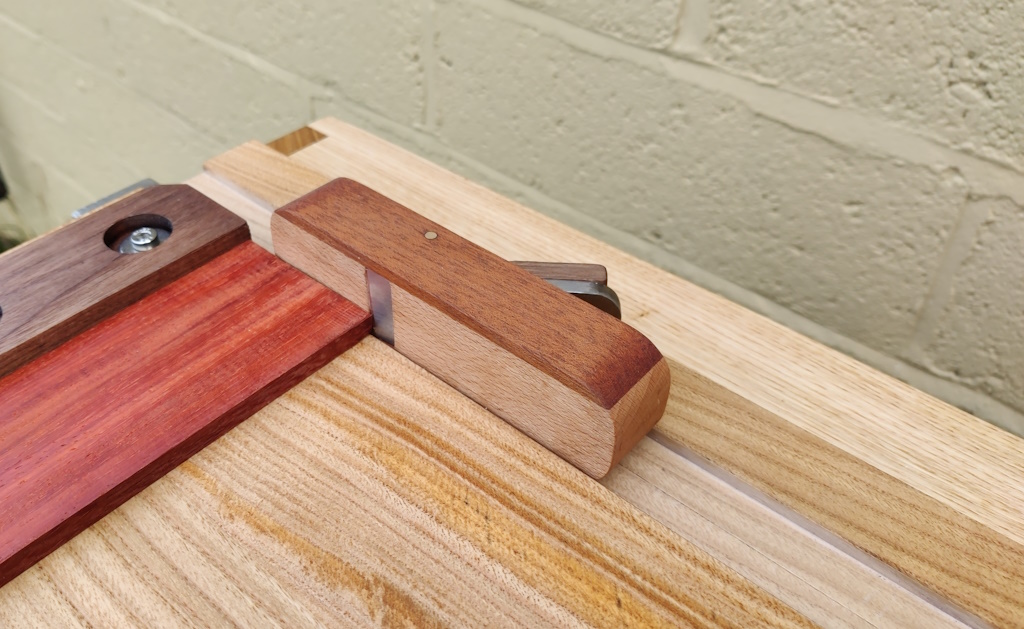
By turning the shooting board round, it can also be used for shooting mitres in boards (up to about 10 mm thick).
Results
I completed the chest in December 2023 and, at the time of writing, haven't taken it away on holiday to try using it. However, in June 2023 I had completed the main frame and the planing stops (albeit with cap screws instead of brass knobs holding them in place) so I was able to try out the process of making small boxes using the chest as a workbench.
 | 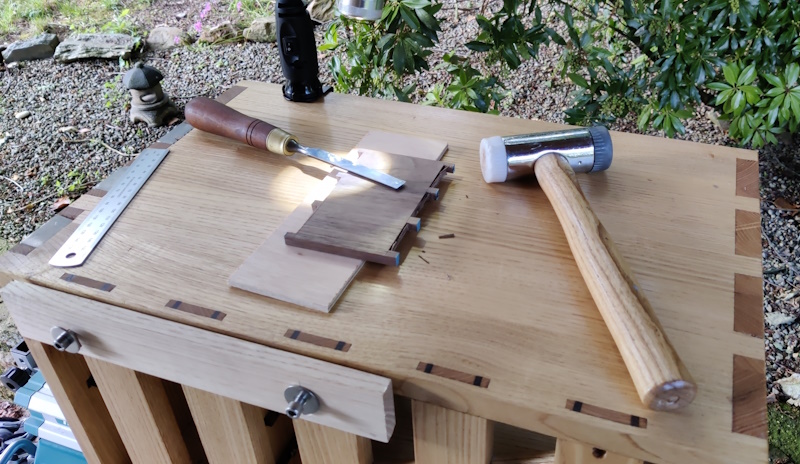 |
These photo shows the tool chest clamped to a mitre saw stand in the garden of a cottage we stayed in (in Brittany, France). The second photo was taken when I was in the process of cutting some dovetails on a box I was making. You'll note that I hadn't made the vice jaw yet, so was just using an offcut in its place. The original aim had been for this to just be a stop; while I was away on holiday I realised it could also function as a "Moxon" style vice.
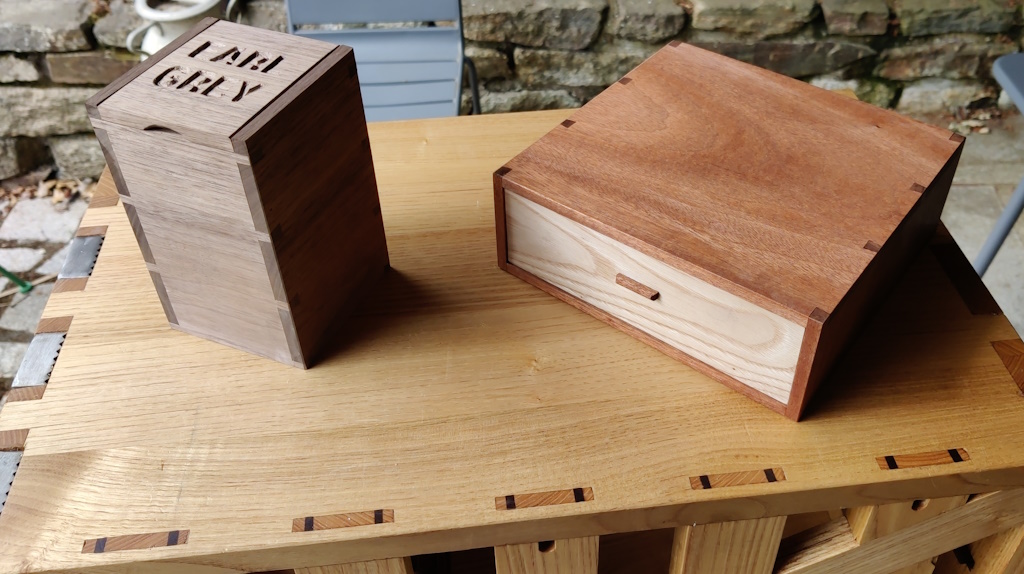 | 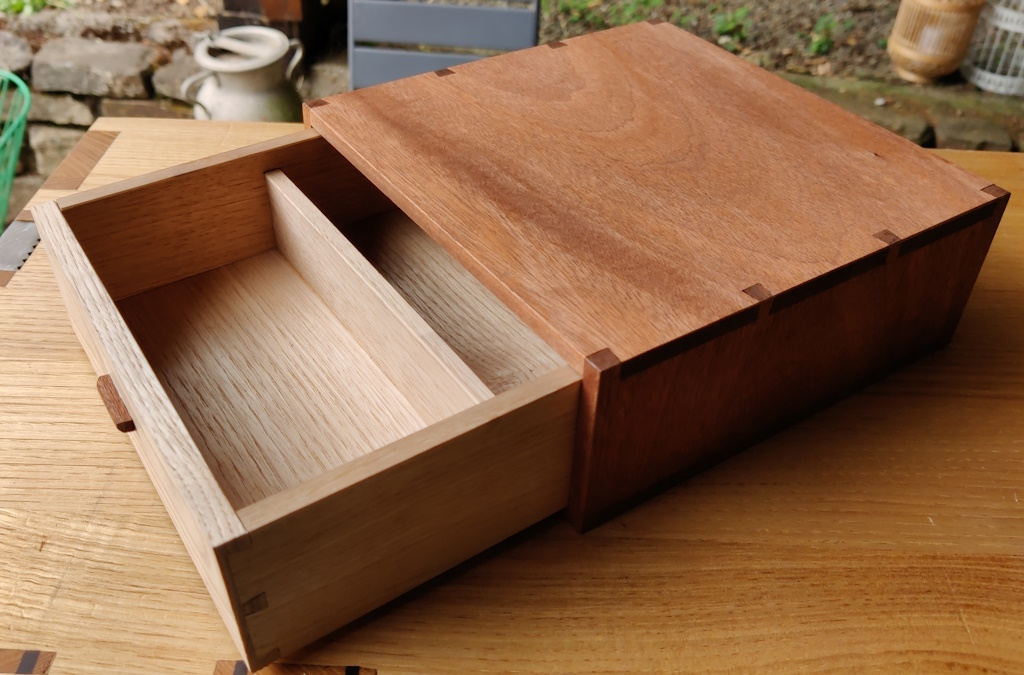 |
These photos show the two boxes I made while we were on that holiday in France. They came out well and proved the effectiveness of the chest as a workbench!
What I Learnt
I mentioned that this project was mainly about learning and practising hand tool woodworking techniques. To expand on that, this was:
-
The first project in which I've made panels from rough sawn wood by hand. In the past I've made panels, but they've involved a table saw (which I'm very happy to have now sold!) and/or thicknesser (which I've still got, but it's nice to be able to work without it, especially given the amount of snipe from my cheap-ish thicknesser). I've planed wood to size by hand in the past, but only relatively small pieces (for boxes) and this is the first time I've had to make lots of pieces of wood square edged and the same size.
-
The first project where I've cut dovetails without any sort of saw guide. I've cut quite a lot of dovetails with 3D printed saw guides and I've cut a few (not very successful) dovetails without the guides on bits of scrap wood for practice, but this is the first finished project that includes guide-less dovetails. Also the first time I've cut dovetails on such thick wood: all previous ones have been on box-scale projects, so 10-ish mm thick rather than 20 mm thick.
-
The first project in which I've cut housing joints (for the middle upright support and the drawer runners) - known as dadoes in America I believe.
-
The first project with wedged through mortice-and-tenon joints (for the rear uprights). I used blind mortice-and-tenons on my side table, but the tenons were cut with a table saw and the fact that the mortices are blind makes them a lot easier! I'd done a few practice joints (with varying levels of success!) in offcuts, but never used them in a project.
-
The first project with half-lap dovetails (for the drawer fronts). I'd done exactly one practice piece before starting this project.
-
The first project with wooden drawers. Unless you count pocket-hole joined plywood boxes with ball-bearing slide runner things, I'd never made a wooden drawer before this project.
-
The first project with half-lap joints (on the anti-racking diagonal piece on the back).
-
The first project in which I've used protein-based glue (most joints with fish glue and some with TB hide glue).
-
The first project where I've had to come up with my own way of dealing with wood movement. On previous projects I've just used well-known techniques (buttons for table tops, grooves for box bases), whereas making what is essentially a five sided box where all sides needed to be rigid took a bit more thought. Hopefully what I've done will last.
-
The first time I've used a "Dutchman" / graving piece to repair a blemish. I used two different types of Dutchman: decorative butterfly ones in a contrasting wood and discrete grain matched ones.
-
The first large project I've finished without sandpaper. The faces were finished with a smoothing plane without any of the dust and tedium of sanding (and I think it looks a lot better for it!). A scotchbrite pad was used for rubbing between coats of finish ("Mike's Magic Mix": equal parts pure tung oil, satin varnish & white spirit) but that's a quick job compared with sanding large surfaces.
-
The first time I've tried photolithography (for etching the numbers that are inset into the top of each drawer front to help re-fit them in the right place as they're removed when the tool chest is in use).
-
The biggest and most complicated hand-tool project (and woodworking project in general) I've done. I did use a bandsaw for some bits of resawing, but all the other woodwork was by hand. Metalwork was all powered, but that doesn't bother me as I hate filing and don't even aspire to being a hand-tool metalworker. Woodwork power tools are noisy and dusty, but most metalwork power tools I use aren't (angle grinders being the obvious exception). Welding the planing stops without some sort of power source would have been quite a challenge!
This website is free, but costs me money to run. If you'd like to support this site, please consider making a small donation or sending me a message to let me know what you liked or found useful.