Portable Workbench
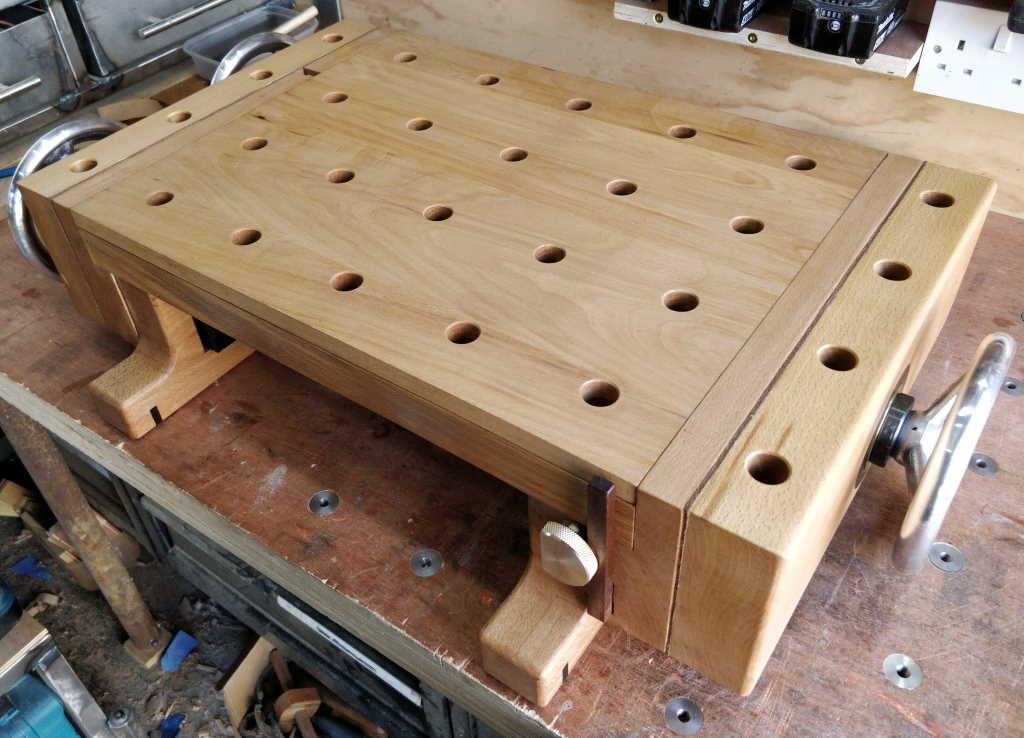
This is a portable workbench that I made over the course of about a month, starting in March 2021. It has two vices, one at each end of the bench and both vices use home-made quick-release mechanisms to allow quick and easy movement of the jaws when unlocked. I made this bench for several reasons:
- I wanted a vice that is raised above the height of my main workbench for holding work while cross-cutting with a hand saw (without the saw hitting the bench) and detailed planing work (where having the workpiece closer to my eyes is beneficial).
- I wanted a dual-screw vice for holding long stock vertically and (to a lesser extent) holding tapered stock.
- Finally (and probably most importantly if I'm honest), I thought it would be a really interesting design-and-make project involving power tool woodworking, hand tool woodworking, metal turning, metal milling and welding.
The photo at the top of the page shows a top view of the workbench with the conventional vice on the right. The vice mechanism used for each of the three screws is based on an idea from a youtube video by Neil Paskin. There weren't any dimensions or other details in his video (although he has also made a plywood version and provided drawings for that), so I had to work it out for myself, which was an interesting process. The vice mechanism works really well: about half-a-turn of the wheel anticlockwise is enough to release the mechanism and the jaws can be freely slid in and out. Turning the wheel clockwise by about the same amount engages the screw and the vice can then be firmly locked.
While I was making this workbench, I posted lots of pictures on a few different forums so people could see (and suggest improvements on) how I was getting on. I've reproduced all of my posts in a "blog" section of this website, so if you've got a lot of time on your hands, you can read the full "warts an' all" details of how this bench was made by clicking on this link. There are 67 pages and 421 photos, so it's very detailed!
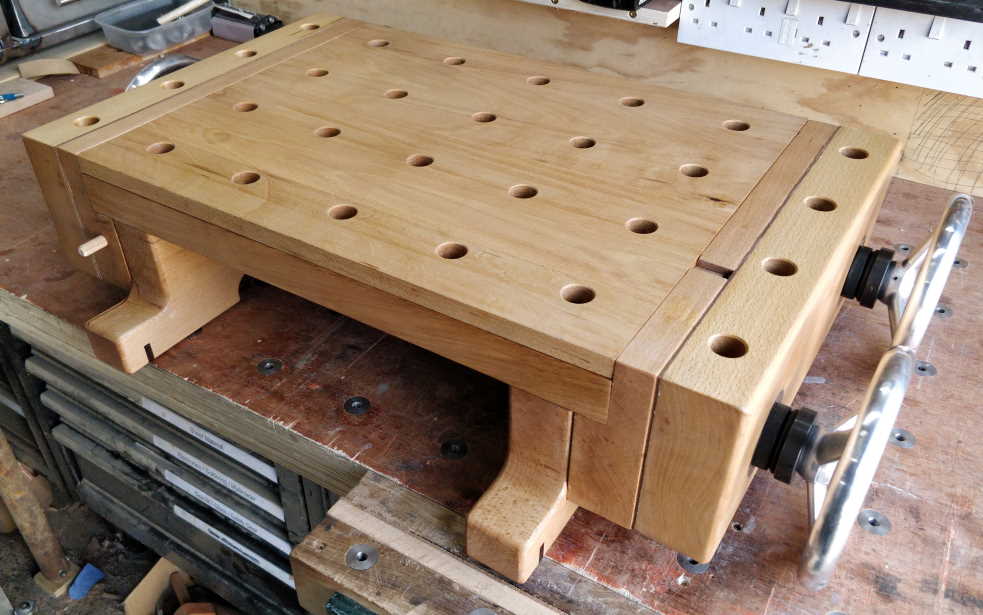
This photo shows the workbench from the other end. The two hand wheels for the dual-screw vice are clearly visible. The only components that I bought (rather than made) for this project were the aluminium hand wheels, the M20 threaded rod used for the vice screws and two pairs of spherical seating washers to help with angled clamping. All of those bought-in components required some modification on the lathe before installation on the workbench.
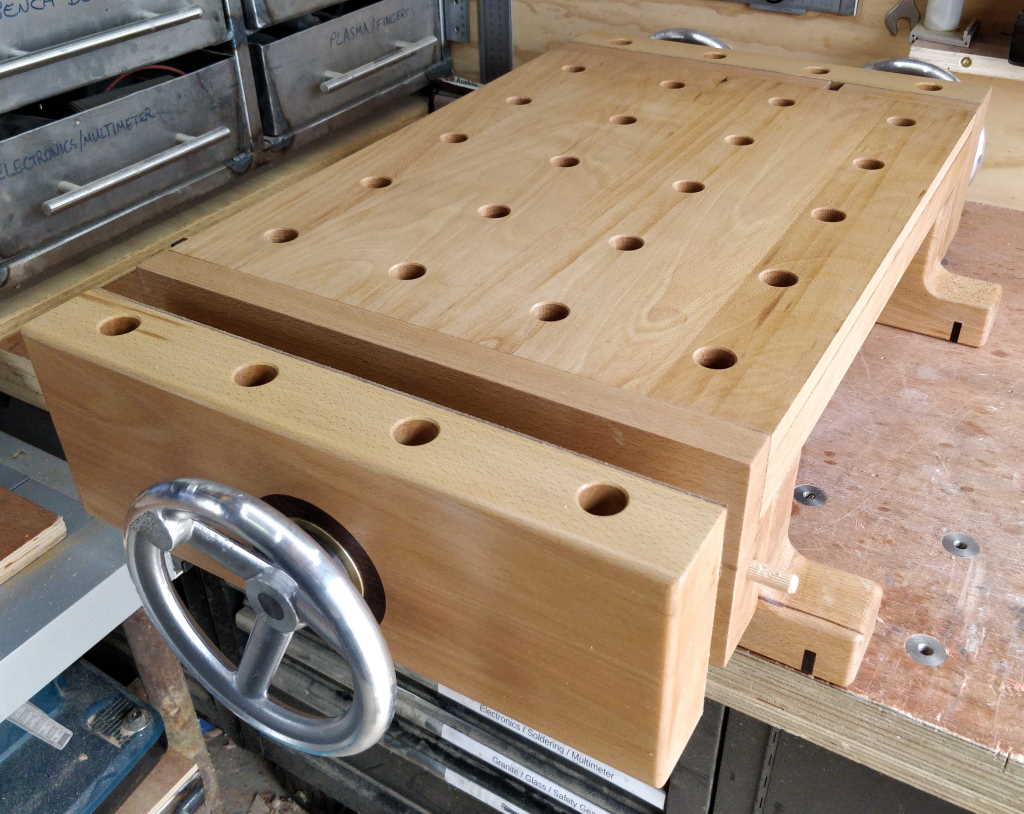
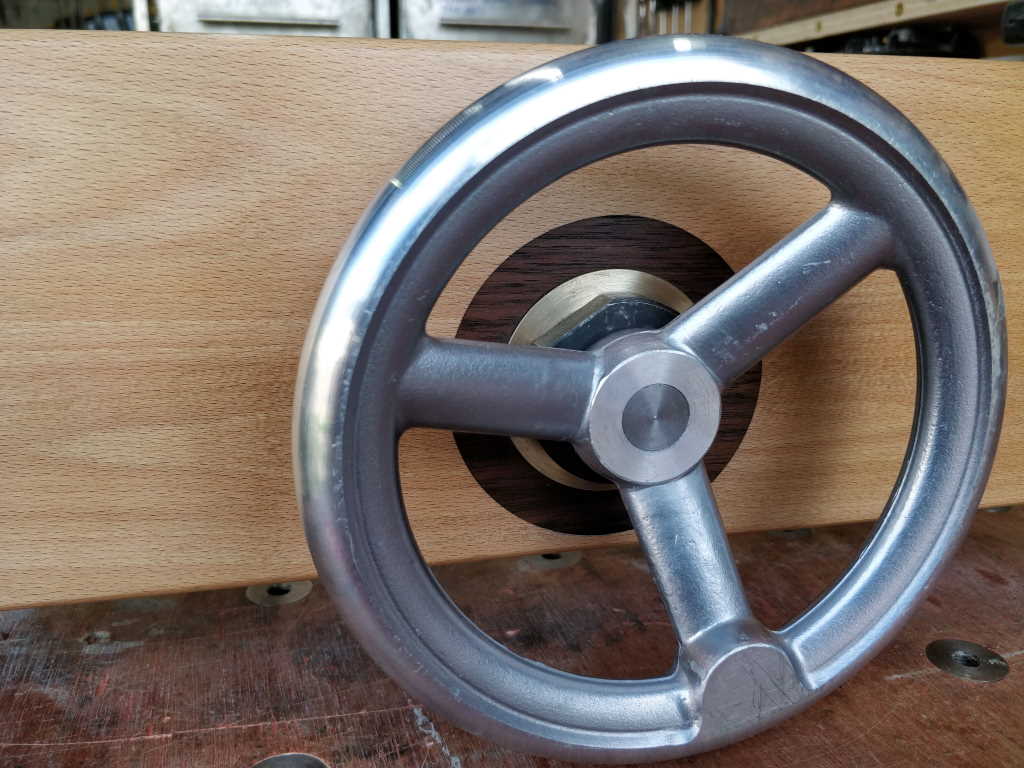
These photos show the standard vice end in a bit more detail. On the right-hand side of the standard vice, there is a 10 mm hole into which an off-the-shelf beech dowel can be fitted. The dowel sits firmly in the slot but can be pulled out easily when it gets worn. It is there for when I'm cross-cutting stock clamped in the vice. At the end of the cut there is a risk of the saw dropping and damaging the workbench's foot. Instead of that happening, the saw hits the exposed and easily replaceable dowel and takes a chunk out of that instead. If you click on the left-hand picture and look closely, you can see the damage the dowel has already suffered.
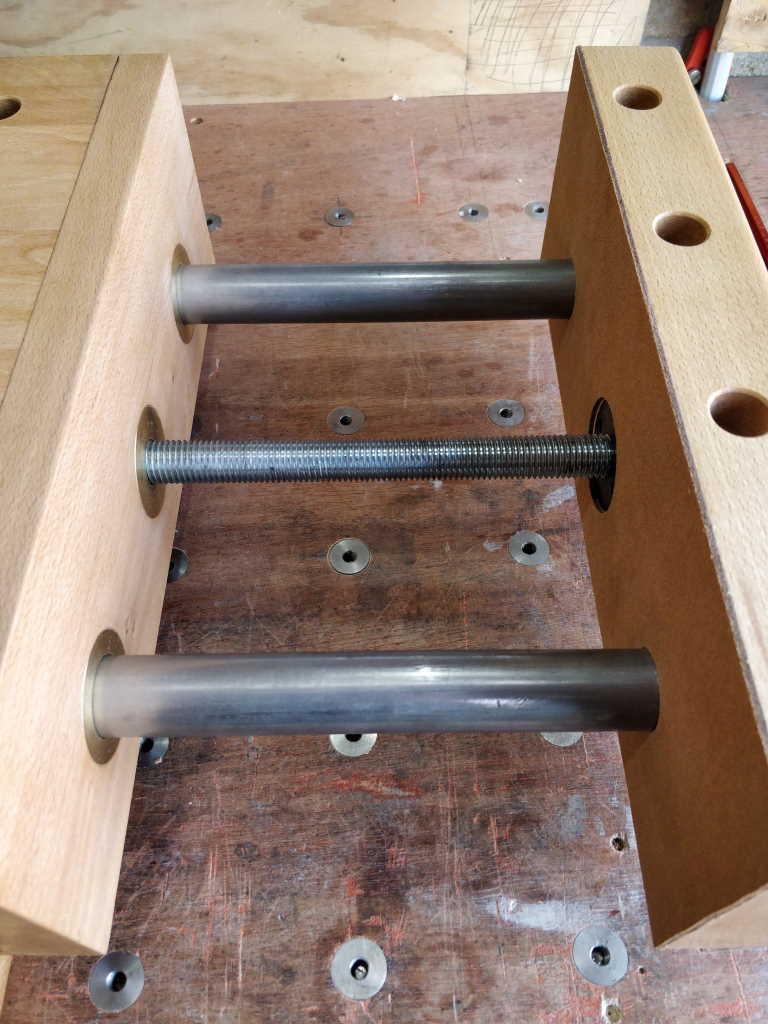
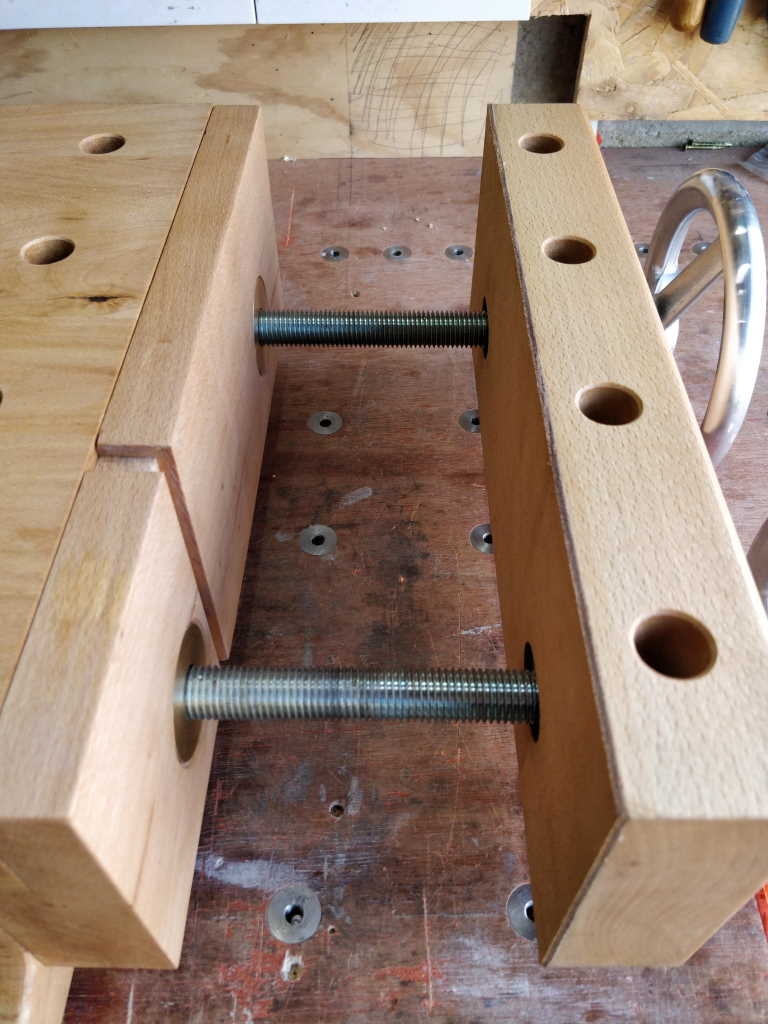
These two photos show what the jaws look like when open. The moving jaw of both vices has been coated with leather to improve the grip on the piece being held. This was the first time I'd ever worked with leather and it was an interesting process to go through. You can read about it in more detail, starting on page 62 of the build log.
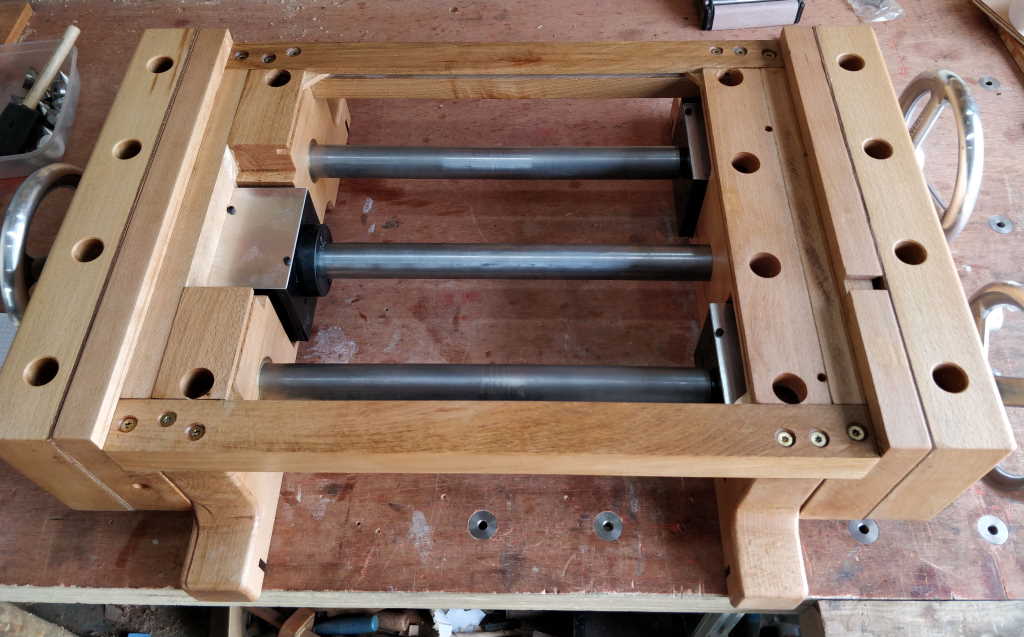
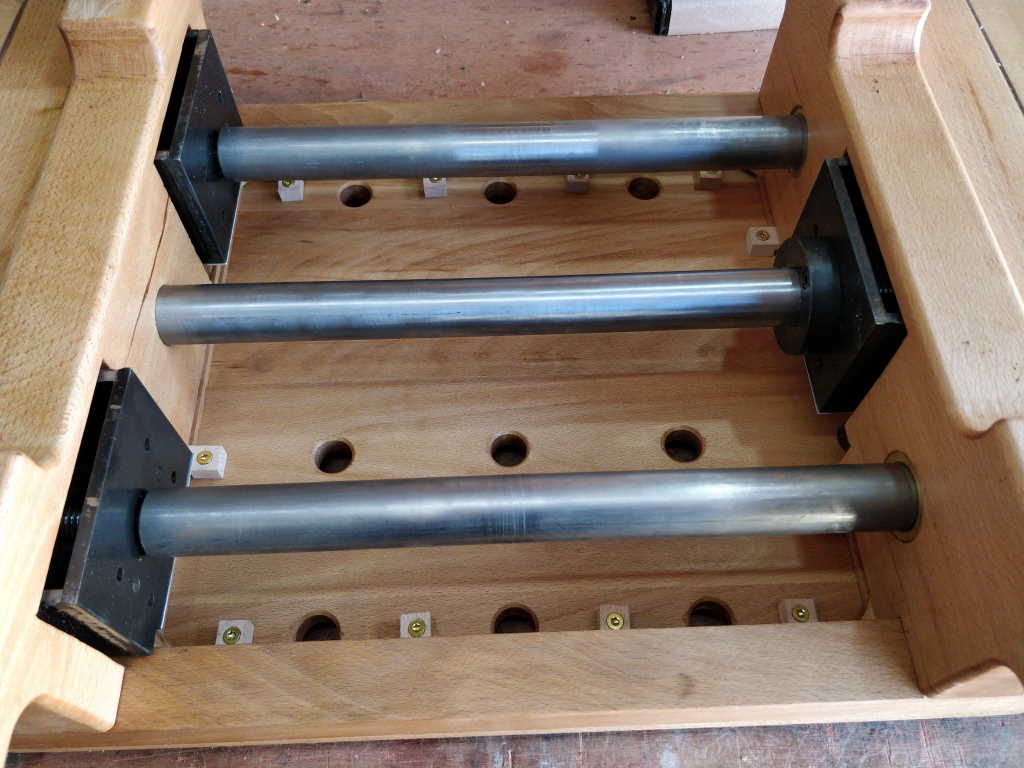
These two photos show the inside of the workbench as viewed from the top (left photo) and from underneath (right photo). The outer two steel tubes are the rails for the standard vice; the threaded bar for the dual-screw vice runs inside these tubes. The middle steel tube goes around the threaded bar for the standard vice (protecting it from too much sawdust getting to it) and also acts as a stretcher to increase the strength of the bench. The vice mechanisms have aluminium lids to reduce the chances of sawdust getting into the mechanisms.
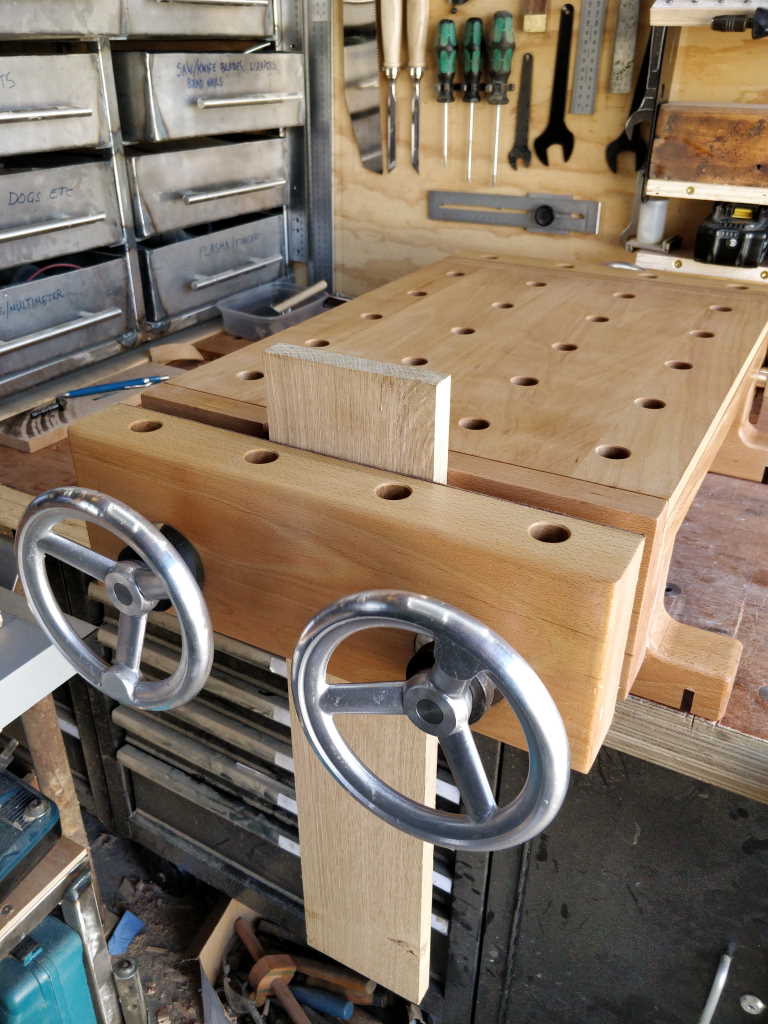
This photo shows an example of clamping long stock vertically in the dual-screw vice. The maximum width of stock that can be clamped this way is 200 mm.
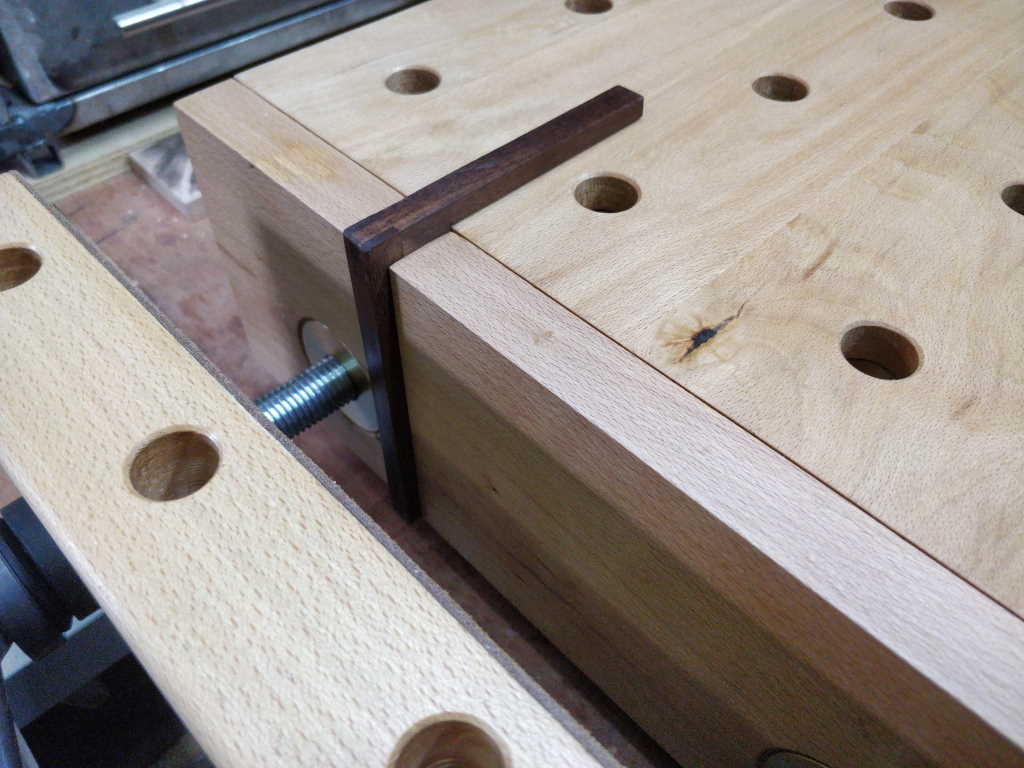
The dual-screw vice has a slot machined into the fixed jaw. This slot allows a walnut "dovetail guide" to be fitted. The dovetail guide is simply two pieces of walnut glued together at right angles. To use it, it is pushed into the slot as shown and then the pin board for a dovetail is clamped into the vice with one edge pressed up against the vertical part of the dovetail guide. The tail board is then pressed up against the horizontal part of the dovetail guide, over the top of the pin board. This ensures that, when marking the location of the pins from the tails, the two boards are perpendicular to one another and with their edges at the same position.
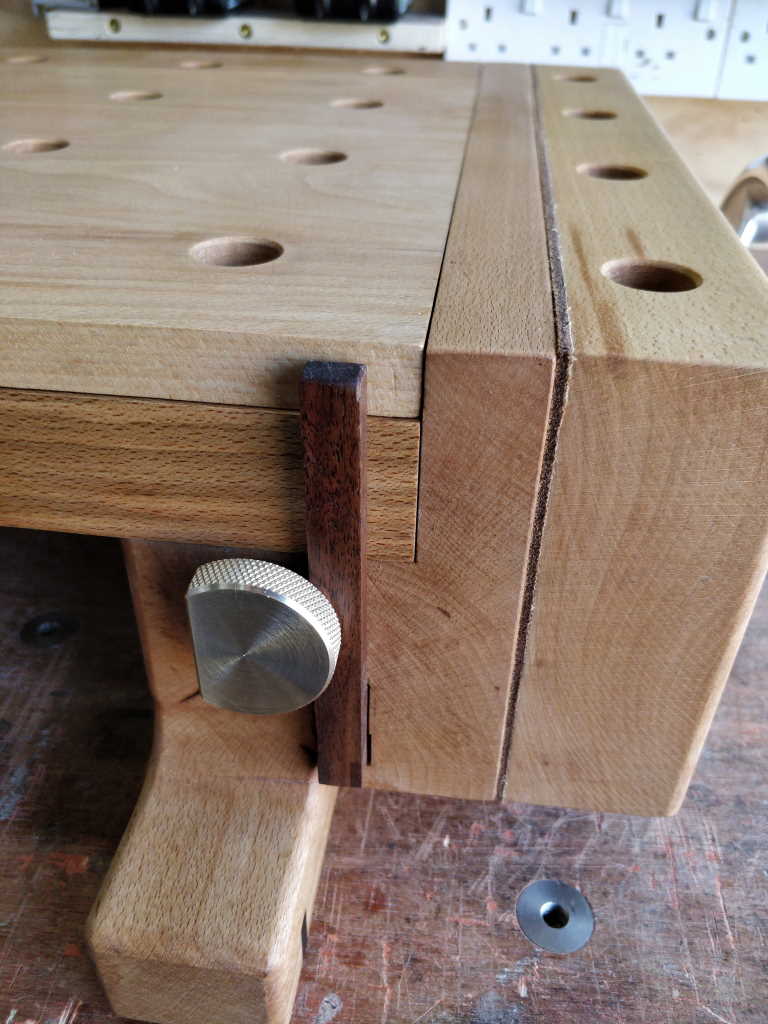
When not in use, the dovetail guide fits into a slot in the side of the fixed jaw for the standard vice and is held in place by a knurled brass clamp. The clamp only needs to be rotated 180° anticlockwise to allow the dovetail guide to be removed.
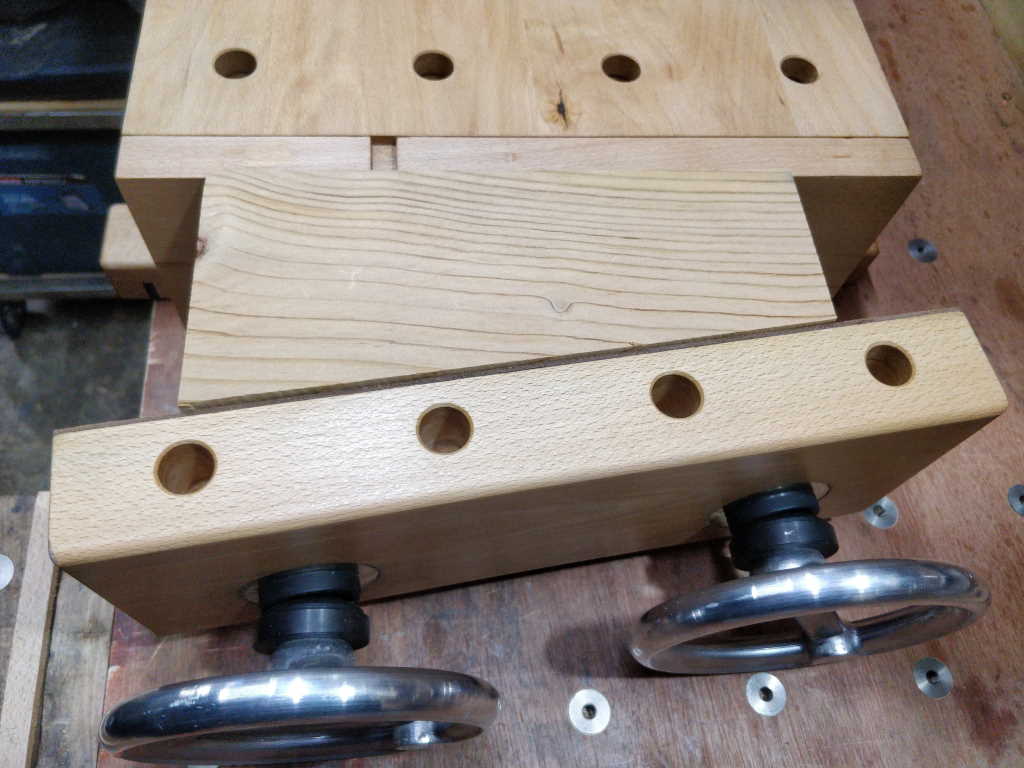
This photo shows the dual-screw vice being used to clamp angled stock. This piece of Cedar of Lebanon was cut with a taper of about 7°, which is approximately the limit of the clamping ability of the off-the-shelf spherical seating washers.
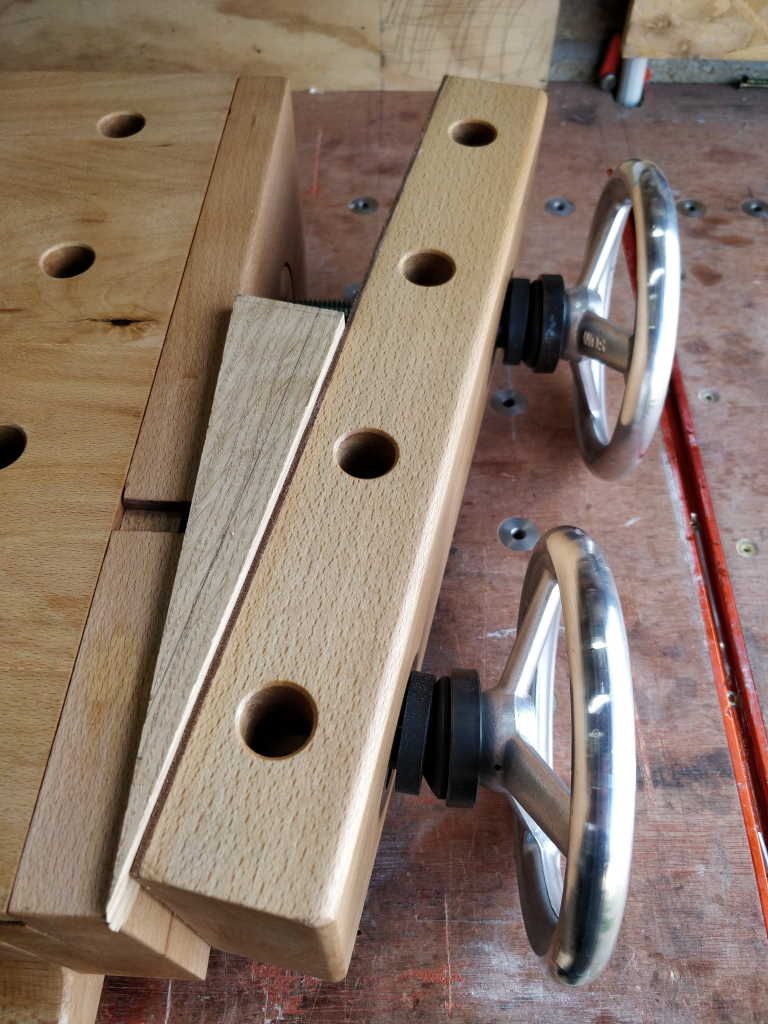
This photo shows what happens when clamping a piece of wood with a more extreme taper. The wood is still held rigidly, but you can see that the spherical seating washers are no longer sitting flush with the slotted bushes in the jaw.
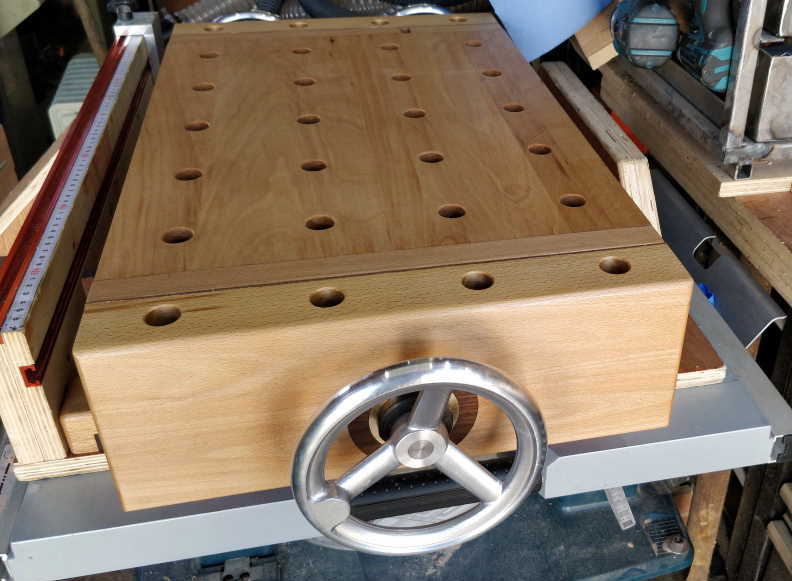
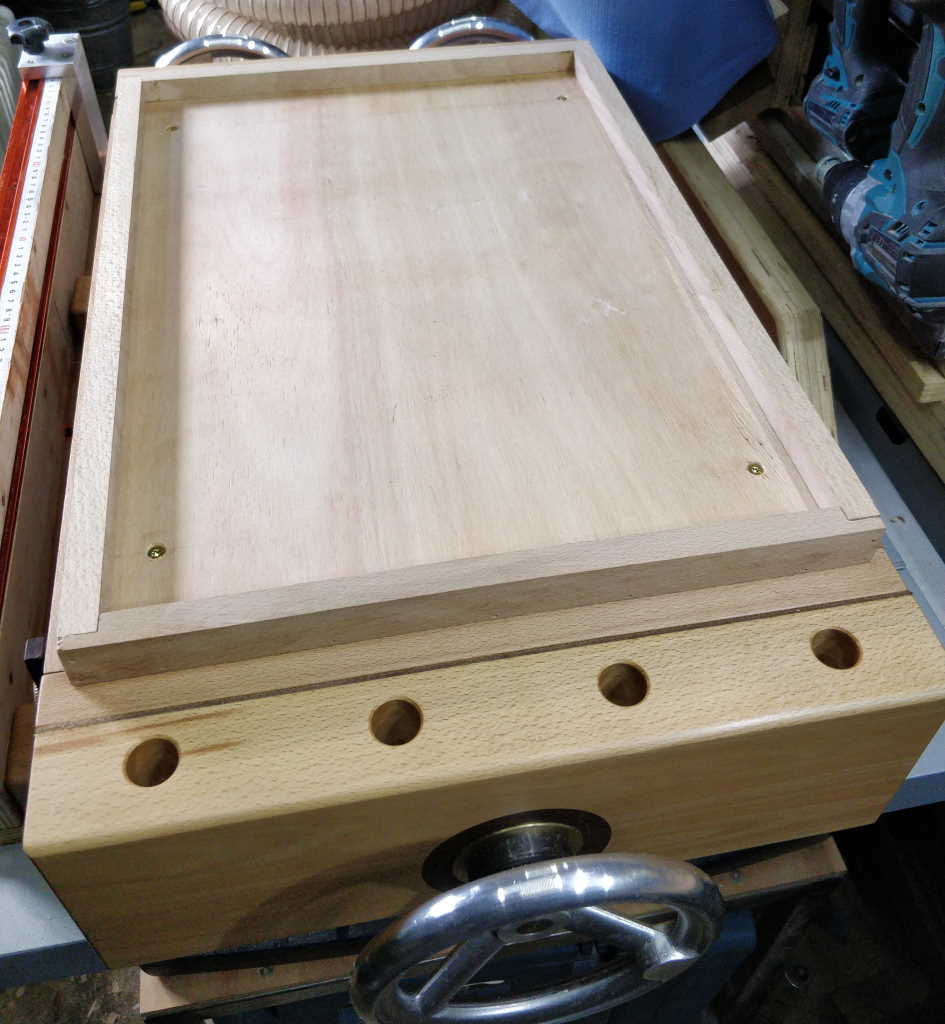
When not on my main bench, the portable workbench lives on a shelf to the side of my bench (you can see its location in the wider context of my working are in the photo at the top of the my workshop page). The vice is perfectly usable in this position and I have quickly found it to be my preferred method of cross-cutting stock: quickly clamp it in the vice and cut down the side (with the dowel to protect against overshoot). I also use it while on the shelf for detail planing operations where it's not necessary to move the workbench onto my main bench.
The right-hand photo shows a simple tray I made to sit on top of the bench. It was made out of a piece of plywood and some beech offcuts left over from making the workbench. It has four 18 mm dowels screwed to the bottom as "feet"; these drop loosely into the dog holes on the workbench and stop the tray from sliding off. The tray is used to hold things that are in use on my main bench without risk of them rolling onto the floor and being lost.
This website is free and ad-free, but costs me money to run. If you'd like to support this site, please consider making a small donation or sending me a message to let me know what you liked or found useful.
