Chunky Planter Build Process
Page 3 of 17
Posted 1st October 2021
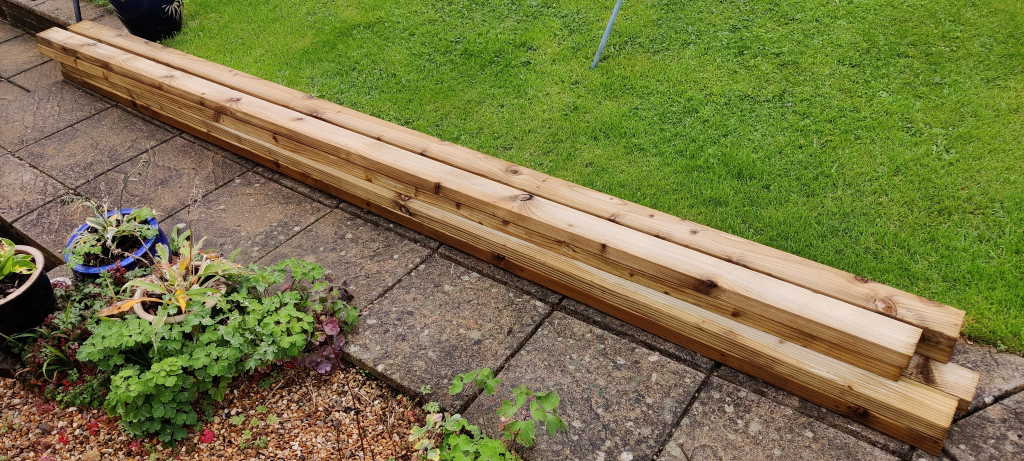
The wood, which I got today, is 47 mm × 100 mm sawn Tanalith E pressure treated softwood timber. The two planters should both come out of these lengths, which cost me £115 from Arnold Laver timber merchants. I'd ordered 7 lengths of 4.8 metres (33.6 metres total), but 10 lengths of 3.6 metres arrived instead. Given the lengths I want, that's fine. This is the same stuff I used to make the original one (except it was 2.4 metre lengths from B&Q). The base will be plywood; I can't remember what thickness I used on the original, but I'm going for 12 mm for this one as I have some already.
These lengths of wood will be cut up into 8 × 1.8 metre planks and 32 × 600 millimetre planks. There would have been no spare lengths at all if I'd got the 7 × 4.8 metres I ordered, but with the extra 2.4 metres that arrived I've got a bit of room for error. There are some subtle differences (mostly just which edges are rounded over, but also the presence or otherwise of some cut-outs) between different pieces depending on where they sit in the structure, so it would be easy to make a mistake and cut out something that shouldn't be removed.
I mentioned that there are a few changes I'm making to the design. On the original the plywood was painted in gloss and the gloss paint was also used up the insides (to a short distance below the top of the soil) to try to protect the wood. There are holes in the plywood for drainage and some rocks were put in the bottom of the planter before the soil was added, also to help with drainage. On the new one I've decided to line the planter with some plastic sheet. I think this should be more effective than the gloss paint. The plywood will still have holes in; the plastic will have drainage holes over the plywood ones (I'll probably make the plywood holes bigger and form the plastic into a sort of funnel to go through the plywood holes). I'll still paint the plywood with gloss paint, but I probably won't paint up the insides of the treated softwood. I can't remember what I put on the softwood the first time round, so unless I change my mind in the next few days, I'll just put some end grain protector on the cut edges.
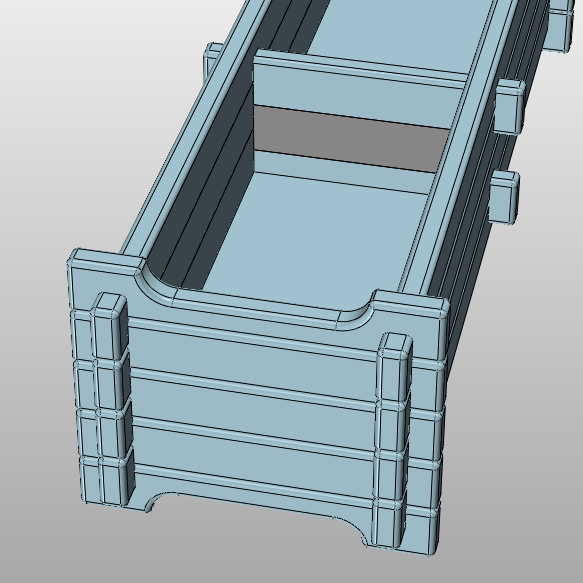
In the middle section of the existing design, there are only two cross planks, which can be seen sticking out of the sides of the planter. To make it easier to line the planter with plastic, I'm going to add an additional (hidden) plank in between the two cross pieces. You can see this highlighted in grey in this image (note that I haven't bothered to model the drainage holes in the plywood base, but they will be there in the real thing):
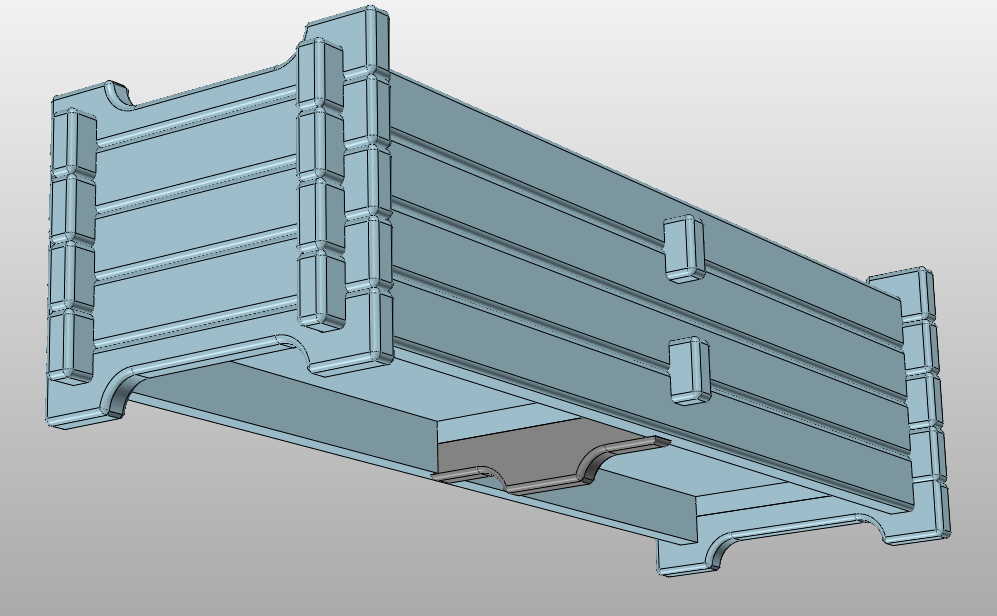
After a few years in situ, the long bottom rails of the original sagged a little. While this didn't cause any real problems, I decided that this time I would add a foot in the middle to support the weight better. You can see this highlighted in grey in this image:
This cross-section through the middle of the planter shows the new foot and hidden middle plank along with groove for the plywood base.
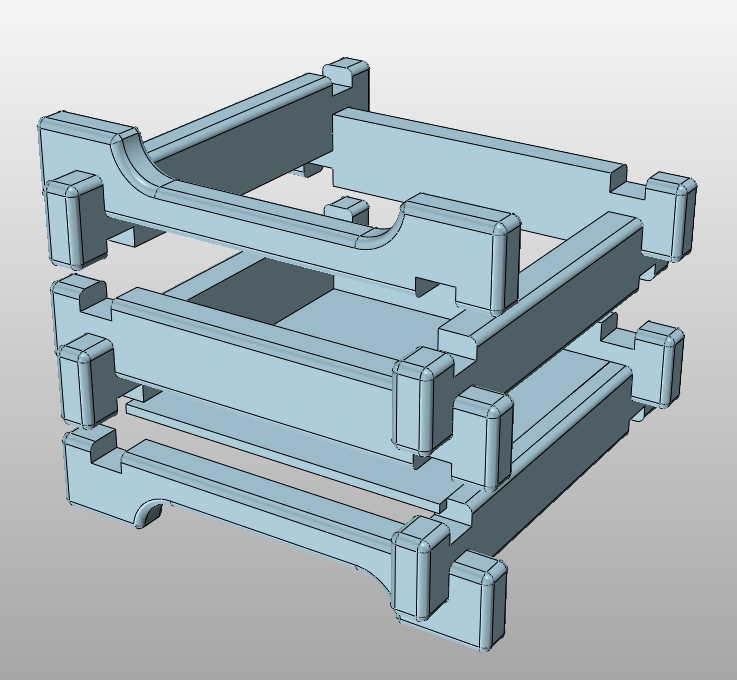
In case the simple construction method isn't already obvious, this image shows the smaller planter with every other plank removed:
Page 3 of 17
This website is free and ad-free, but costs me money to run. If you'd like to support this site, please consider making a small donation or sending me a message to let me know what you liked or found useful.

 Return to main project page


