Pantograph
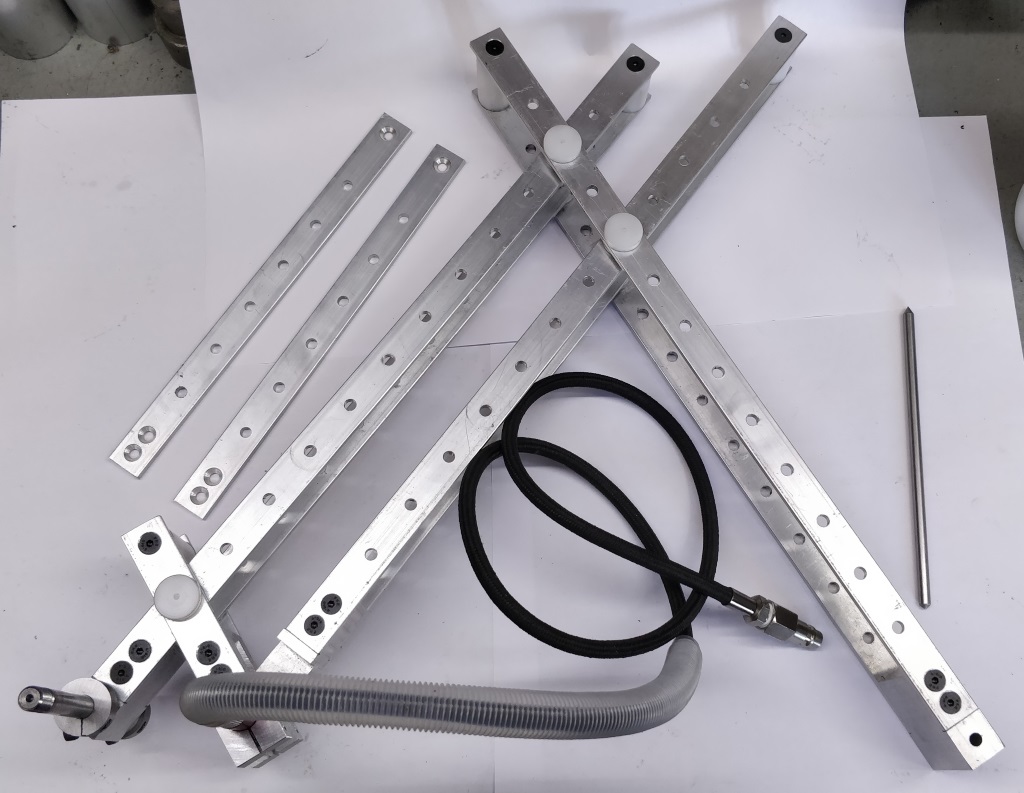
This is a pantograph, used for engraving text (or in principle, anything else) into a part. It is based very heavily on a design made by Joe Pieczynski on his youtube channel. There is a link to the first part of the video in which he describes the design and use of the pantograph here.
There are relatively few differences between the design of my pantograph and Joe's original one. The only significant changes I made were:
- I recreated the design in metric units in Onshape (I have metric dimensioned drawings available if you're interested: feel free to get in touch). My version is based on 20 mm × 4 mm aluminium bars; the spacing of the holes is 30 mm.
- I modified the shape of the stylus somewhat to suit my template letters.
- After initial trials, I made two new short arms (shown fitted in the photo above; the original arms are lying next to the pantograph). At the moment, I only use the 6:1 scaling ratio. With the original arms I had to be very careful with positioning the pantograph to stop the arms colliding with the column of the mill due to its relatively shallow throat depth. The new arms can only do the one ratio, but allow much more freedom of movement.
- I made (rather than bought) the collars: unsurprisingly these have a 10 mm hole rather than the 3/8" one in Joe's design.
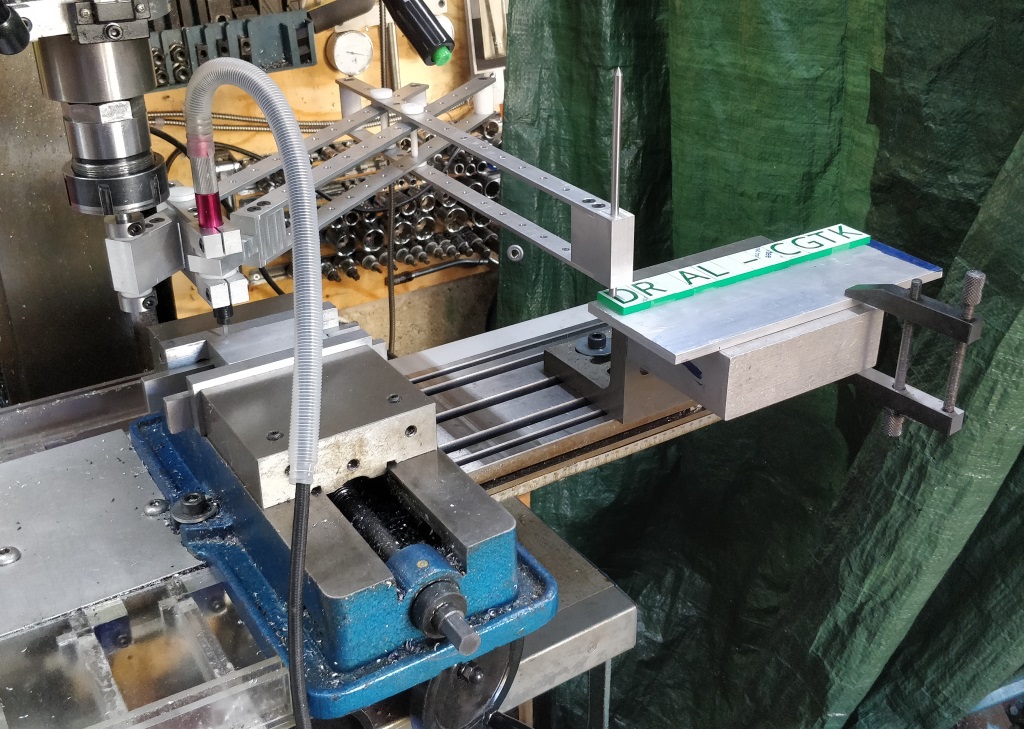
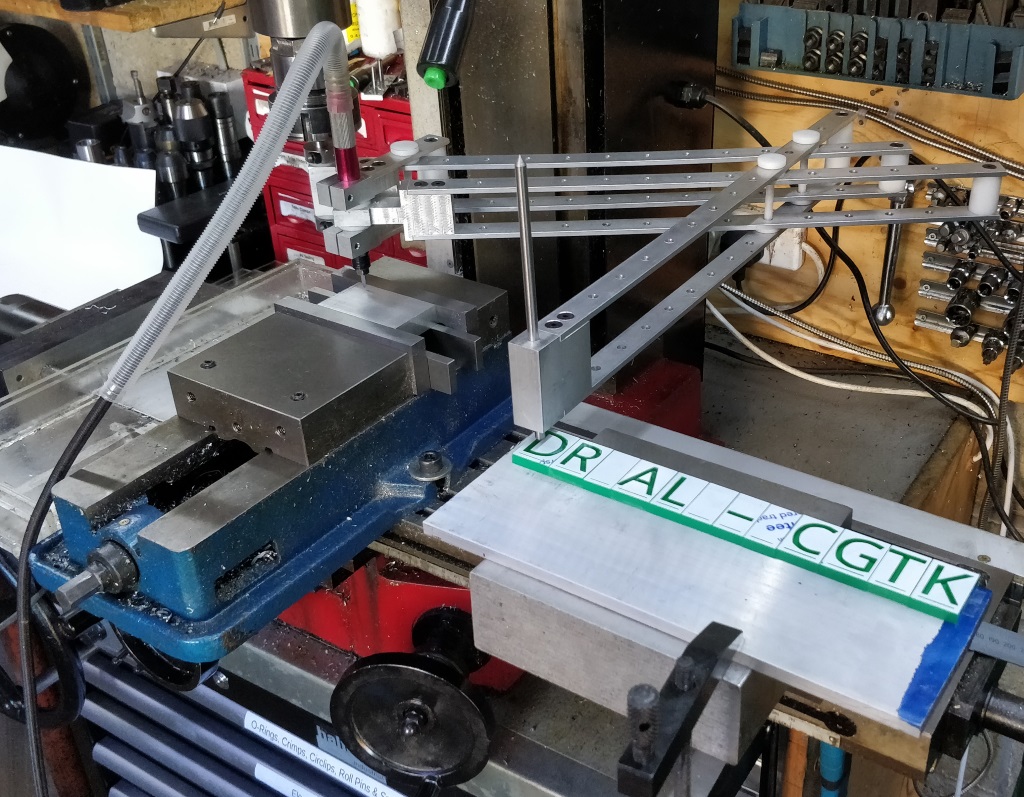
These images (click on them for a better view) show the set-up I use for engraving on the bench-top milling machine. As you can see from the photos, this is stretching the size limits of the little mill to the limits, but I do like the fact that I can take advantage of the milling machine's precise Z-axis control to control the depth of cutting. I use my depth stop to set both the upper (retracted) and lower (cutting) position.
The angle plate that you can see mounted on the right-hand end of the milling machine table is used to raise the reference letters up to the same (ish) height as the material in the vice. If I wasn't holding the part in the vice, this wouldn't be necessary, but it provides a good reference surface to ensure that the letters are square to the X-axis of the milling machine. As the vice is also square to the X-axis, this ensures the engraved text is square to the part. The letters themselves sit on a block of aluminium that is bolted to the angle plate. They are held in place with double-sided tape. In the photo there is an additional piece of aluminium fitted to allow a slightly longer text length.
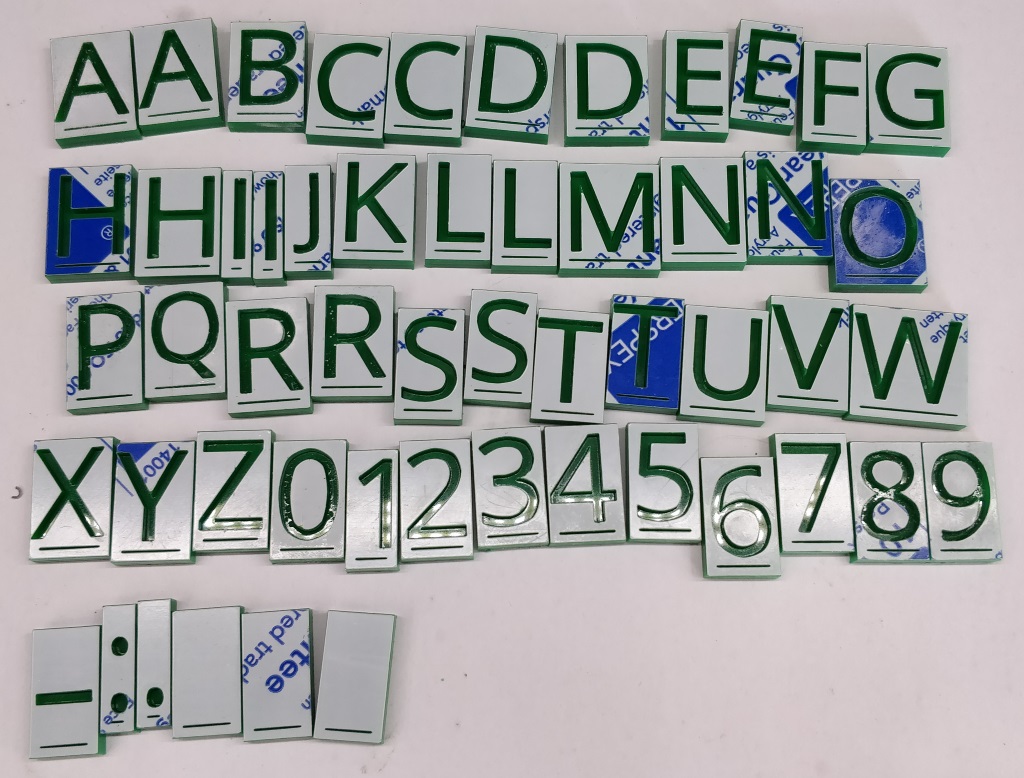
In Joe's youtube video, he shows a set of engravers letters that he managed to get hold of locally. I haven't found a source of engravers letters that aren't eye-wateringly expensive so I needed an alternative approach. As I've mentioned in some other pages, there is a laser cutter/engraver available at work and I bought a job lot of acrylic on ebay. The laser cutter isn't ideally suited to this as it is typically designed to either take very shallow cuts for engraving plastic (these are too shallow to be usable as an engraving template) or to take deep cuts to cut the material out completely.
The laser cutter can be configured to cut different depths of material (the power and cutting speed are varied to suit the material thickness). I decided to take advantage of this and customised the settings so that it would do a first pass cutting 3 mm material and a second pass cutting 6 mm material. I then took two sheets of 3 mm acrylic and stuck them together with some spray mount adhesive. After cutting, I had to carefully pick out the unwanted part. I then added some superglue to the bottom of the cut-out letter area in order to provide a more permanent join (as the spray mount is a weak adhesive).
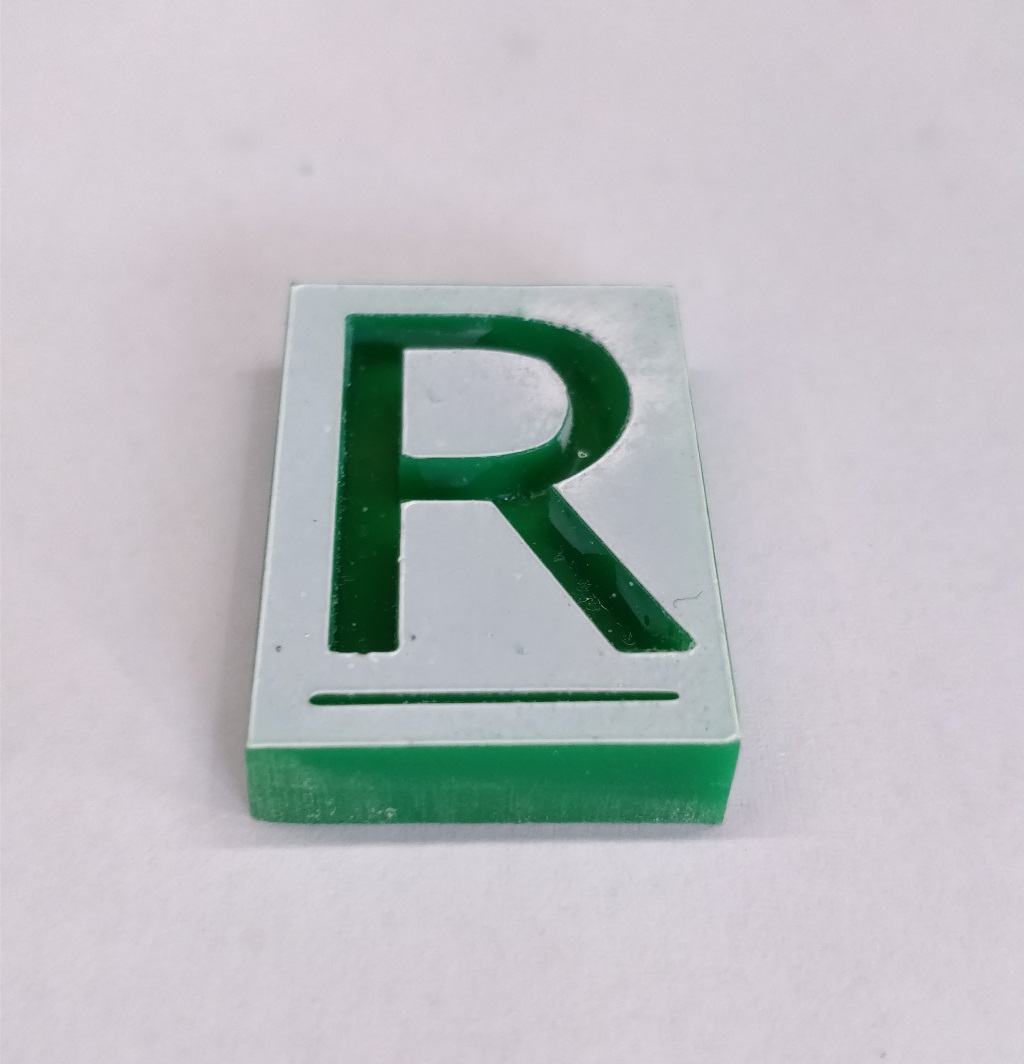
This shows a close-up of one of the letters. As you can see in this photo and the photo of all the letters together, I haven't removed the protective film from the front face of the letters. I'm sure in due course this will peel off, but for now I like the added contrast to help see at a glance which letter is which. I probably could have made this better by laminating two different colours of material, but the job lot of acrylic I bought contained a lot of green!
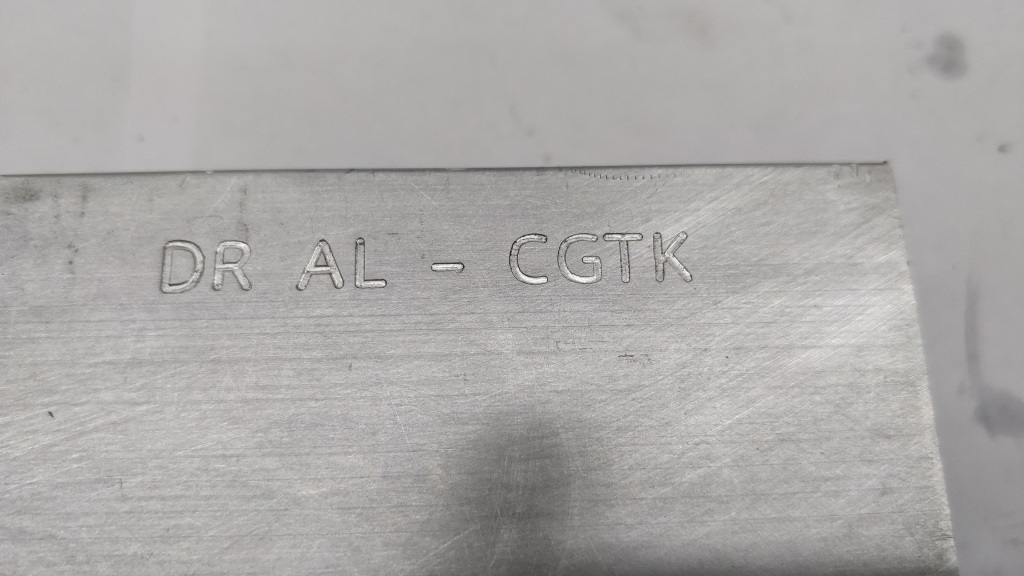
The pantograph does a good job of engraving, as long as very shallow cuts are taken. This is quite straightforward with the mill's depth stop and fine feed (for initial set-up) as long as the part to be engraved is square to the mill's travel.
This website is free and ad-free, but costs me money to run. If you'd like to support this site, please consider making a small donation or sending me a message to let me know what you liked or found useful.
