Tangential Fly-Cutter

After making my tangential tool-holder for the lathe and reading the Mike's Workshop page about a tangential fly-cutter, I thought it would be interesting to have a go at making one myself. I made it out of aluminium so that I could make it fairly quickly and test whether the idea worked. I'll probably re-make it in steel fairly soon, but I've got some ideas for some design tweaks to do first.
The design is somewhat different to Mike's fly-cutter. Unlike Mike's design, it has two cutting bits (both came from a 2 1/2" long piece of 5/16" square HSS, which I cut in half). One of these cuts on a diameter of 105 mm and has a very sharp tip. The other cuts on a diameter of 100 mm and has a heavily rounded tip. The rounded cutter is set 0.1 mm lower than the sharp tip. As the sharpened tip cuts at a greater diameter, it reaches the workpiece first and can take very deep cuts from the surface of the workpiece. The rounded cutter reaches the workpiece later and takes a very shallow (0.1 mm) cut. The intention of this is that the rounded cutter produces a better finish.
In use, I've found that fly-cutter is able to take fairly deep cuts in mild steel: I usually limit myself to 0.5 mm cuts but it feels like it could take more. I have been less impressed with the rounded cutter though. Although it produces a reasonably good finish, it isn't much better than the finish from the sharpened cutter. If/when I re-make the fly-cutter in steel, my plan is to replace the rounded cutter with one ground from a piece of 8 mm round HSS. This should make a much better radius than I was able to grind by hand from a piece of square HSS.
Manufacture


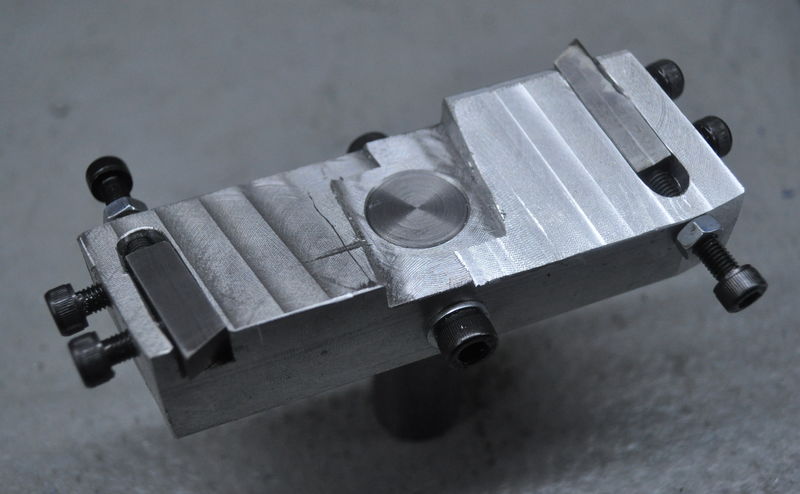
Without a tilting vice, it took me a while to work out how to machine the complex angles involved in the tangential tool holder. In the end, I used my high-profile clamps to hold a piece of scrap aluminium at 12° to the table (set with a digital angle gauge). I machined the top surface flat and drilled/reamed a 12 mm hole in the middle of it. I then put a 12 mm piece of silver steel in the hole and placed the machined piece of scrap aluminium on the table at 80.5° to the X-Axis (having calculated the angle required for 12° to the tangent to the circles of 100 mm and 105 mm diameter, I found the angles to the X-Axis should be 81° and 80° and I figured that it probably wasn't too critical so used the average for both cutters). I used some standard table clamps to hold this at the right angle and then mounted a piece of 38 mm × 25 mm aluminium with a 12 mm hole reamed in the middle onto the piece of scrap. This was held in place with the high-profile clamps and one standard table clamp on the end that wasn't being machined. I could then machine one half of the fly-cutter, turn it round and machine the other half. The photos above shows the set-up prior to cutting the first side. The precision vice you can see on the right-hand end of the table was mounted square to the table and used as a reference for the protractor when setting the 80.5° angle.
A 3D Model
If you have a relatively modern browser, you should be able to drag the model below around with your mouse to look at it from different angles. The left mouse button will rotate the part, the right mouse button moves it and the scroll wheel zooms in and out. On mobile phone browsers, one finger rotates the model while two can be used to pan and zoom. Note that the model may take a few seconds to load.
This website is free and ad-free, but costs me money to run. If you'd like to support this site, please consider making a small donation or sending me a message to let me know what you liked or found useful.