Spindle DRO
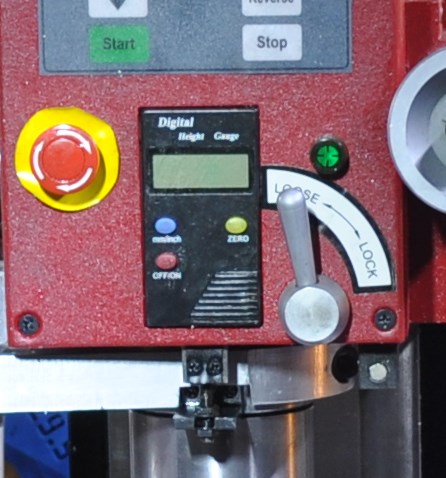
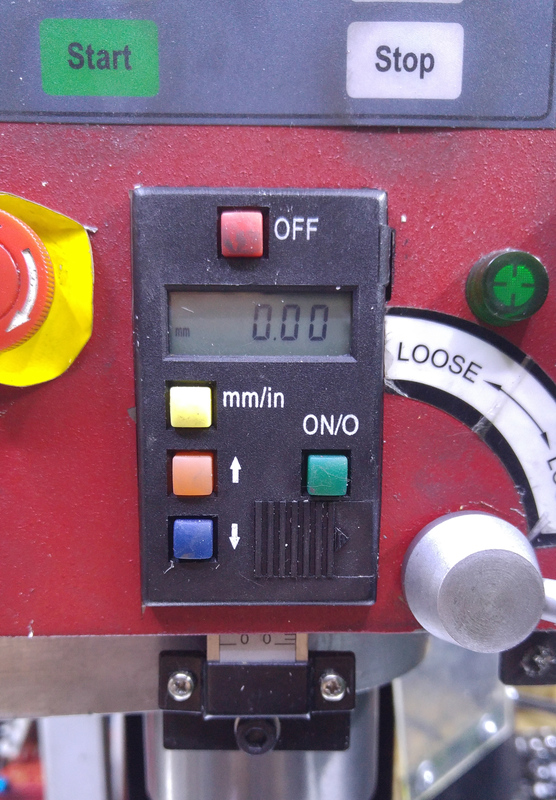
The SX3 milling machine comes with a digital read-out for the spindle. This is shown on the left-hand picture above. There is no other way of determining the depth of the spindle as there are no graduations on the fine-feed handwheel.
Unfortunately, the standard digital read-out is awful. It was quite common that I'd be taking fine cuts and approaching the target dimension by 0.01 mm at a time and then the read-out would jump by more than a millimetre in one go. I'd have to raise the spindle by a few millimetres and then approach again and hope that it didn't jump in the same place. Thankfully the reference didn't seem to be lost, but it still made it extremely unpleasant to use. I contacted arceurotrade from whom I'd bought the machine a few months previously, but their (not especially helpful) response was (paraphrasing slightly) "yeah, they're rubbish". As an aside, this combined with the similar response to the issue with the R8 anti-rotation pin falling out hasn't impressed me particularly with arceurotrade's approach to what I would consider to be warranty issues (compared with Axminster's quick replacement of the mini-lathe control circuit).
So I put up with it for a long time and relied on the Z-axis column movement (and frequent measurements) where accuracy was important. Then, one day I was reading model engineers' workshop magazine and saw they had a subscription offer of a vertical DRO. I'd been meaning to subscribe for a while and the offer seemed tempting enough to be worth a punt on the off-chance I could replace the worse-than-useless one that comes as standard with the milling machine.
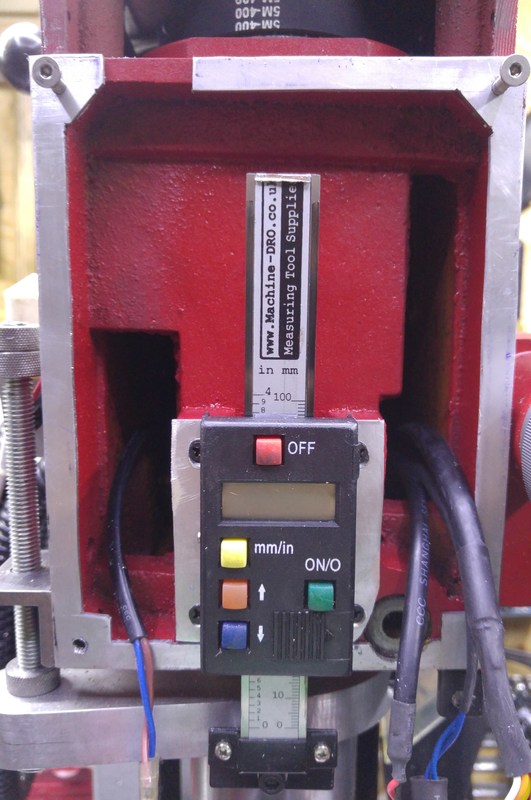
A couple of magazine issues and a nagging email to the subscriptions department and my new digital read-out arrived. It appears to be a 100 mm scale from machine-dro. The body of the scale is a few millimetres wider and deeper than the standard scale and, unsurprisingly, the mounting points are different. The scale is a little too long for the available space inside the cover, so I had to cut it down with the bandsaw - a very simple operation that doesn't affect the operation of the scale at all.
I spent a long time umm-ing and ah-ing about how to mount this in a neat way, initially considering a very complicated block filling in the space behind the existing scale, but in the end I settled for a much simpler solution that was started and finished in a few hours. The finished result can be seen in the right-hand picture at the top of the page.
The scale is mounted using a piece of 2 mm aluminium plate of about the same size as the bracket attached to the original scale. Four countersunk holes take the original screws and hold the bracket to the machine. Two countersunk holes are used to mount to the scale itself - the countersinking allows the bracket to lie flush with the mill's casting.
Due to the increased thickness created by moving the scale out by 2 mm, I also had to move the electronics cover out by the same amount. This was done using a plate cut out of 2 mm aluminium sheet using my father's scrollsaw, which coped admirably with the complex shapes in a piece of thin aluminium. I'd pondered painting this (or at least the edge of this) plate red to match the body of the mill, but I haven't got round to it (and probably never will!).
Due to the slightly larger dimensions of the body of the scale compared to the old one, I had to enlarge the hole in the cover. Since it was only a millimetre or so larger in both dimensions, I did this with a hand file.
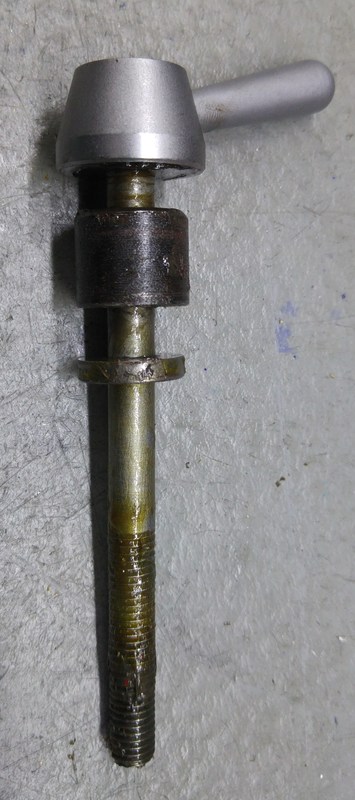
A washer was produced on the lathe to move the locking point of the spindle lock out by a few millimetres to compensate for the movement of the cover.
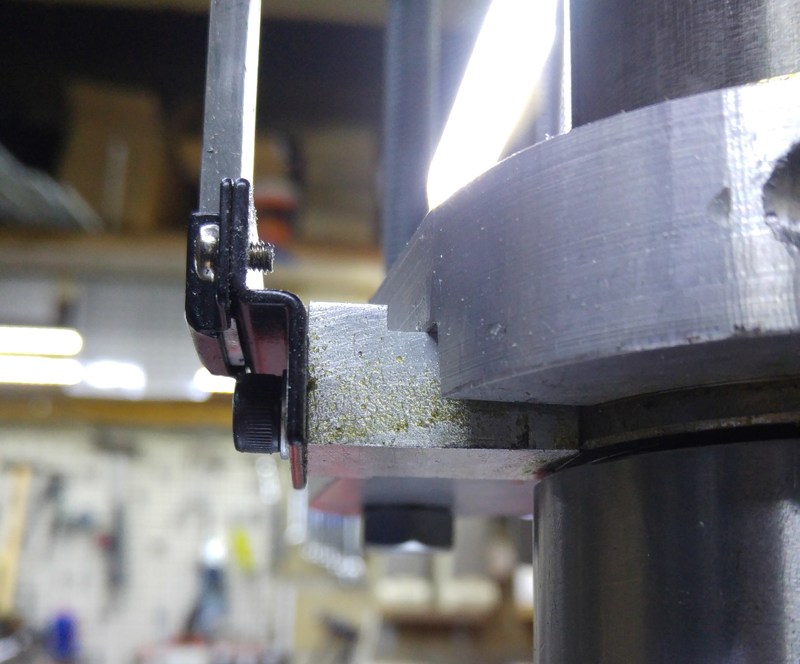
The end of the scale was attached to the spindle using a small bracket made from aluminium. Due to the presence of the clamp for my depth stop (which had been designed around the existing bracket), the shape of this ended up being overly complicated rather than a simple cuboid with a few holes in it, but it was easy enough to make and seems to be rigid enough.
The new digital scale is far more consistent than the old one and also offers an additional feature: the ability to nudge the reading up and down to alter the zero point. Non-essential, but it certainly can help as you can aim for zero rather than some arbitrary number that you've forgotten by the time you're half-way through the job. The only limitation I've found is that it always zeros on power-up, so if you're doing a job over the course of a few days, you have to write down where you've got to (something I would typically do anyway out of paranoia).
Overall, I'm really pleased with the new digital scale and I'd recommend it to anyone with one of these mills.
This website is free and ad-free, but costs me money to run. If you'd like to support this site, please consider making a small donation or sending me a message to let me know what you liked or found useful.

