Travel Tool Chest & Workbench Build Process
Page 3 of 144
Posted 17th May 2022
I wasn't going to post any pictures so early in the design thinking, but as I've been asked about work holding, I thought I'd share my ideas so far. All subject to change etc etc...
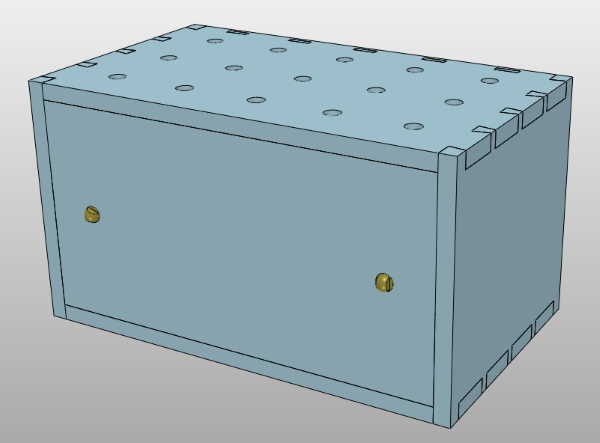
This is what I'm calling the "chest base":
There will be another part that sits on top of that (and is attached for transit) that contains the bigger tools like my LA jack plane and saws. I haven't started designing that really, but it's likely to be a tool tote that sits on top with a (removable) hinged lid that closes over the tote to cover it all up.
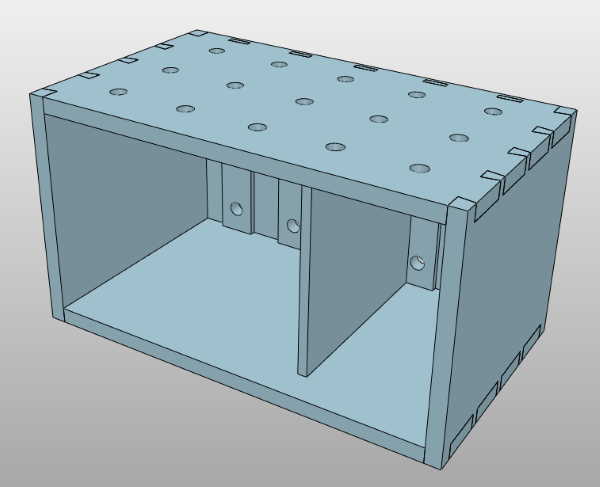
The front cover gets removed and it'll look like this:
The gaps either side of the vertical dividing wall thing will be filled with drawers. To get a sense of scale, that's 540 mm wide, 315 mm deep and 300 mm high at the moment. The top and sides are 20 mm thick (in an attempt to make it reasonably sturdy as a "bench"). The divider is there to give a bit of extra strength in the middle; it's set over to one side so that my chisels will fit (oriented with the handles on the left or right) in the left-hand side.
The divider (and the drawers) are set back from the front face to give room for the front cover (more on that later) and to give a clear area at the front of the base that can be clamped down to a table.
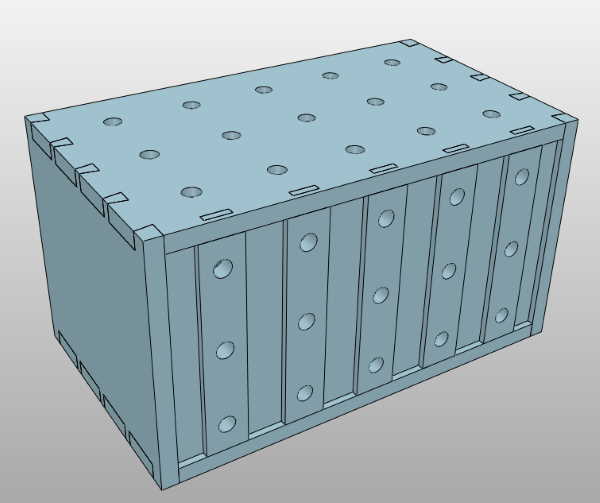
The back looks like this:
I'm hoping that this construction (dovetails on the corners and narrower tenoned planks on the back) will be okay with wood expansion etc. The bits in between the tenoned planks are thin pieces sitting loosely in grooves. I was concerned that having a full-width back would cause problems.
All those holes are there to give me options for holding stuff. I've got various 3D printed cam clamps for holding stuff on the top with a free top surface (for surface planing) and I can also use other types of clamps through the 20 mm dog holes (either guide rail clamps or if I'm feeling flush I might buy one of the Veritas Surface clamps or an equivalent). I'll probably just live with the fact that the top drawers will get filled with sawdust etc!
The holes on the back are there to allow me to clamp boards vertically to work on the ends (e.g. when sawing dovetails or edge planing). My original plan had been to just put the chest on it's side/front, but I'd prefer not to have to empty it every time I want to do something like that.
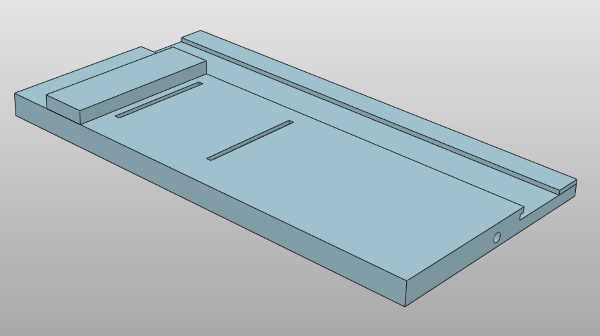
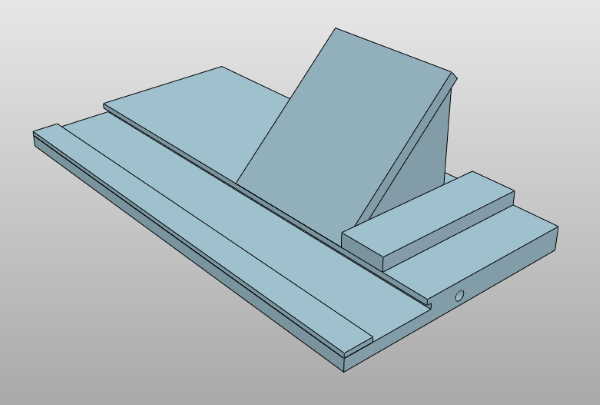
Back in the first picture, I showed the front cover that hides the drawers (and keeps them closed in transit). That cover is quite deep and serves another purpose:
Obviously that shooting board doesn't have a cleat or anything (as it would stick out the front of the chest), so it'll get used either with clamps or by plonking it on the top of the chest and taking advantage of the fact that the handles for locking it in front of the drawers just happen to be in the right place to drop into a couple of the dog holes.
I haven't quite worked out the details yet, but I'd probably use the non-shooting side of the shooting board as a bench hook.
I suspect this bit is optimistic, but the slots in the shooting board are intended to allow insertion of a flat-packable mitre thing:
As I've said many times, this is all very much a work-in-progress but I thought I'd share some of the ideas I've had so far.
Page 3 of 144
This website is free and ad-free, but costs me money to run. If you'd like to support this site, please consider making a small donation or sending me a message to let me know what you liked or found useful.

 Return to main project page