Bar Clamps Build Process
Page 3 of 32
Posted 3rd May 2021
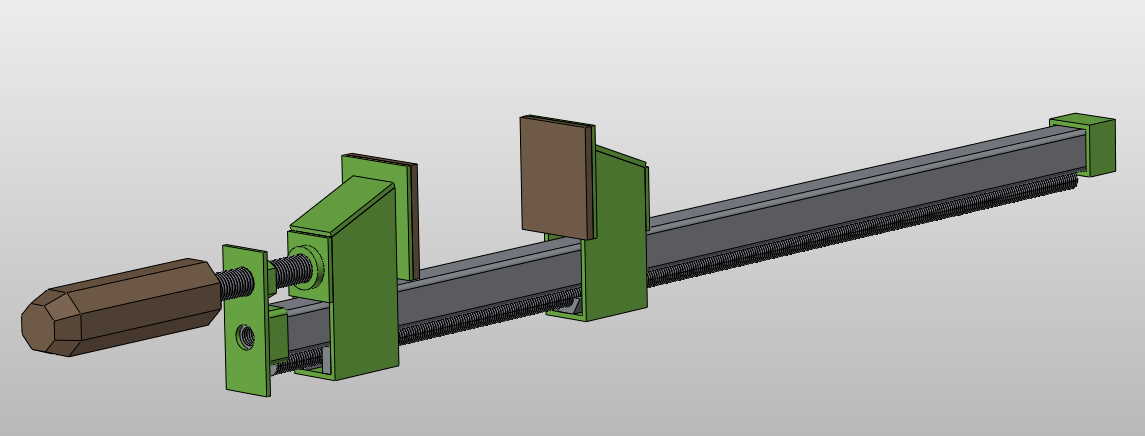
The model above is fairly close to how Neil Paskin designed his bar clamps (as far as I can tell from the limited information in the video). My plan is to make eight clamps; four will have a maximum clamping length of 1 metre; the other four will clamp up to about 1.7 metres. These lengths were chosen based mostly on material availability: I'll be using four 3 metre lengths of threaded rod. Allowing for the 1 metre clamping length of the shorter bars and adding the extra length required due to the shape of the jaws, the 1 metre clamps will use 1140 mm long pieces of threaded rod. The "offcut" will be about 1860 mm and hence that will be the basis of the size of the longer bar clamps.
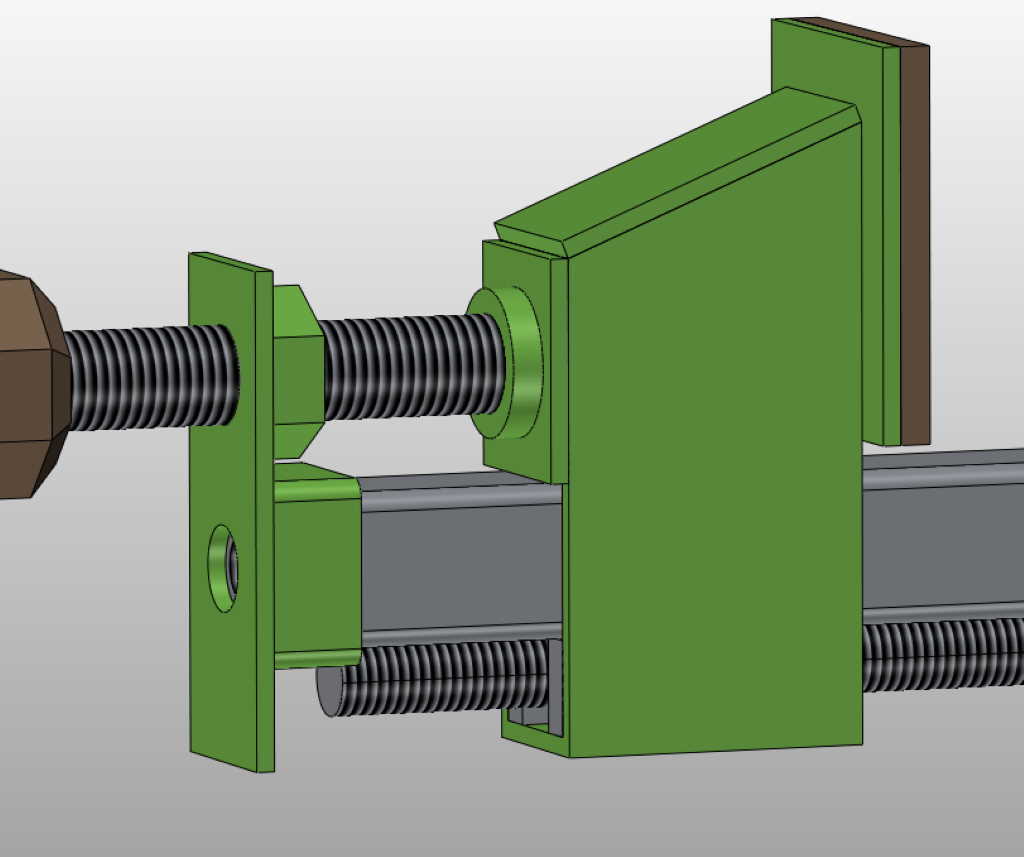
This shows a close-up of what I'm calling the "screw jaw". This shows one of the more significant changes I've made relative to Neil Paskin's design. In the original, the end plate was welded onto the end of the box section piece that forms the main bar. For mine, I decided to attach this in a removable way using an M12 hex-head screw. A piece of steel is welded into the end of the box section and has an M12 hole drilled and tapped in the end. There's a short length of 30 mm × 30 mm × 2 mm box section welded to the end plate - this stops the end plate from rotating and the M12 hex-head screw (not shown in the model) holds it tight to the main 25 mm × 25 mm × 2 mm box section.
The advantage of this modification is that both jaws will be removable from their box section bar, which will mean that I can make longer or shorter bar clamps in future simply by welding some threaded bar to some box section.
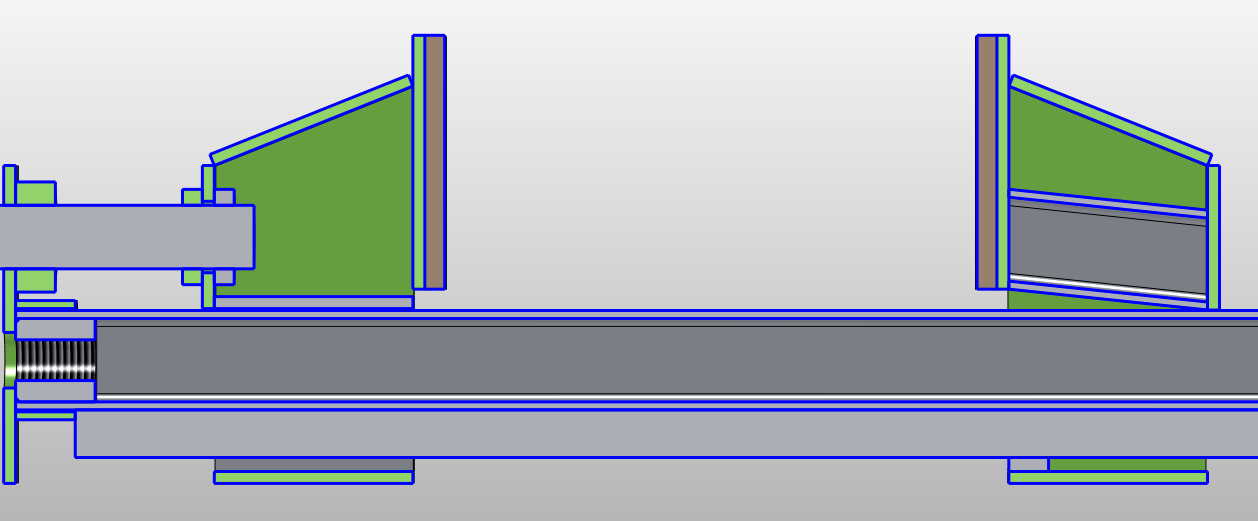
This image shows a cross-section through the bar clamp. Another change I've made to Neil Paskin's design is to make the sliding jaw (right-hand side) the same width as the screw jaw. This means I can use the same size bar stock to make the parts.
Apart from dimensional details (as I don't have all the dimensions for Neil Paskin's version) and build process (due to available tools), that's pretty much all I'm changing (although you'll see later that I've also reinforced the end plate with some side pieces).
Page 3 of 32
This website is free and ad-free, but costs me money to run. If you'd like to support this site, please consider making a small donation or sending me a message to let me know what you liked or found useful.

 Return to main project page

