Travel Tool Chest & Workbench Build Process
Page 101 of 144
Posted 23rd September 2023
Today's efforts are likely to fall foul of the swear filter.
I wanted this project to really challenge my hand tool skills. To that end I had decided that, with one exception (resawing thick wood into thinner wood), I would only use hand tools for all the wood work in this project. What I needed to do next would have been really, really quick & easy with a template and a power router. Assuming a bit of care and a well-made template, I also wouldn't have bug*ered it up if I'd used a power router.
Ah well, here's what I did anyway.
I had today booked off with nothing planned (needed some R&R after a very busy few months at work, and what better R&R could there be than a bit of garage pottering?). I decided the best thing to do would be to try to tackle the daunting task of making the slots for the "locks" that will hold the shooting board into the front of the chest.
These slots need to be 17 mm deep and the wood is only 19 mm thick (I had thought it was 20 mm, but I'd obviously planed it a bit more than originally planned!).
I did a few trial runs on some offcuts. Most of these went badly, with the Forstner bit wandering during the cut (especially the second one). My hand-powered pillar drill isn't exactly rigid and it allows the chuck to move both left-to-right and back-to-front a little. This is not ideal when you're trying to drill a hole right next to another one so the point can't guide the second hole.
Anyway, after about 5 or 6 attempts (during which I came very close to just giving up and getting the power router out), I'd finally managed to come up with a successful method, so I decided to bite the proverbial bullet and start drilling into the shooting board.
First job was to mark out where the cut-outs needed to be. I did this by using a square & my edge-distance-gauge-thing to get the piece in the right-place, then knifed around it. Finally, I used a fine pencil to make the knife line more visible. This photo was before adding the pencil line and you'll have to look very closely to see the marking.
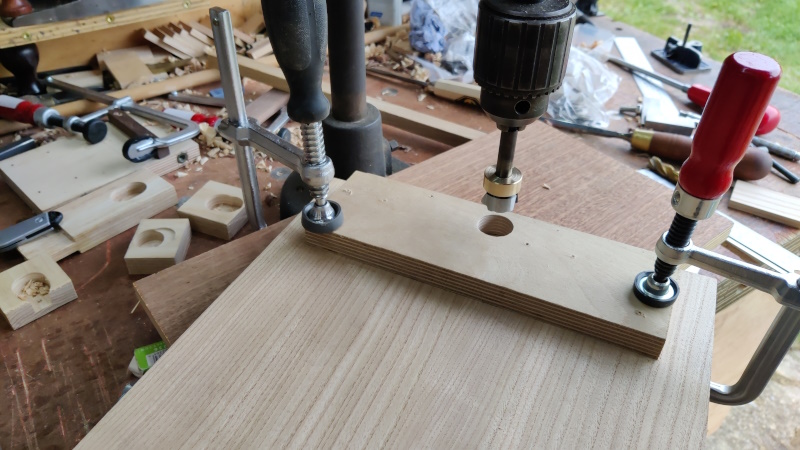
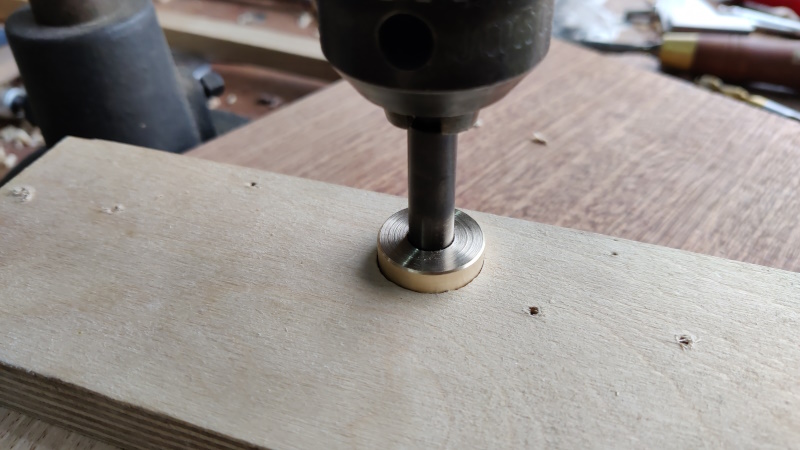
I used the Forstner bit to drill a hole all the way through an offcut of plywood. I also turned a little brass ring, 24 mm diameter (to match the Forstner bit) with a 10 mm hole through (also to match the Forstner bit). That slid over the shank of the Forstner bit.
The plywood piece was very carefully lined up with the marked out slot and then everything was clamped in place:
As the Forstner bit went into the cut, the brass piece was pushed into the plywood template and helped stop the bit wandering around. Inevitably the waste wood eventually started pushing the brass alignment piece up, at which point I retracted the drill, cleaned all the waste wood out and then carried on drilling.
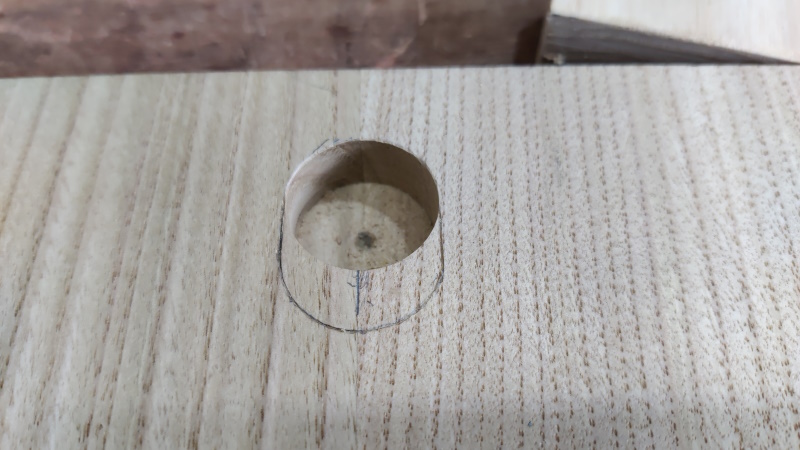
After the first step was complete, this is what it looked like. All good so far:
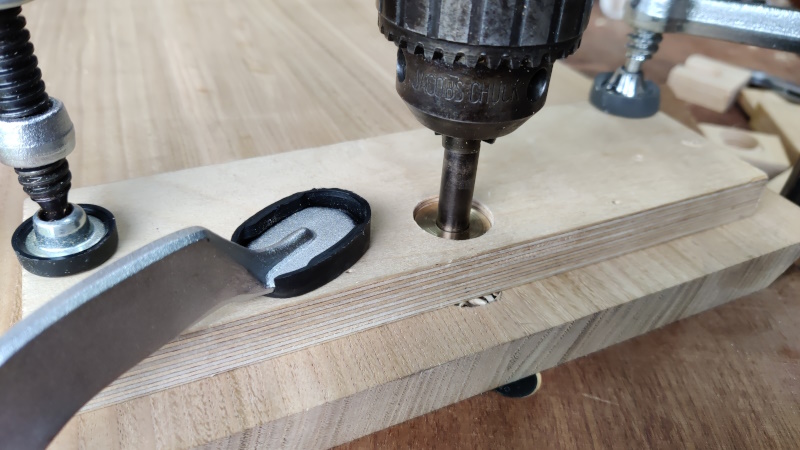
The second half of the slot was cut in the same way. This is where the plywood template and the brass piece really help: once the Forstner bit is deep enough in the wood that it's no longer in the template, the brass piece keeps it going in a straight line.
With that done, I had the beginnings of a slot:
I'd set the pillar drill up so that the point of the Forstner bit wouldn't penetrate through the wood (leaving about 2 mm clearance). That meant that the resulting hole was only about 13 mm deep whereas I needed it to be 17 mm.
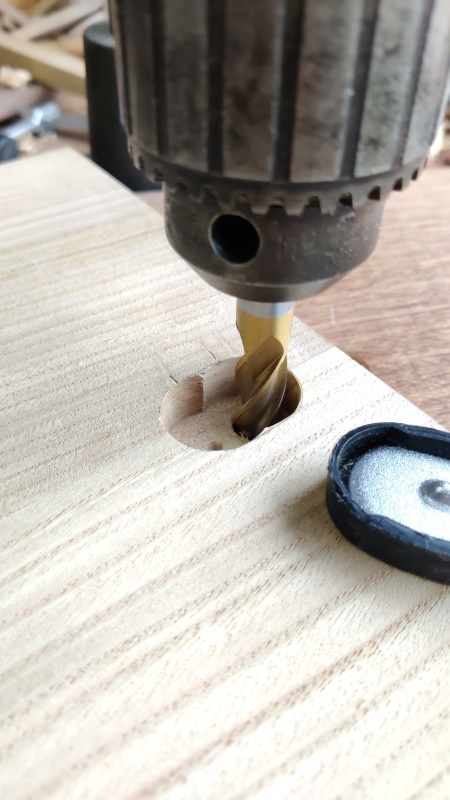
To get rid of the bulk of the remaining waste, I grabbed a 12 mm end mill from the other end of the workshop and used the hand pillar drill to make four cuts into the wood, again using the depth limit on the pillar drill to stop about 2 mm before I would have punched through to the other side.
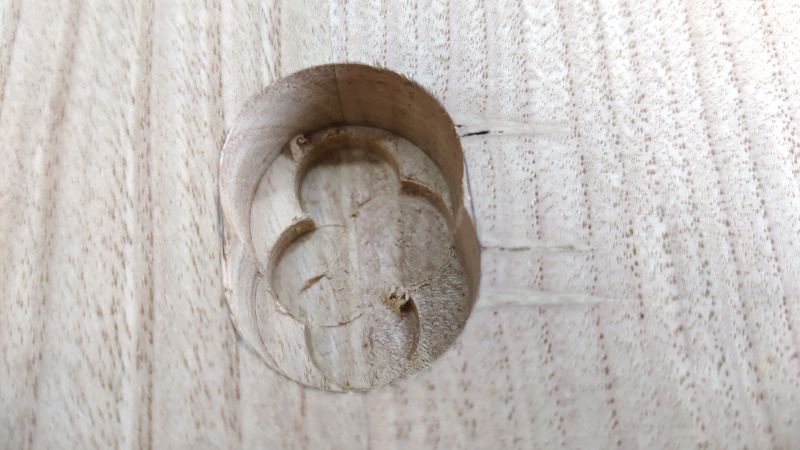
The result:
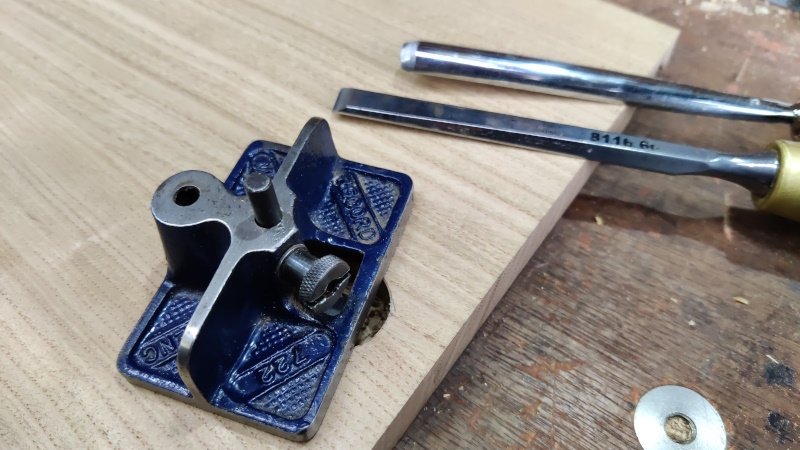
From there it was just gouge, 10 mm chisel and the mini router plane (which is much less enjoyable to use than the big ones are!)
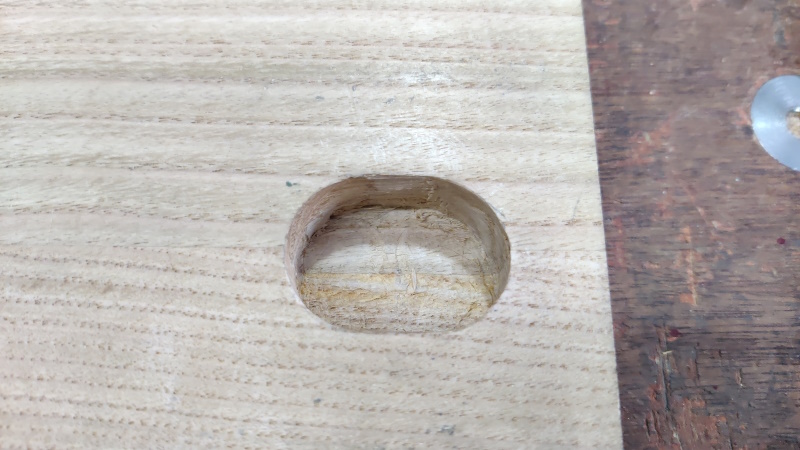
The first one came out really well:
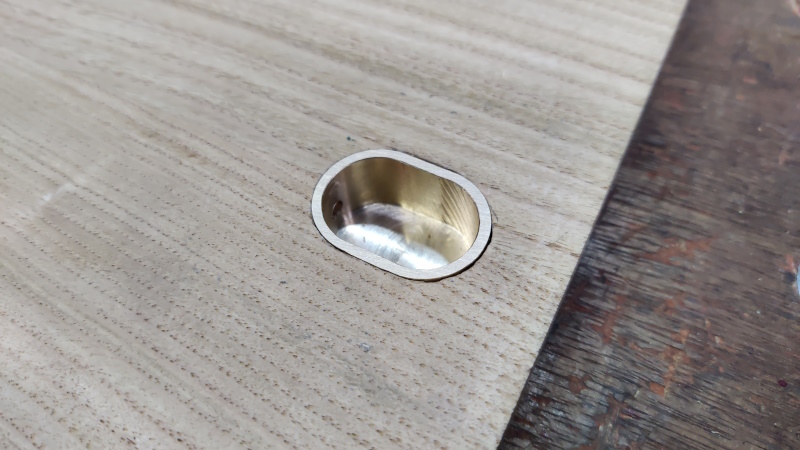
Test fit:
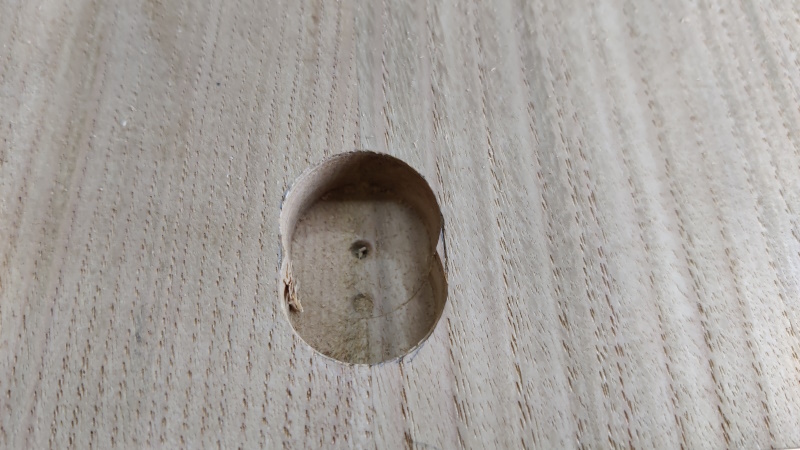
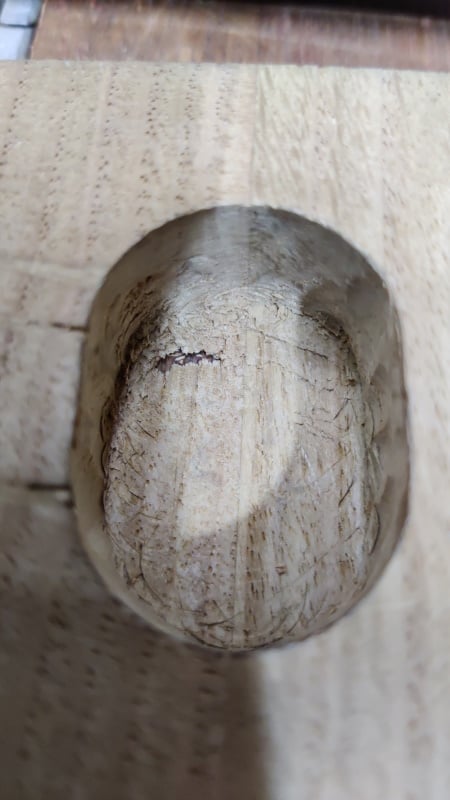
The second one seemed to be going really well until it was time to use the router plane, at which point there was a nasty bit of tear-out (which I didn't notice until after I'd blown all the chips away):
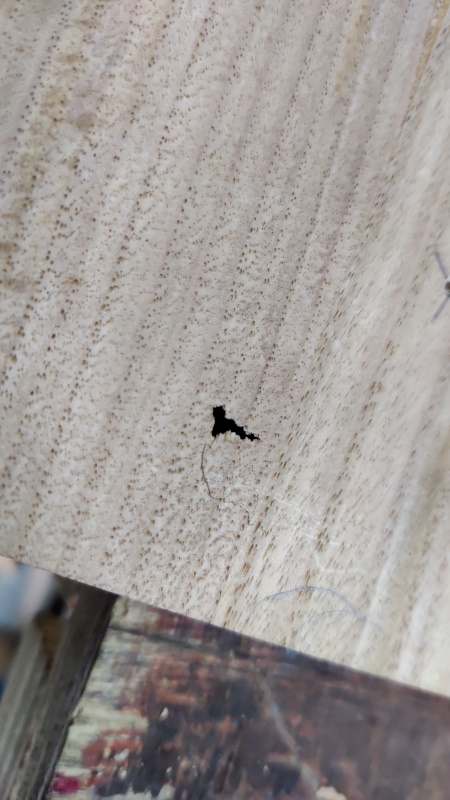
That dark bit is my bench showing through.
This is what it looks like from the other side:
That probably wouldn't have happened if I used a power router and a template.
I haven't figured out what I'm going to do about that yet. I guess I could try and find a thin-ish piece of wood with a matching grain (I'm not sure how easy that would be given the colouring of the wood) and set it into the shooting board side of the panel. Or I could try to shove something in from behind (under the brass locking thing), but I suspect that would look rubbish. Or I could just make a new main shooting fence that's a lot wider and hence covers the hole.
Any and all other suggestions are very welcome.
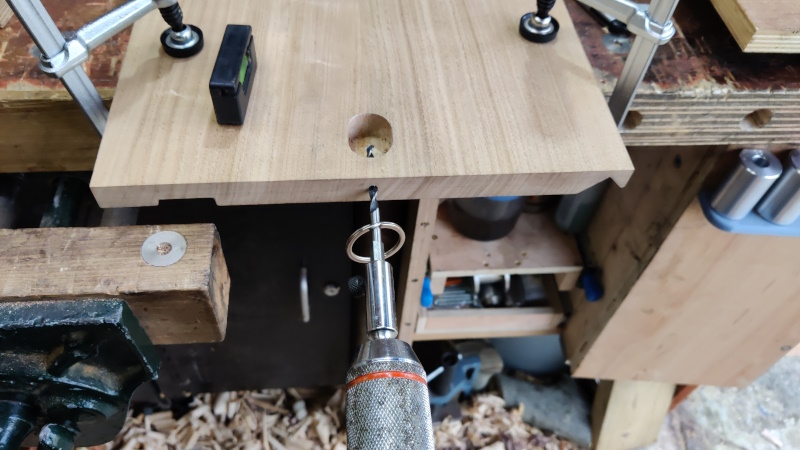
Rather than just wallowing in self-pity, I thought I'd have a go at drilling some holes. After marking out, I drilled a 5 mm hole into from the end into the pocket. On one end (the same one as the breakage!), the drill started slightly off where I'd intended, but I was able to persuade it back into the right place so it ended up okay.
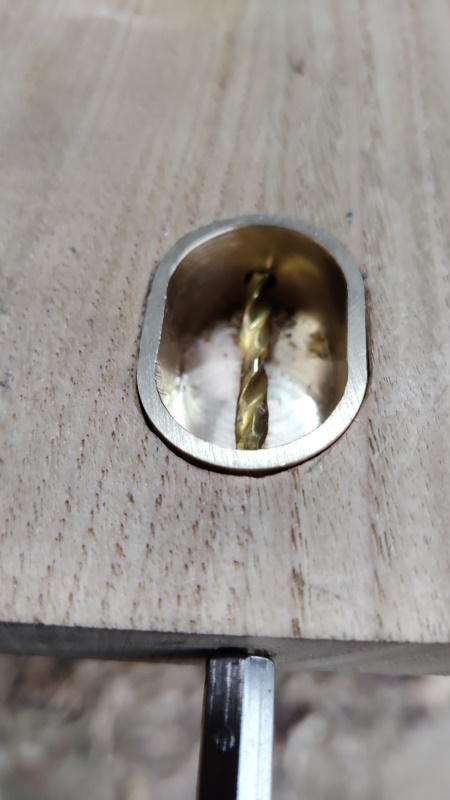
I then inserted the brass bit and used a 4 mm drill bit to mark where the continuation of the hole needed to be:
The 5 mm drill bit then went back in to give a bit more depth & clearance at the back.
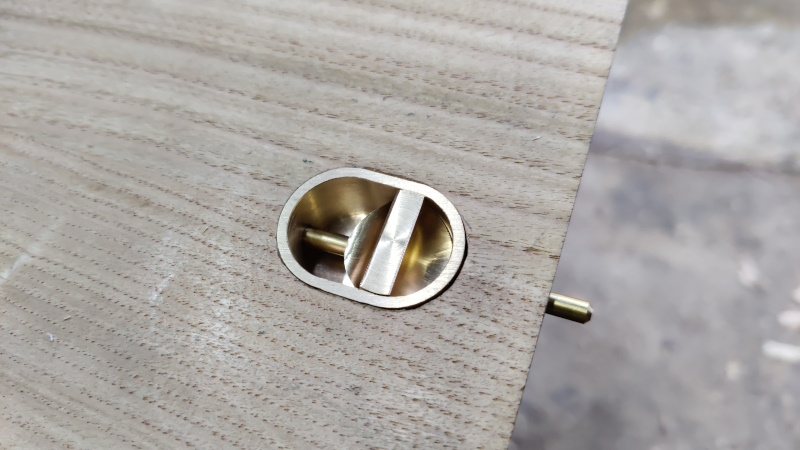
With that I could do a little test and see what it looks like locked:
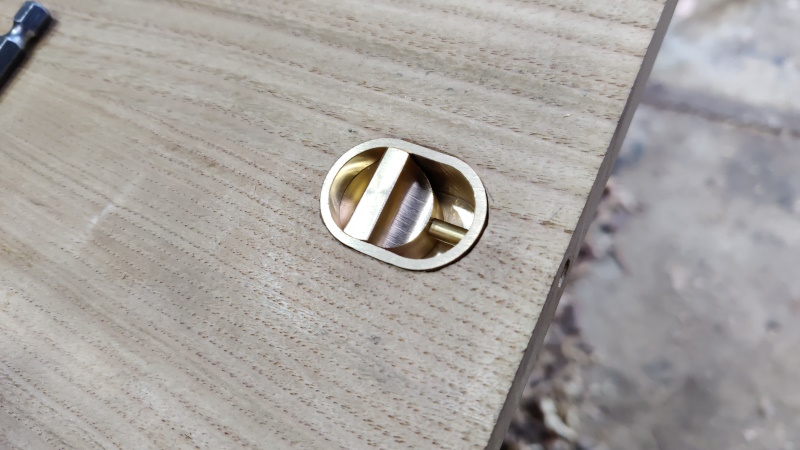
and unlocked:
Note that the pin isn't attached to the knob yet (it'll eventually be glued in place with Loctite 603) , so for now unlocking it is just a case of pushing on the end of the pin and then sliding the knob to match!
That's it for now. I guess I've got a few days to ponder (and despair!) on what to do about the breakage.
Page 101 of 144
This website is free and ad-free, but costs me money to run. If you'd like to support this site, please consider making a small donation or sending me a message to let me know what you liked or found useful.

 Return to main project page
