Travel Tool Chest & Workbench Build Process
Page 108 of 144
Posted 31st October 2023
It probably won't surprise you that I've been doing a bit more thinking about drawer pulls. To try to get my head round things, I thought I'd do a CAD model of a few of the more plausible options and try and see what they might look like.
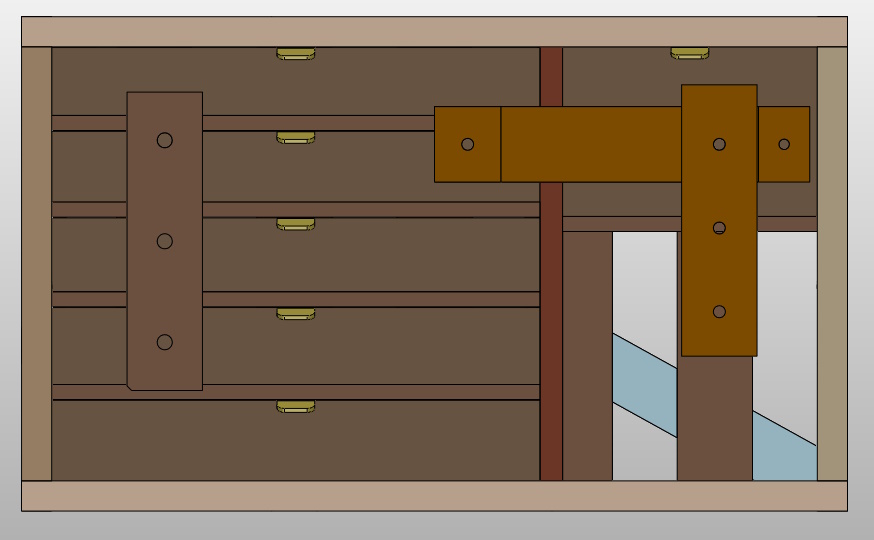
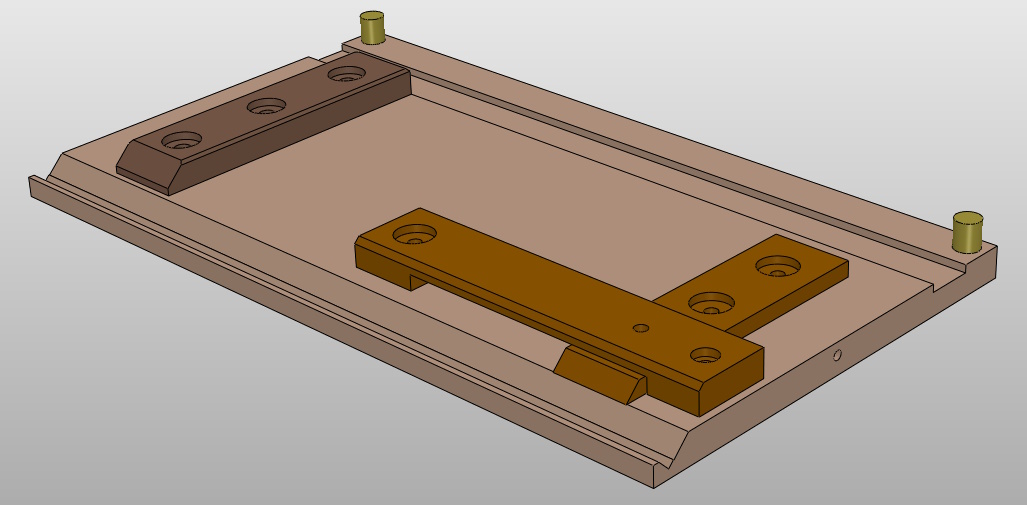
As part of that, I also set the model up with the shooting board attached to the front and then hid the main part of the shooting board. That's useful to see where the fences sit (the fence on the left and the horizontal one on the right will be flush with the drawers; the vertical one on the right is about 8 mm from the drawer face).
One thing I hadn't clocked until creating that drawing is that the bottom drawer isn't held in place – it can slide forward until it hits the face of the shooting board. For that matter, the same is true of the plane tote in the bottom right. It might also be partly true of the top drawer as the shooting fence is mitred at that end.
I'll have to think of a solution to that. It might be as simple as adding a couple of pillars to the corners of the shooting board, something like this:
I'll have to have a little play and see whether that's going to cause problems with my hand (or the plane) hitting the pillar on the top-left of the image above when shooting. An alternative could be to install a swivel latch like the sort you get on a shed door (e.g. this sort of thing), but it would need to be right down the bottom of the middle support (or the plane tote would slide out under it) and the space constraints may make it impractical. Yet another option could be as simple as one or more handy bits of wood (doe's feet etc) that happen to add up to the right thickness and could be stored in front of the bottom drawers (whether that's plausible or not will depend on the chosen drawer pull style).
Anyway, let's put that aside for now and go onto drawer pull options. Here are the ones I've modelled, in rough order of increasing difficulty to make.
First up is a simple leather tab, glued and/or nailed/screwed into a pocket in the underside of each drawer front:
The biggest advantage I see of this one is that it would be very easy to make. A little bit chopped out of the bottom of the drawer front, with the added advantage of being underneath the drawer so if it's a bit shabby no-one will notice! The main disadvantage is the bottom-left drawer: the leather tag will lie directly on the base of the chest, making it slightly more awkward to grab and pull.
Next up is a leather loop:
This would be also very straightforward to make. I've listed it second in the difficulty stakes as I'd probably want to make a brass pin or something like that, so there's a bit more work involved. The main disadvantage of this one is that my first impression of it was "that looks a bit naff". The loop for the right-hand drawer will be squished a bit by the mitre fence (the vertical one in the first CAD model at the top of this post), but I don't think that would be a problem: the 8 mm clearance should be enough.
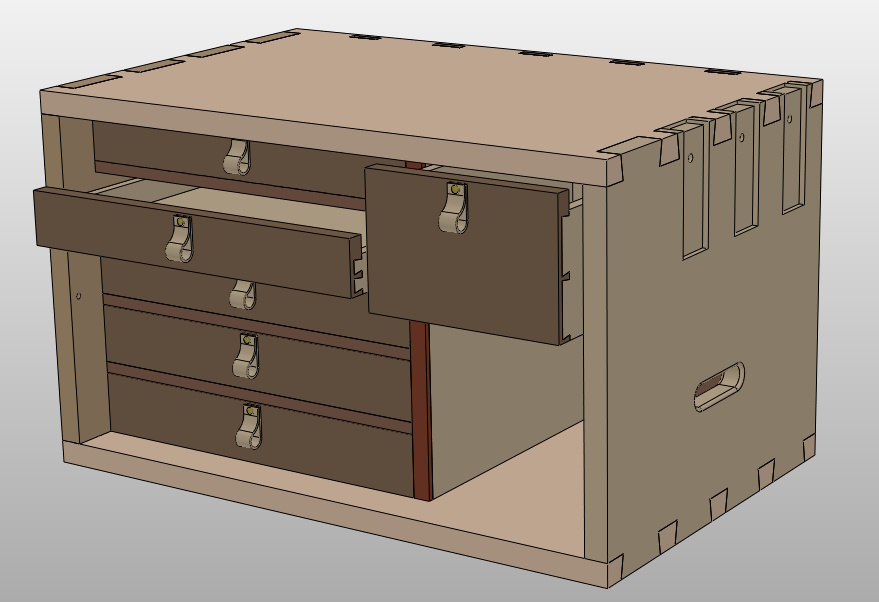
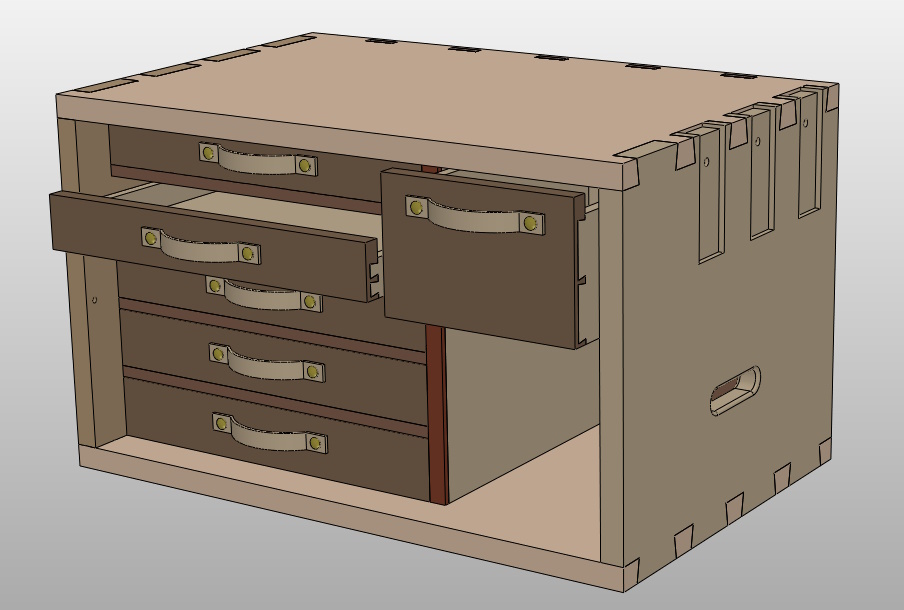
Not much more complicated, but looking an awful lot better would be some leather handles:
Again quite easy to make (but twice as many brass pins to make!). The CAD model makes it look quite good (I'm sure that's subject to how well I do at the leatherwork!). The handle on the right-hand drawer is modelled about as low as it can go. It'll get squished a bit by the mitre fence (depending on how far the loop sticks out, which I guess could lead to a permanent deformation in time.
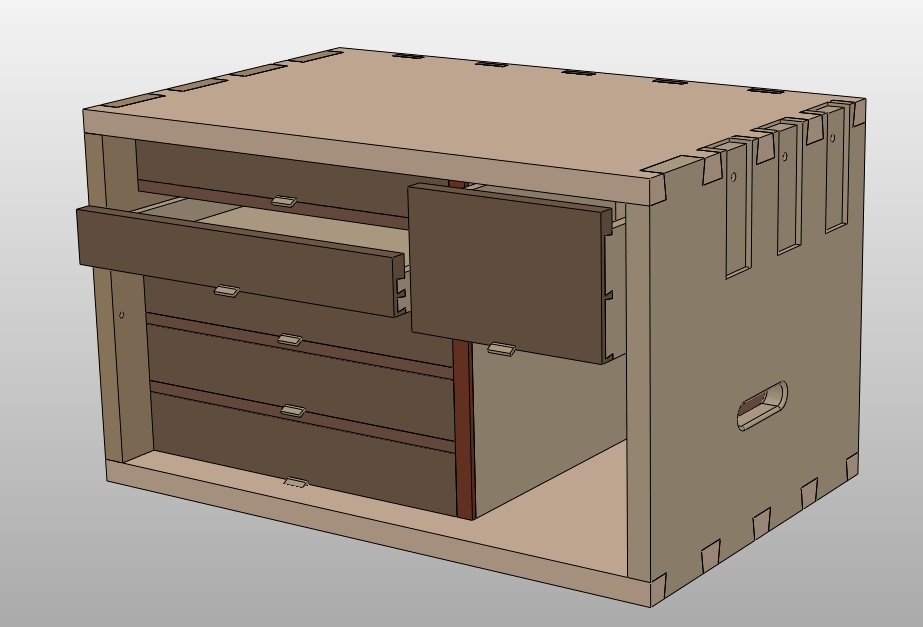
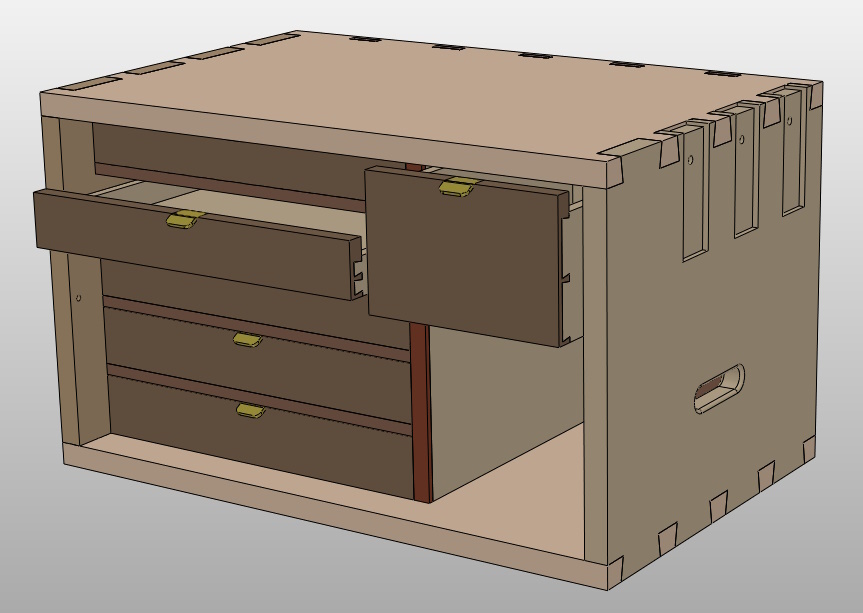
Next up is brass tags at the top of the drawer.
A bit harder to make again as I'd have to bend some bits of brass to consistent angles. I'm sure I could do that without too much difficulty though. Once the brass bits were made, they would be quite easy to fit. I've only included one version of these, but they could either pull on the back of the drawer or be screwed into the top, as shown in the models I posted yesterday.
This is probably the easiest so far in terms of actually pulling the drawers out: just reach in with hand palm side up, lift very slightly and pull. That's not to say that any of the others are going to be exactly difficult (with the possibly exception of the leather tab at the bottom of the bottom drawer).
It could also be made out of leather (i.e. like the first one but with the pull in the top of each drawer), but I think the cut-out for the leather wouldn't look as good as a cut-out for brass and it wouldn't be quite as easy to pull the drawers out as the brass option (grab the leather rather than just lift-and-pull the brass).
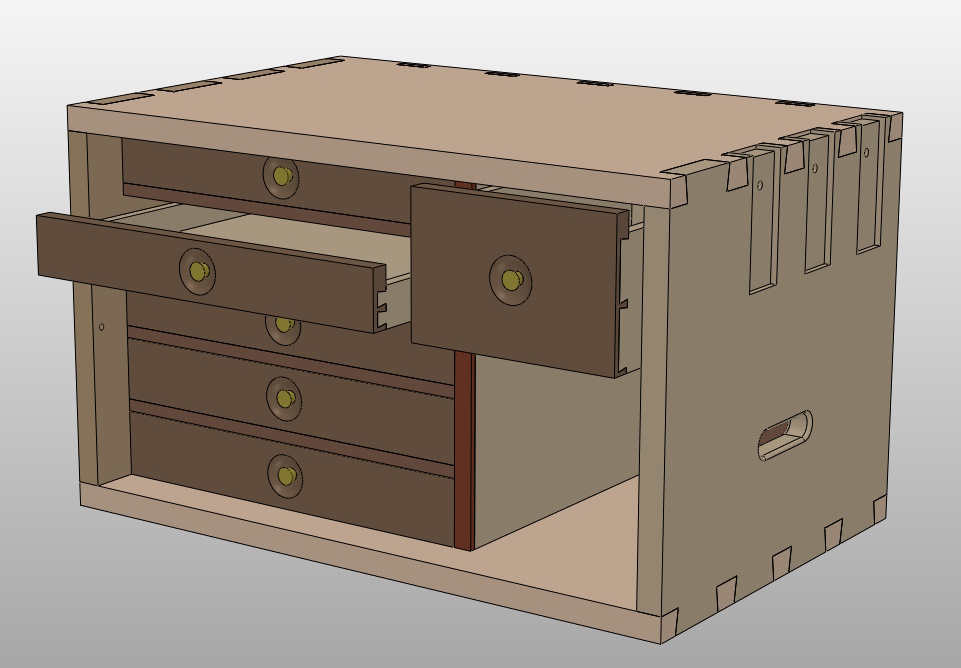
I was torn regarding the order of the last two (i.e. which was easier and should go first), but I think I'll go with some indented knobs for the next one:
The knobs are brass (so I can use my metal lathe to make them!); the indents are carved with a gouge or similar. How easy they are to make depends entirely on how I find the process of carving the curved indents. As the brass knobs don't protrude at all beyond the front surface of each drawer (they're the same length as the depth of the carved indent), there's no concerns with interference.
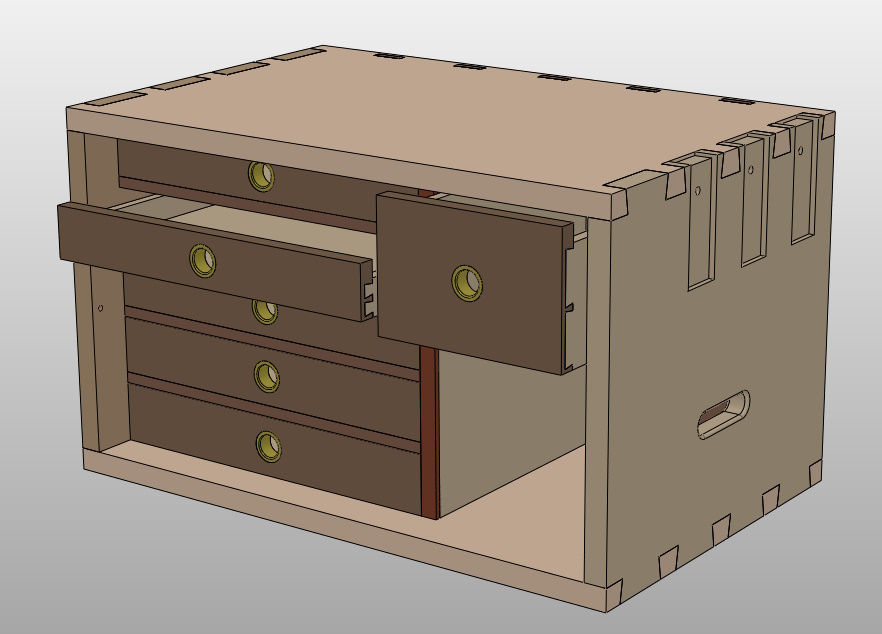
Finally, we have some brass-lined holes (they could also be unlined, but I thought I'd just model the brass-lined version):
The brass parts would be easy to make, but drilling the holes could be a little fraught. I'd want to start drilling the hole from the front and then finish from behind, but with the drawer already assembled I don't think I'd be able to get a drill bit to the back and achieve a clean hole. I think I'd have to clamp some scrap firmly behind the hole and then try to drill just from one side.
The main disadvantage of this one is the (probably small) risk of small things finding their way out through the hole.
I haven't included the flush ring pull handle as at the moment that feels like the hardest of all the options (either making something custom or finding an extremely thin and small one and then fitting it without it looking rubbish).
Anything I've missed? Any aesthetic opinions on the images above?
Thanks for reading.
Page 108 of 144
This website is free and ad-free, but costs me money to run. If you'd like to support this site, please consider making a small donation or sending me a message to let me know what you liked or found useful.

 Return to main project page