Cordless Power Tool Vacuum Cleaner Starter - Details
Page 3 of 10
Purchased Parts
As well as the 3D Printed Parts, there are a number of off-the-shelf parts that are required for the design.
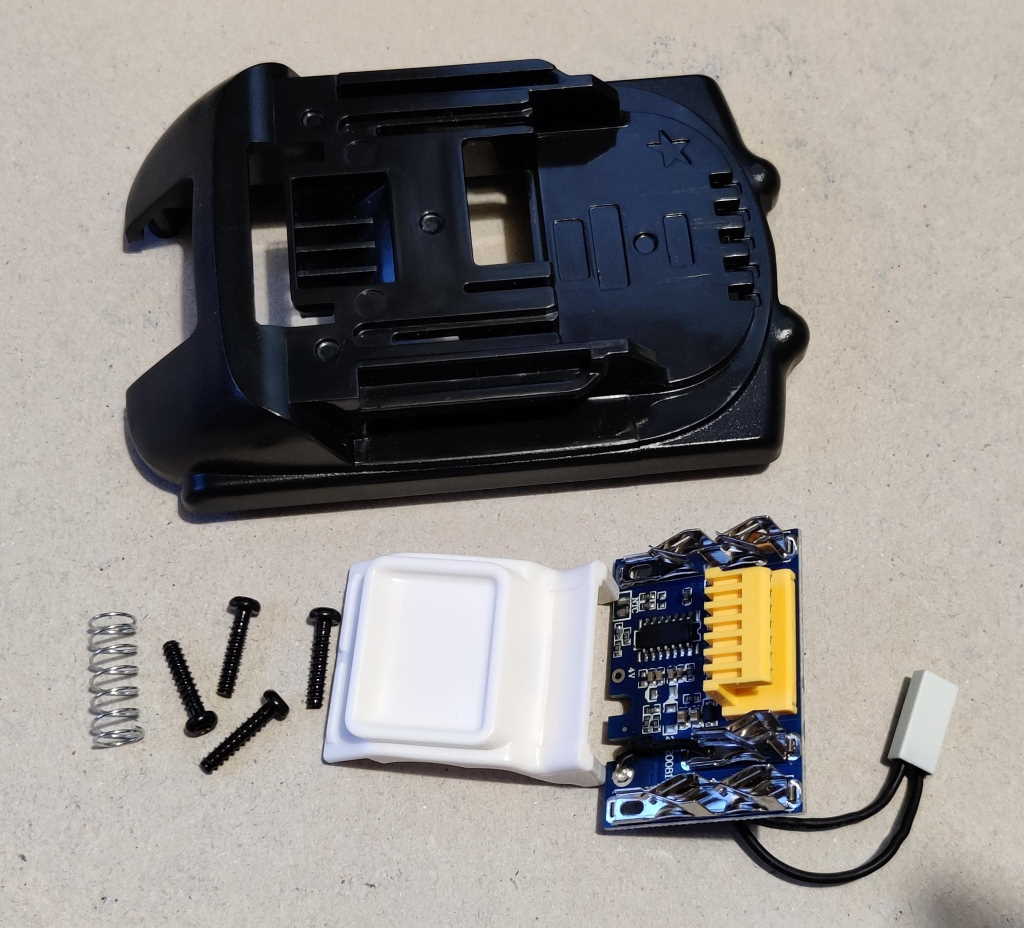
The first required part is a battery case kit. These are available for about £7 from AliExpress and include all of the components required to make your own Makita LXT compatible battery, except for the cells. The photo above shows the kit components that are used in this design: the top black plastic housing piece, the spring, the screws, the white plastic button piece and the top contact PCB. It's worth searching on AliExpress as different ones seem to have discounts available at different times; however, note that different kits are slightly different shapes. I bought two variants: this one and this one (they cost me about £7 each including shipping to the UK when I bought them). The first one of the two seems a slightly nicer design so I'd recommend that one as a first preference.
When you get the battery case kit, the first thing to check is how it fits to the 3D printed PCB holder and PCB retainer. I've included two variants of PCB holder and retainer, denoted "Case Variant A" and "Case Variant B". The "Case Variant A" version is for the first case style, in which the base box of the kit (which you don't use but you can see in the pictures on AliExpress) has a tab with four holes in sticking up to act as the battery level indicator. The "Case Variant B" version is for the other design. There is a reasonable chance that the shape of these cases may change (or you'll get a much better price on an alternative kit). In that case you'll have to use the included STEP file to tweak the design to suit your case kit. For the "Case Variant B" design, you'll also need to buy some 16 mm long 3 mm self tapping screws (I used 16 mm long M3 machine screws and they worked okay) for one end of the adaptor.
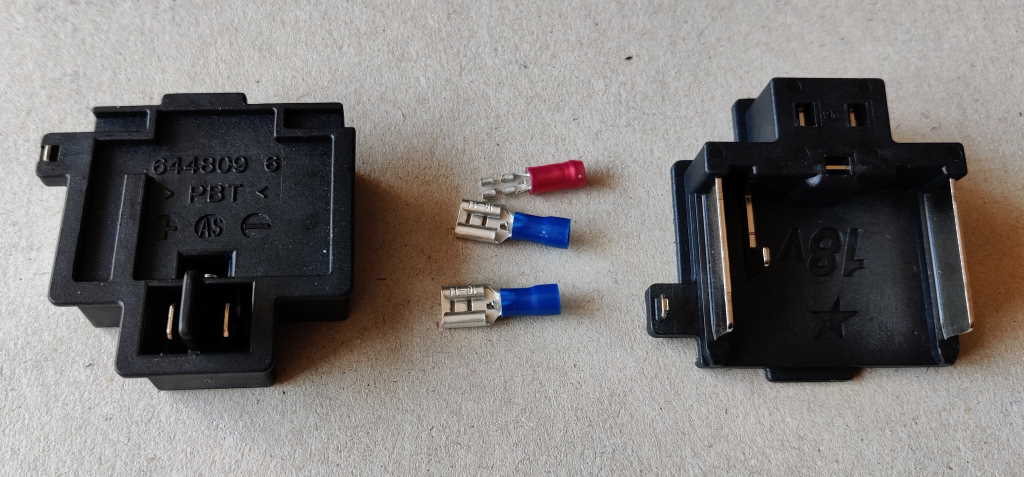
The second required component is the connector to which the battery attaches. These are available as spare parts from many ebay sellers and probably lots of other places. The part number is 644809-6. I bought two of them from ebay for £6.96 (so £3.48 each). The other parts in the photo are some crimp connectors that are used to connect to the three terminals on the battery connector. I used these ones for the thermistor (middle) connection.
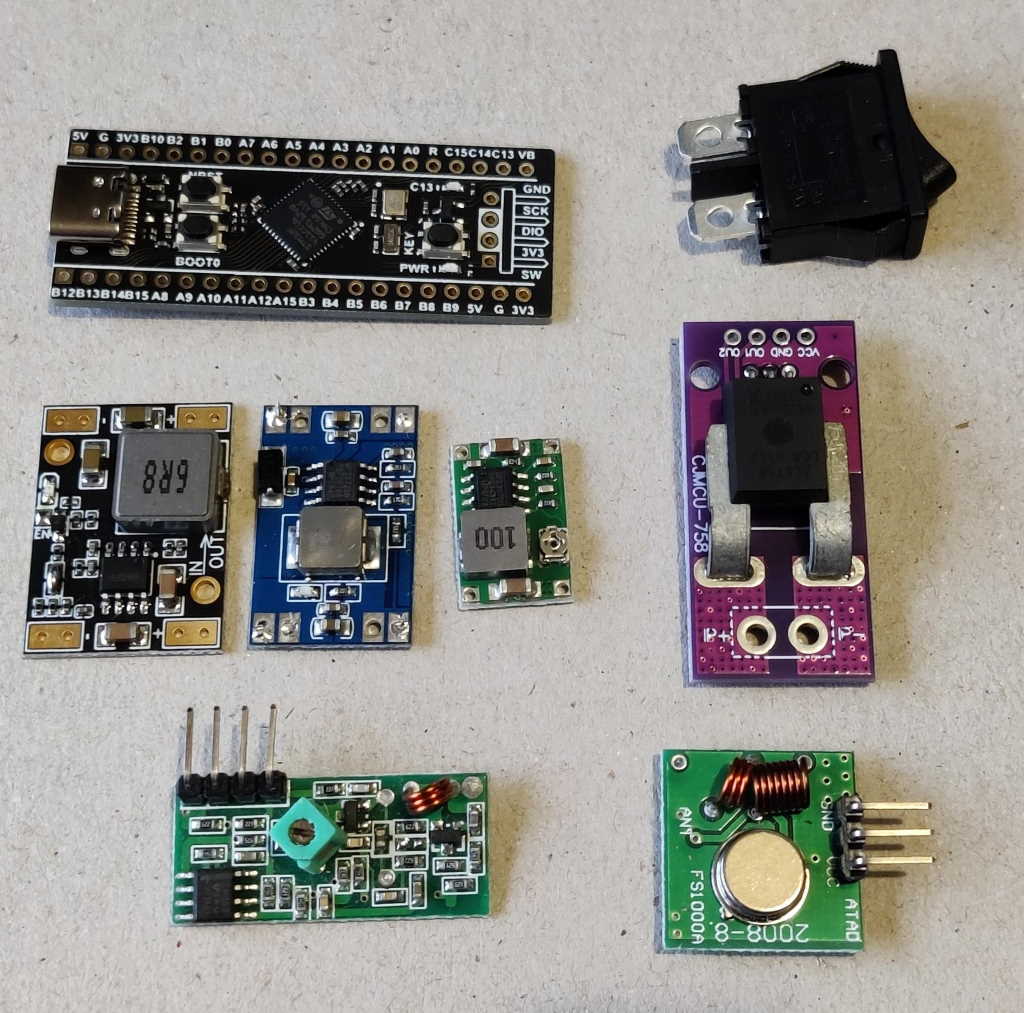
Finally, a number of electronic components are required. In the order (left-to-right, top-to-bottom) of the photo above, these are:
- A WeAct Studio "Black Pill" STM32F411 development board: direct link here. It is important to ensure you get the STM32F411 variant and not the STM32F401 variant. In theory, it shouldn't be too hard to port the code to work on the F401, but you'll make life a lot easier if just buy the F411! It doesn't matter whether or not you get the version with flash memory.
- (Optional) a 19 mm × 6.8 mm cut-out rocker switch to allow you to turn off the microcontroller if you want to leave the battery connected when not in use. This is the one I used. If you don't want to fit the switch there is an additional 3D printed part that can be added to fill in the gap in which the switch would have sat. This isn't shown in the photos on the 3D printed parts page, but is included in the files available for download.
- A DC-DC converter to convert the 18 V battery voltage to 5 V for the STM32F411 development board. This is the one that I used (they cost me £4.25 for two including shipping), although there are variants of the PCB holder that work with two alternatives: the one from WeAct Studio and this tiny one.
- A PCB with an Allegro ACS758LCB-050B-PFF-T current sensor IC. It would be possible to just use the bare current sensor IC with some very careful soldering, but the PCB makes assembly much easier. This is a link to the one I bought.
- A 433 MHz receiver (left) and transmitter (right) module. Strictly speaking, you only need the transmitter module, however if you have an oscilloscope then the receiver is very useful for debugging problems and it is essential if you want to use the vacuum starter with a different radio controlled power socket. There are loads of suppliers of these; this is a link to the one I bought.
- (Not shown) Some wire and heatshrink tubing. I used 0.2 mm² (24 AWG) silicone wire (which is nice and flexible) for most connections and 2 mm² (14 AWG) silicone wire for the power tool connections. Note that the Makita batteries are capable of delivering up to 20 A. It is your responsibility to ensure that the wire you use is capable of carrying the required current for the tools you're going to use it with.
- (Not shown) Two M4 nuts and two M4 30 mm long countersunk socket screws.
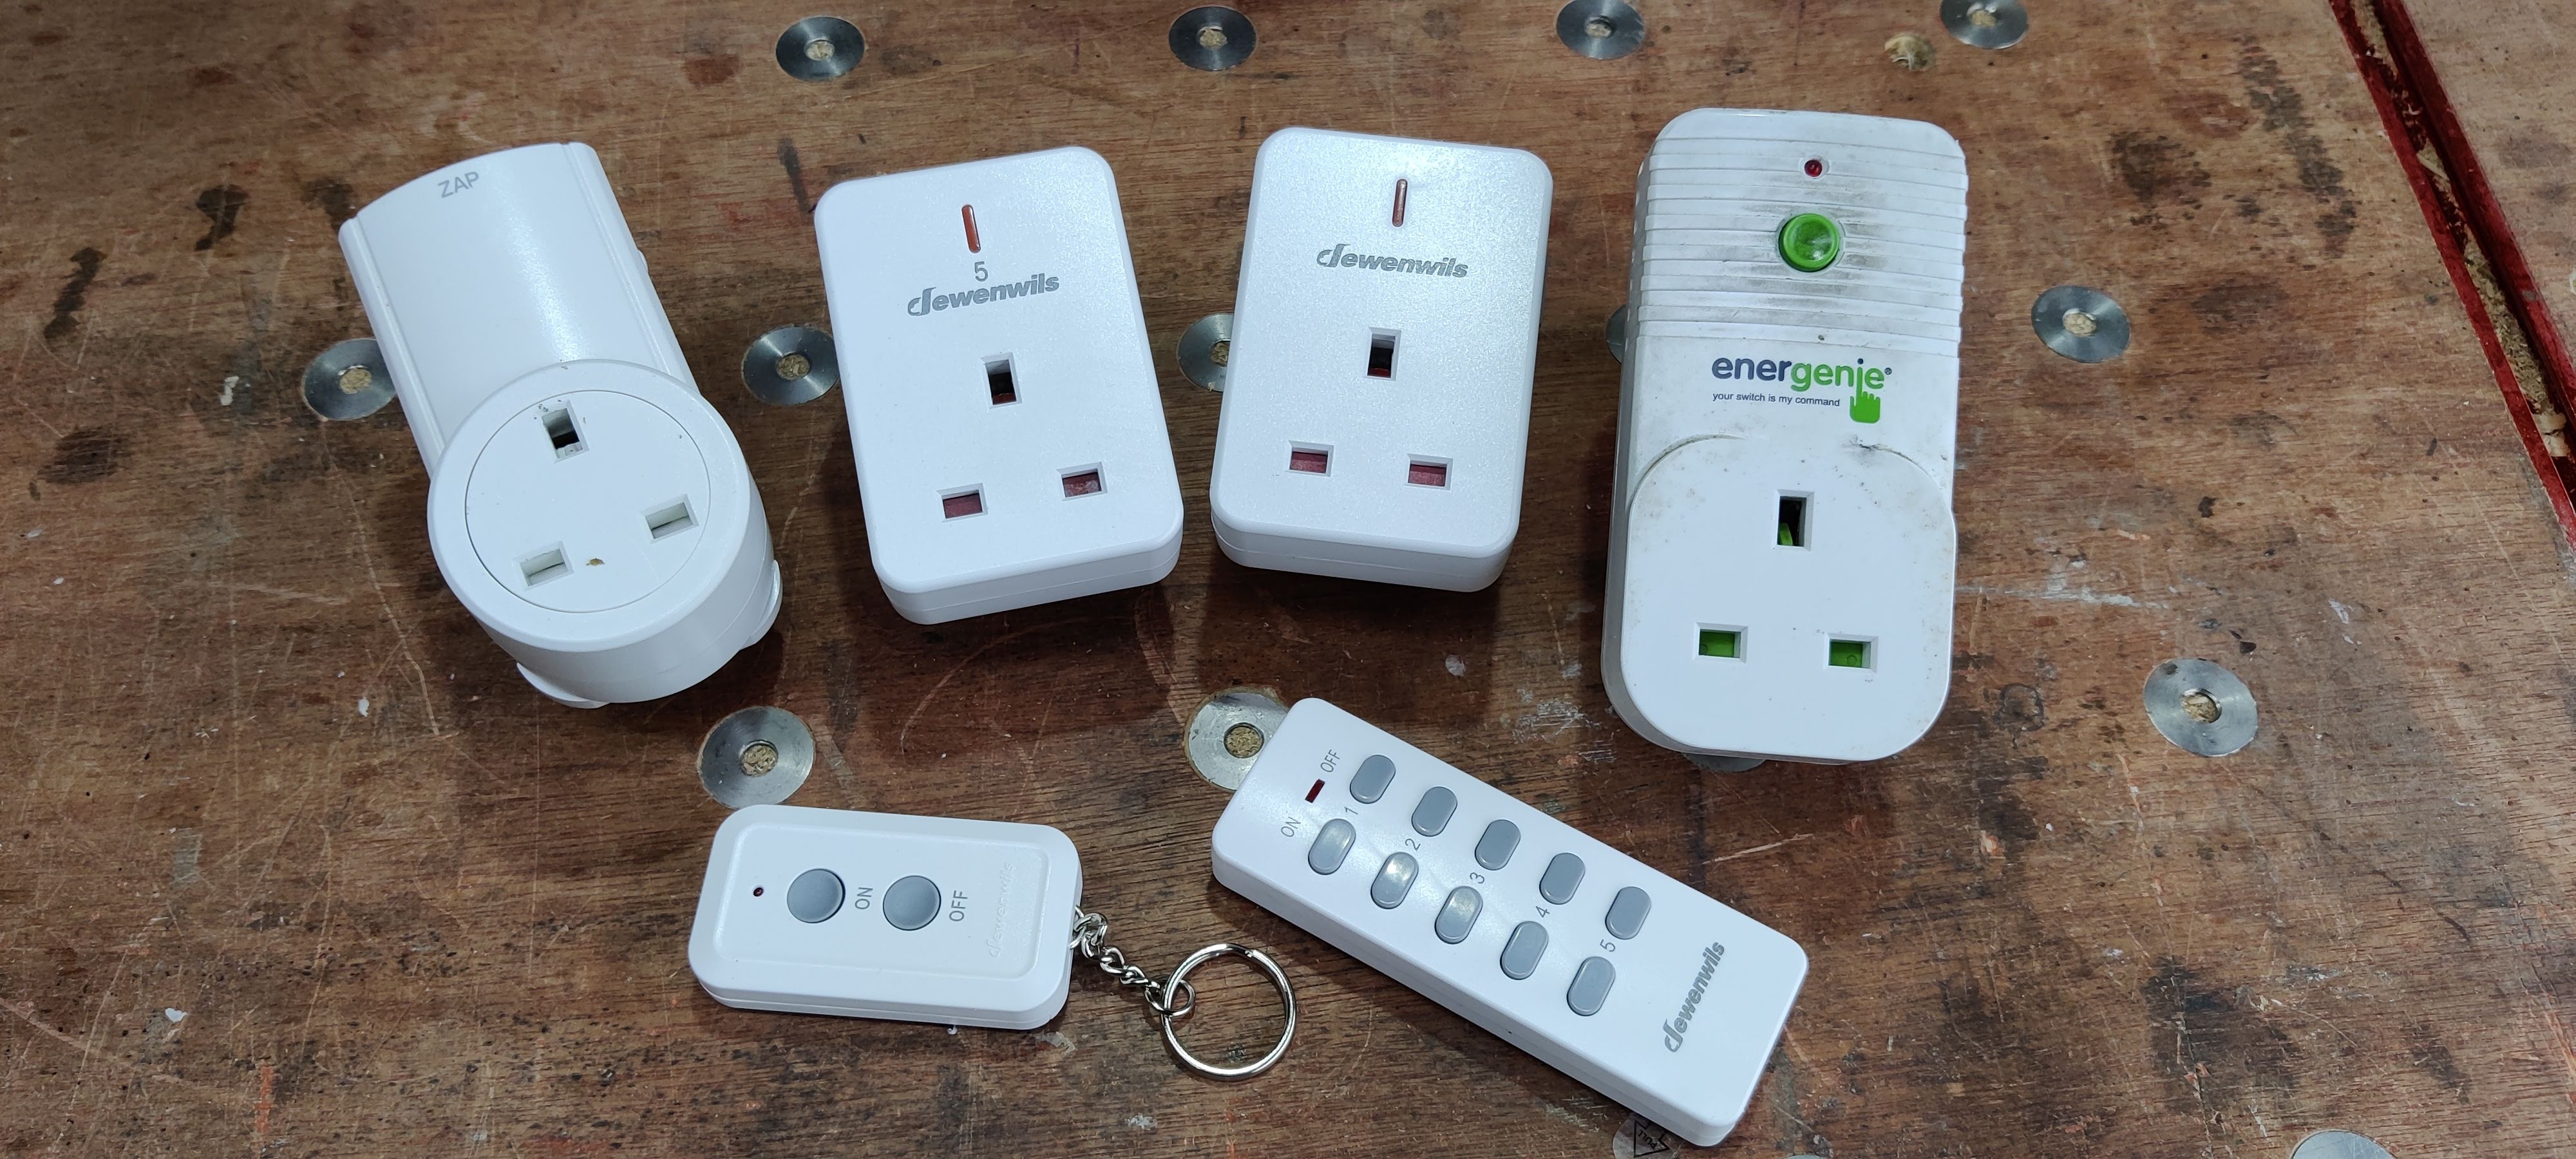
As well as the components that go into the module, you'll also need a radio controlled power socket. I use a Dewenwils socket: available from here individually or also in sets of three units or five units. There are different microcontroller programs available for different socket numbers, although these were only tested on the units that I have. Many remote control sockets (including the Dewenwils ones) can be programmed to accept a command from more than one remote control, so if the microcontroller program doesn't work straight away, one option is to try to program your socket to accept the command being sent by the vacuum starter: see the manual for your remote control socket for details.
For sockets that only support a single remote button, it's best to figure out the code being sent by your remote control and customise the microcontroller program to match. However, if you don't mind not being able to use the remote control that comes with the socket, you can also easily reprogram the socket to match whichever microcontroller binary file you downloaded, as long as its for the same manufacturer's socket (follow the instructions in the manual for this, but rather than pressing a button on the remote, start your power tool).
Page 3 of 10
This website is free and ad-free, but costs me money to run. If you'd like to support this site, please consider making a small donation or sending me a message to let me know what you liked or found useful.

 Return to main project page


