Travel Tool Chest & Workbench Build Process
Page 117 of 144
Posted 16th November 2023
While the carving and drawer pull pondering continues, I wanted to have a go at the drawer numbering. Experience tells me that this is going to take quite a few attempts to get right.
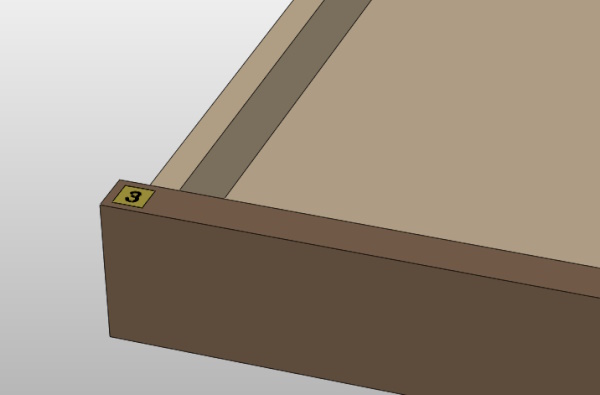
The plan is to have a small brass insert, about 10 mm square with a number engraved or etched into the surface. Something like this:
There are three approaches that I see as viable for this:
- Engrave it with my home-made pantograph.
- Use a toner-transfer process and etch it.
- Use a photolithography process and etch it.
Engraving is a messy process and doesn't give the prettiest result, so I think I'd prefer to go with etching. I've never tried photolithography (although I think I've got most of the stuff that would be needed and I'd like to give it a try), so I thought I'd start with the toner transfer option.
I've tried toner transfer etching several times before and found it to be a rather hit-and-miss process, but I've got some "press-n-peel" paper left over from the last time I tried, so I figured I might as well give it a shot. For this process. it's necessary to print a mirrored and inverted version of the image onto the transfer paper using a laser printer. I don't have a laser printer, but my work does.
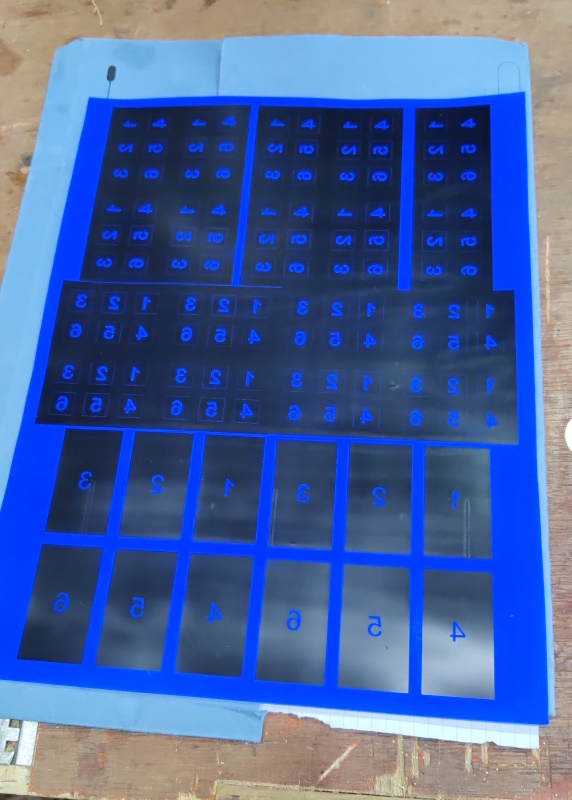
As I knew it was going to take multiple attempts to get it right, I filled the page with numbers (all printed in Arial Rounded MT Bold in case anyone cares):
The faint border is 10 mm square and is intended to give me a mark to file down to after the parts have been cut out of the brass stock.
I went through (at least part of) this process several times; the photos below were from attempt number 5 which was the best of the 5 attempts I've made so far; as I said: it's a bit hit & miss.
The first step is to cut a bit of thin brass sheet to about the right size and give it a very, very thorough clean, first with 400 grit wet & dry paper under a running tap, then with acetone.
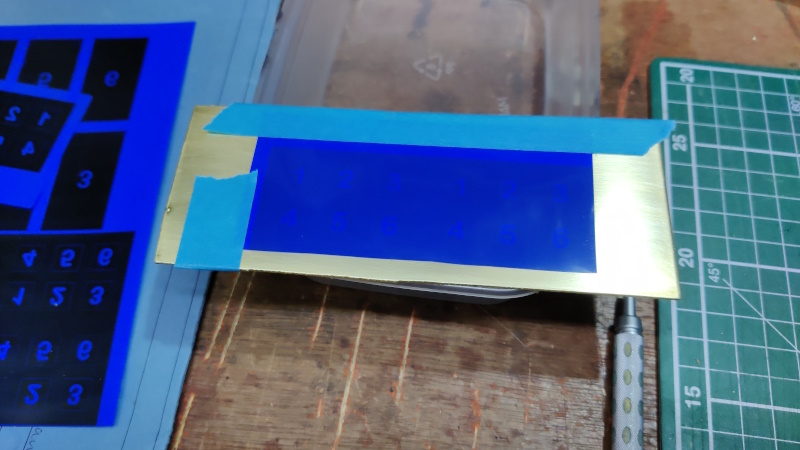
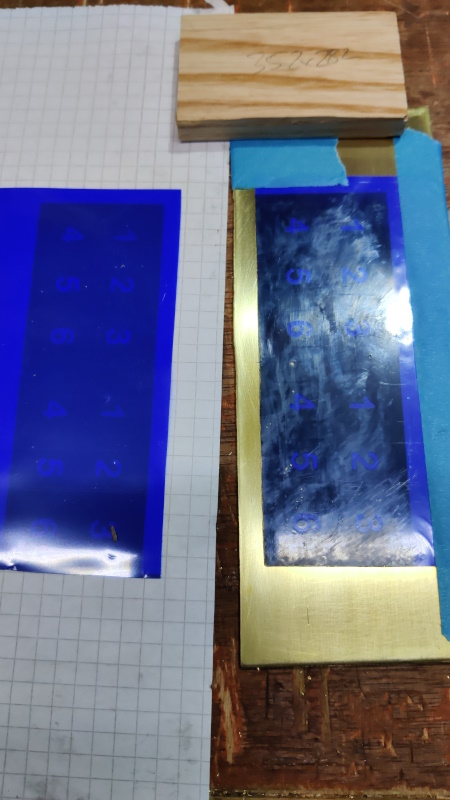
A section out of the press-n-peel paper is fixed it in place with some masking tape (with the toner side down):
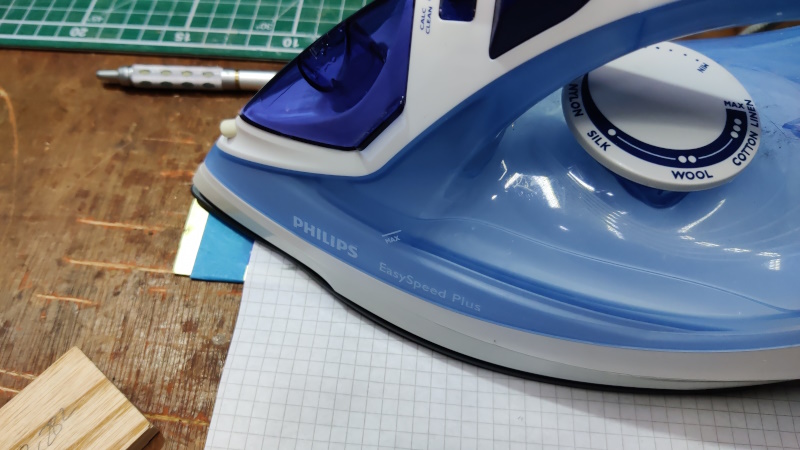
A piece of paper is then placed on top (to stop the iron sticking to the paper) and an iron is used to heat everything up while pressing the paper down onto the thin brass sheet (a better option is apparently to use a laminator rather than an iron, but I don't have one). The idea is that the toner detaches itself from the press-n-peel paper and sticks to the brass instead.
After ironing for a bit, it's clear that the colour has changed a bit, indicating that the toner has melted and detached from the film:
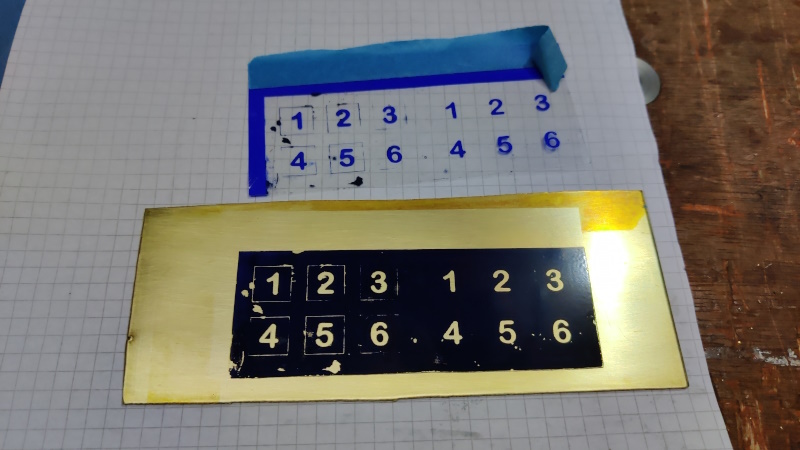
This is the first moment of truth with this process: you then peel the press-n-peel paper away to see what it looks like:
Not great. That's far, far better than any of the previous attempts, but still not great.
Wherever possible, the blemishes can be filled in with marker pens (paint might be better, but marker pens work and they're quicker):
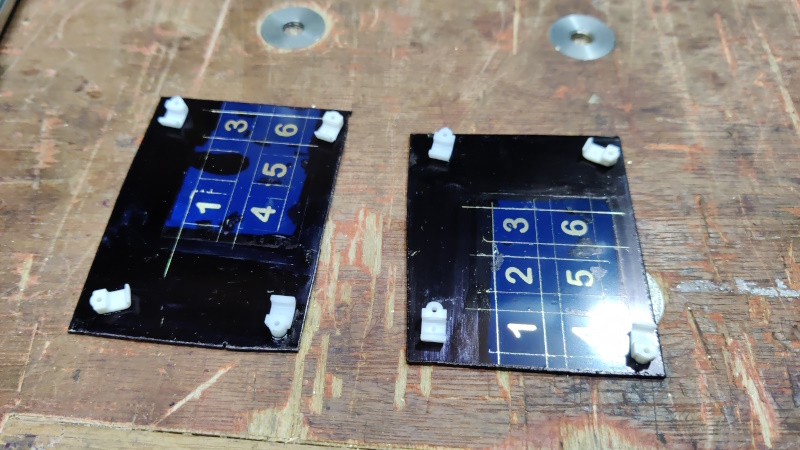
I rescored the borders (not very accurately), which hadn't come out very well and then the final preparation stage was to chop the brass piece in half and superglue on some bits of plastic.
The plastic bits I used were just some cable pins with the pin removed. During etching, the to-be-etched face points down (so that etched material falls away) and the cable pins are just there to lift the face off the bottom of the tray in which the etching is done.
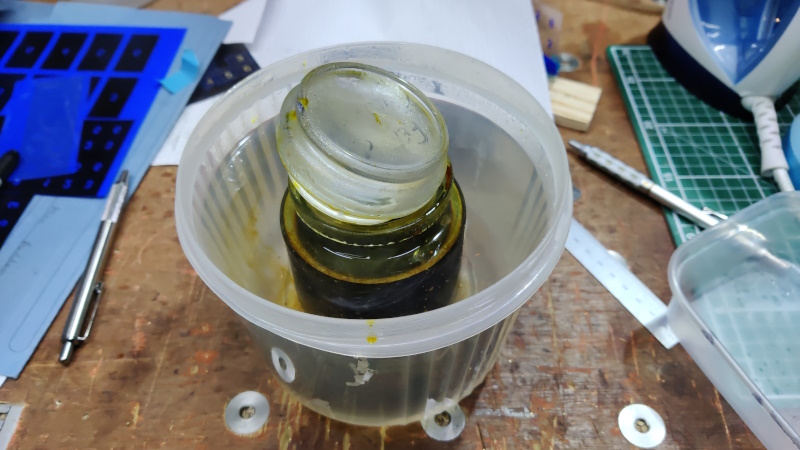
While all of that was happening, I put my (10+ year old) jar of ferric chloride in a plastic tub and poured boiling water into the tub to warm the ferric chloride up a bit. 70°C is a good target, although I didn't measure the temperature.
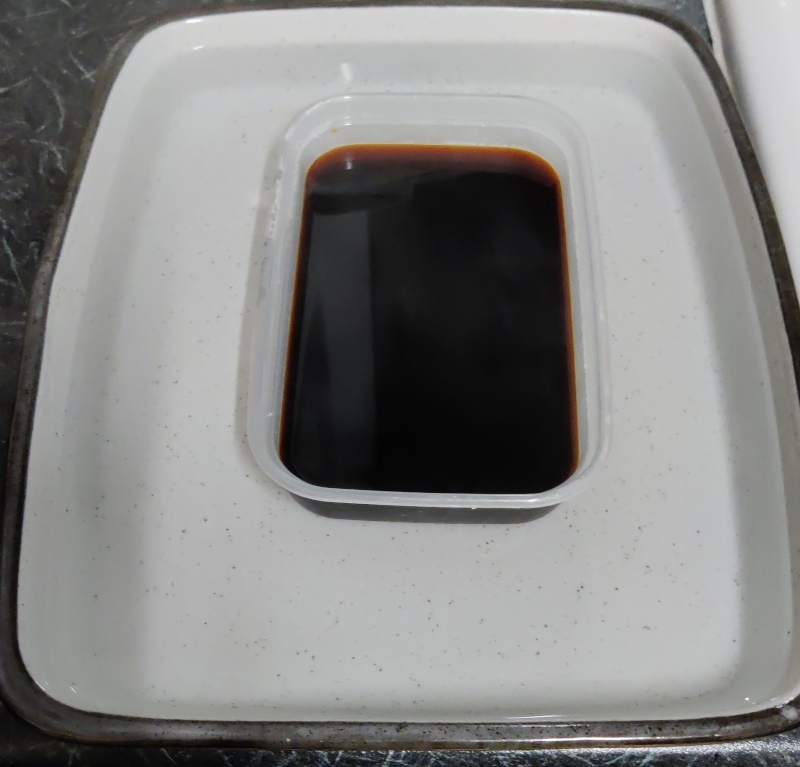
I could then put the two brass pieces number side down into a takeaway tray, pour the ferric chloride over the top and then fill the outer container with boiling water to help keep things warm.
A scrappy bit of plywood was chucked over the top to help contain the heat and then it was left for 30 minutes.
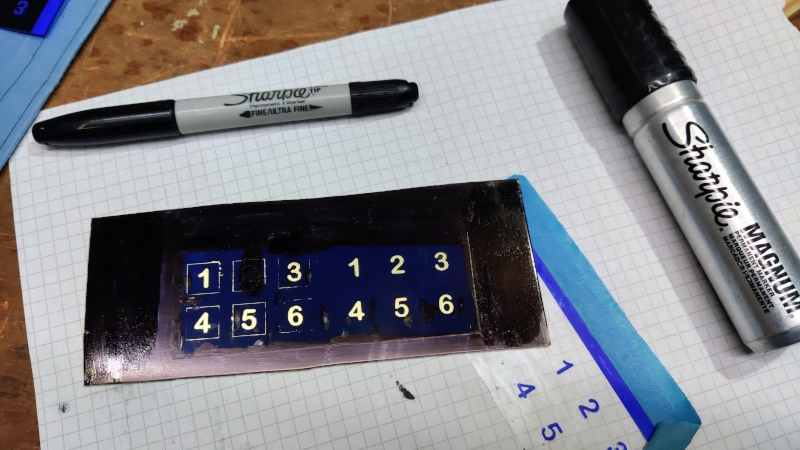
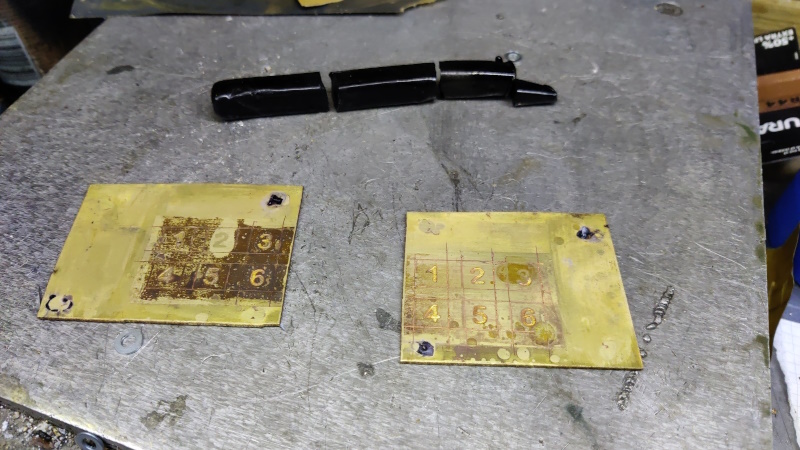
Once the timer went off, I pulled the parts out of the ferric chloride and gave them a thorough clean under the tap and then removed the toner with acetone. The results were again not great:
It looks like the toner hadn't adhered very well on one of the halves and hadn't protected the brass from the toner anywhere near as well as the marker pen had.
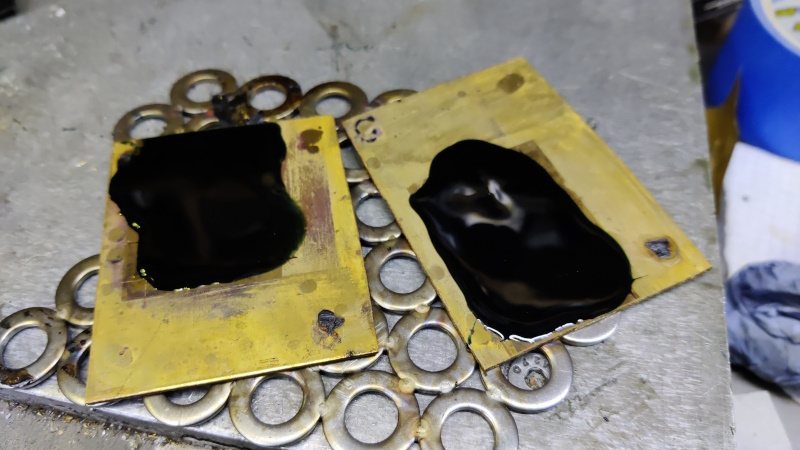
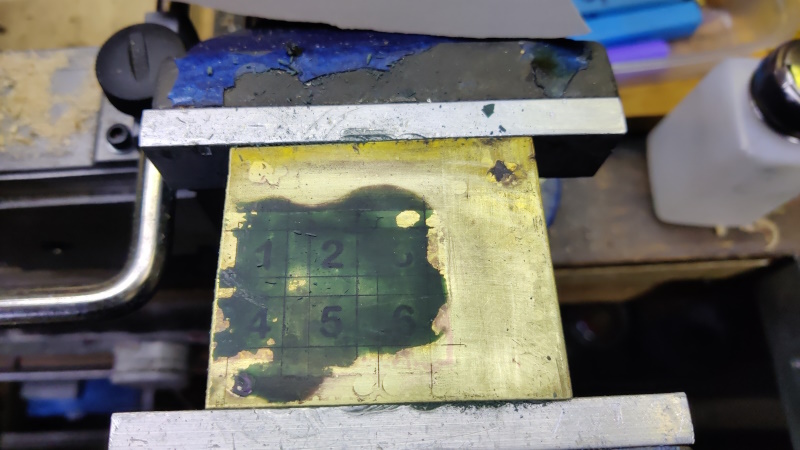
Nevertheless, I figured I might as well carry on to keep practising the process as much as possible. That broken stick in the top of the previous image is an engraver's black shellac stick (can't remember the proper name for it, but it's basically shellac with a dark pigment). The brass bits got heated up and, once nice and toasty, the shellac stick got shoved into the face of the brass, whereupon it melted and glooped over everything:
It probably would have been better to heat the brass a bit more than I did so the shellac went more runny and didn't end up quite so thick, but that's why I'm practising!
Once the brass bits had cooled down thoroughly, I attacked it with some 600 grit wet & dry paper. Part way through:
Nearly there:
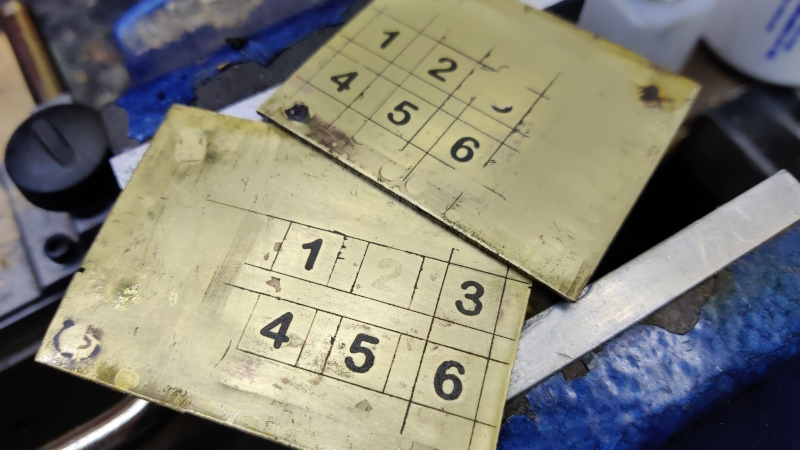
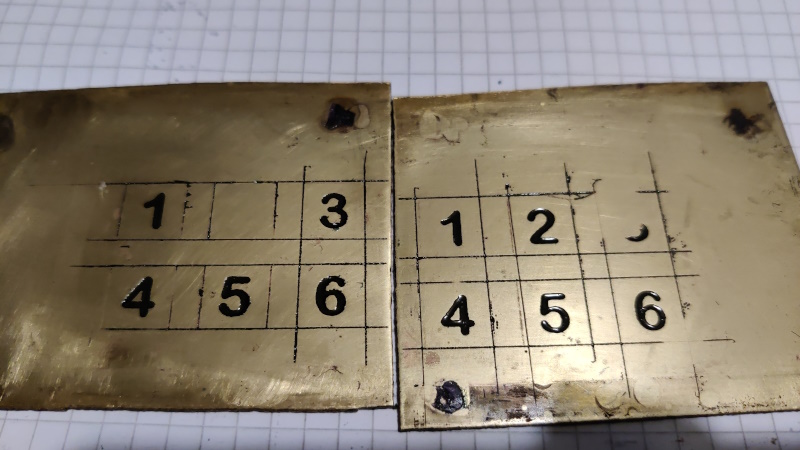
The last stage was to shove the brass bits in the kitchen oven at 180°C for a bit (probably not actually that hot as I took them out before the oven had got up to temperature). That remelts the shellac and gives a more glossy finish:
They're much better than my previous attempts, but there's definitely still room for improvement. I'm inclined to have a go at the photolithography process on the next attempt, although there's quite a lot of set-up to do and I'm sure that photolithography will take a few attempts as well. I'll also be using lots of old materials (e.g. the photosensitive film, which I bought about 5 years ago when I was last trying etching but still haven't got round to using). Hopefully the old materials won't have degraded and will still work okay.
Page 117 of 144
This website is free and ad-free, but costs me money to run. If you'd like to support this site, please consider making a small donation or sending me a message to let me know what you liked or found useful.

 Return to main project page