Tool Holder Storage


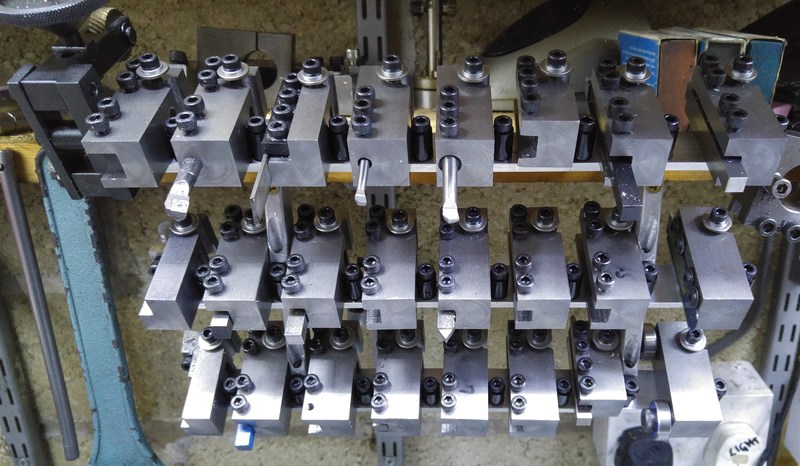
One of the big advantages of Harold's tool holders compared to the ones for my pillar tool post is that they take a lot less space (being made from 25 mm × 25 mm steel rather than 25 mm × 50 mm steel). Having made a lot of them, I thought it would be useful to have a handy way of storing them and I realised I could use the clamp hole to hold them in place and the side of the tool holder to stop them rotating. Due to the clamp hole being offset from the centre axis of the tool holder, if they are mounted at an angle to the horizontal, they will naturally try to rotate in one direction only and hence a single rotation stop is sufficient.
The mount can hold 24 tool holders. The left-hand most slot for the tool holders is mounted flush with the edge of the mount so that the end holders (two tangential tools and my knurling tool) can overhang the mount. The right-most slot is spaced slightly wider apart than the middle ones to allow slightly wider tools to be fitted (at present this is my work nudger and my hacksaw blade holder).
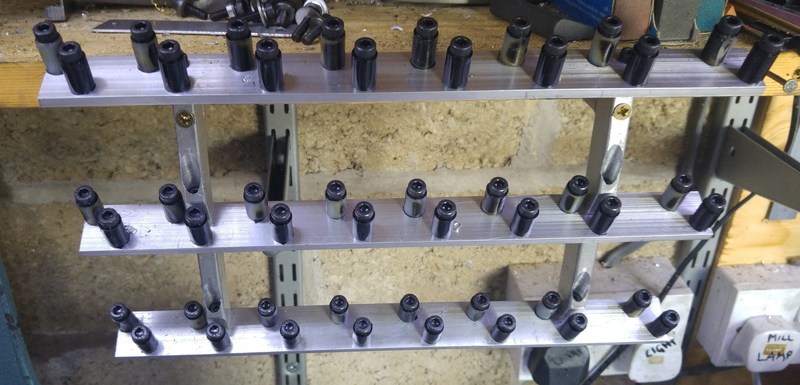
The platforms on which the tool holders rest are made from 25 mm × 5 mm aluminium flat bar. The uprights are machined from 3/8" × 3/4" aluminium flat bar.
The supports for the clamp are made from 10 mm diameter nylon spacers. The spacers have an internal diameter of about 5.2 mm (they are designed for M5 screws) and are 15 mm long, although 10 mm would be ample. The ones used to prevent rotation worked well, but I found that the ones that fit in the clamp hole were a very tight fit and hence I reduced the diameter of these slightly. In hindsight, it might have been better to buy some 3/8" (9.525 mm) diameter spacers instead (assuming such things are available with a suitable inner diameter and length).
The disadvantage of this mounting arrangement is that the tip of the tool is partially hidden from view, which makes tool selection slightly more complicated, but I've quickly come to know where the commonly used tools are as I reach for them so often; the less often used tools can be identified with careful positioning of the eyes so it doesn't cause too many problems! As I work on the premise that each tool will have its own holder (hence having lots of them), another alternative would be just to stamp the name of the tool in the back of each holder.
If you have a relatively modern browser, you should be able to drag the model below around with your mouse to look at it from different angles. The left mouse button will rotate the part, the right mouse button moves it and the scroll wheel zooms in and out. On mobile phone browsers, one finger rotates the model while two can be used to pan and zoom. Note that the model may take a few seconds to load.
This website is free and ad-free, but costs me money to run. If you'd like to support this site, please consider making a small donation or sending me a message to let me know what you liked or found useful.
